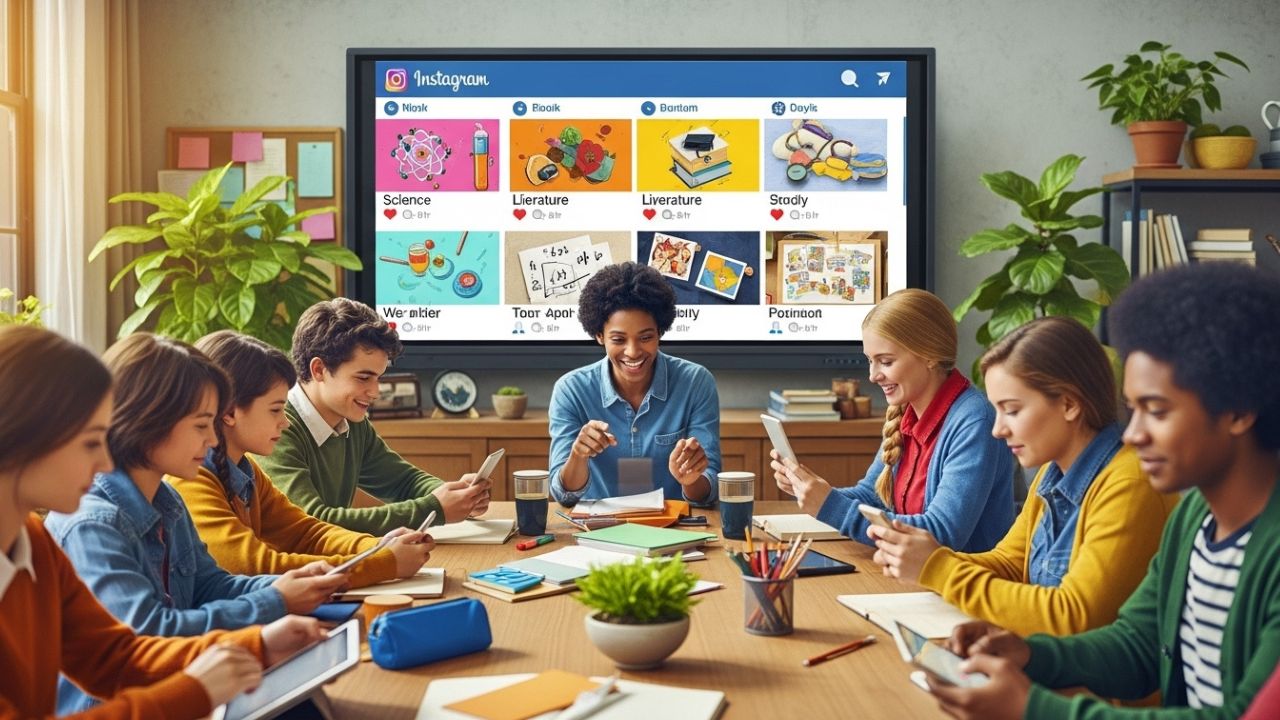
Social media has evolved far beyond a simple tool for entertainment or social connection. Platforms like Instagram have transformed into spaces for learning, creativity, and inspiration. For educators, Instagram offers an incredible opportunity to engage students in new, dynamic ways.
In the past, teachers relied solely on classroom discussions, textbooks, and traditional homework to spark interest. Today, the visual and interactive nature of Instagram allows educators to meet students where they already are — online. This isn’t just about posting photos; it’s about creating a micro-learning ecosystem filled with storytelling, challenges, and community interaction.
Instagram for education is about blending the familiar with the academic — taking the everyday scrolling experience and turning it into meaningful learning. Whether you’re teaching literature, science, art, or mathematics, Instagram can help you reach your students, increase participation, and make learning fun again.
1. Why Use Instagram in Education?
Instagram has over 2 billion active users, and a large portion of them are young people — students between the ages of 13 and 25. This is exactly the demographic educators strive to engage with. By leveraging Instagram, teachers can make their lessons more relatable and extend classroom conversations beyond school walls.
Key Benefits:
Visual Learning: Images and videos enhance retention and understanding.
Community Building: Fosters collaboration among students.
Instant Feedback: Quick polls, comments, and direct messages promote dialogue.
Real-World Relevance: Connects academic concepts to current events and pop culture.
Motivation Boost: Gamified challenges and creative projects encourage participation.
When used strategically, Instagram can turn passive learners into active participants who take ownership of their educational journey.
2. Setting Up an Educational Instagram Account
Before you dive into creating content, it’s important to set up your Instagram account with clear goals and guidelines.
Step-by-Step Setup:
Create a Separate Professional Account: Don’t mix personal and professional content. Create a dedicated page for your class or educational brand.
Choose a Recognizable Handle: Keep it simple and relevant, e.g., @HistoryWithMsClark or @MathInMotion.
Use a Profile Photo and Bio Wisely: Add a professional photo or a class logo. In your bio, clearly state what your account is about (e.g., “Interactive learning and daily science facts for curious minds 🧠✨”).
Switch to a Creator or Business Account: This gives you access to analytics — you’ll see which posts students engage with most.
Set Guidelines for Engagement: Define rules for respectful interaction. Make it a learning community, not a free-for-all comment zone.
3. Content That Engages Students
The heart of any Instagram educational strategy is content. Not just any content — but material that inspires curiosity, invites interaction, and reinforces learning objectives.
Below are proven content ideas tailored for educators.
A. Mini Lessons and Quick Tips
Short, digestible lessons (under 60 seconds for Reels) can make complex topics easy to understand.
Example:
“How to identify themes in poetry in 3 steps”
“The Pythagorean Theorem explained with pizza 🍕”
“5 English words borrowed from other languages”
These quick insights keep learning light, shareable, and memorable.
B. Student Takeovers
Allow students to post stories or photos showing what they’re learning. For instance, during Science Week, a student might share how they built a mini volcano experiment at home.
This not only builds excitement but also gives students ownership of their learning journey.
C. Polls, Quizzes, and Q&A Sessions
Use Instagram’s interactive stickers in Stories to:
Ask multiple-choice questions.
Run “True or False” quizzes.
Let students submit questions anonymously.
Example:
Story Poll: “Which is the largest planet? 🌎 A) Saturn B) Jupiter C) Neptune”
This transforms your Instagram stories into quick learning check-ins.
D. Behind-the-Scenes Posts
Show your students the human side of education — your preparation process, your favorite teaching moments, or a day in your life as an educator.
Students connect better when they see authenticity. When they realize that teachers are passionate humans and not just authority figures, they engage more deeply.
E. Inspirational and Motivational Posts
Quotes from scientists, authors, and historical figures can be paired with beautiful visuals. These posts can start the day with positivity or spark deeper reflection.
Example:
“Education is the most powerful weapon which you can use to change the world.” — Nelson Mandela
Pair this with a serene background image and a caption that encourages discussion in the comments.
F. Carousel Posts
Instagram carousels are perfect for step-by-step lessons.
Example:
Slide 1: Title – “How to Write a Strong Thesis Statement”
Slide 2: Example of a weak thesis.
Slide 3: Improved version.
Slide 4: Practice prompt for students.
Carousels invite users to swipe and spend more time engaging with your post.
4. Using Instagram Reels for Education
Instagram Reels are one of the most powerful tools to grab attention. Short-form videos can transform boring lectures into bite-sized, engaging lessons.
Reel Ideas for Educators:
“Fun Facts Friday” series with interesting trivia.
Speed tutorials: “How to solve quadratic equations in under 30 seconds.”
Language lessons: “Word of the Day” explained with visuals.
Historical moments reenacted with props or costumes.
“Before and After” demonstrations (e.g., art projects, experiments, or grammar corrections).
Reels can help you reach not just your students but also a global audience of learners. With consistent posting, you can build an educational brand that inspires people worldwide.
5. Encouraging Collaboration and Peer Learning
Instagram naturally fosters collaboration. By incorporating group challenges, educators can turn it into a space for teamwork and critical thinking.
Ideas for Collaborative Projects:
Photo Challenges: Example: “Capture a picture that represents biodiversity.” Students share their photos with a unique hashtag.
Hashtag Discussions: Create a class hashtag (e.g., #HistoryInFocus2025) where students post summaries, reflections, or visuals related to lessons.
Creative Competitions: Ask students to create memes, posters, or reels that explain a concept creatively.
Cross-Class Collaborations: Connect with teachers from other schools or countries and host virtual Instagram exchange projects.
This approach builds digital literacy, teamwork, and global awareness — essential skills for modern learners.
6. Storytelling as a Teaching Tool
Storytelling is at the core of Instagram. For educators, it’s a powerful way to bring lessons to life.
For example:
A history teacher could tell stories from the perspective of historical figures.
A literature teacher could narrate poems or analyze stories in an emotional way.
A science teacher could document the “life story” of a discovery.
Tips for Educational Storytelling:
Use a beginning–middle–end structure.
Incorporate emotion and real-world relevance.
End each story with a takeaway or discussion question.
Stories trigger empathy and memory, helping students internalize knowledge far more effectively than rote memorization.
7. Promoting Digital Citizenship
When using Instagram in education, teaching students about digital citizenship is essential. It’s not just about how to post; it’s about how to behave online responsibly.
Core Lessons:
Respect Privacy: Don’t share others’ images without consent.
Fact-Check Information: Not everything on social media is accurate.
Positive Communication: No bullying or negative comments.
Understand Algorithms: How engagement works and why certain posts trend.
By embedding these lessons into your Instagram activity, you’re helping students become smarter, safer digital citizens.
8. Measuring Engagement and Progress
Instagram Insights (available to professional accounts) allows educators to track which content performs best.
Metrics to Observe:
Reach: How many people saw your post.
Engagement Rate: Likes, comments, shares, and saves.
Story Views: Which stories keep viewers until the end.
Reel Plays: The total number of views and replays.
By analyzing this data, educators can adapt their strategies — focusing more on what students respond to and less on what doesn’t spark interest.
9. Integrating Instagram With Classroom Activities
The goal is not to replace traditional learning but to enhance it. You can integrate Instagram into classroom work in creative ways:
Examples:
Virtual Field Trips: Use Instagram to showcase museum exhibits or science experiments.
Literature Journals: Students post quotes, reflections, and artworks inspired by books they read.
STEM Challenges: Weekly posts showcasing experiments or inventions.
Art Portfolios: Students use Instagram as a visual resume for their projects.
Classroom Announcements: Share updates, reminders, or motivational messages.
Instagram can become an extension of your classroom — a digital community where learning never stops.
10. Accessibility and Inclusivity
Accessibility is often overlooked in educational content creation. On Instagram, you can make your content inclusive by:
Using alt text for images.
Adding captions to all videos and Reels.
Using high-contrast visuals for readability.
Being mindful of cultural representation in examples.
Inclusive content ensures that every student — regardless of ability, language, or background — can participate fully.
11. Safety and Privacy Considerations
Since Instagram is a public platform, educators must be mindful of student privacy and institutional policies.
Tips for Safe Use:
Always get parental consent before featuring students.
Avoid posting sensitive or identifiable information.
Use closed groups or private accounts for class-only content.
Moderate comments regularly.
It’s essential to create a digital environment where students feel safe expressing themselves.
12. The Future of Instagram in Education
The integration of social media into education is still evolving. Future trends include:
AI-Powered Learning Tools: Personalized quizzes or caption analysis.
AR Filters for Learning: Imagine exploring the solar system through interactive filters.
Collaborative Class Reels: Students co-create educational content.
Gamification: Learning badges and achievements integrated with Instagram activities.
Instagram isn’t just a social media app anymore — it’s becoming a learning network, where creativity meets knowledge.
Conclusion: Turning Scrolling Into Learning
Instagram for education is not about abandoning traditional methods but about expanding their potential. When used with intention, Instagram can turn passive scrolling into an engaging educational journey.
By incorporating storytelling, interactivity, and community, educators can bridge the gap between students’ digital lives and academic growth.
In the classroom of the future, learning doesn’t stop when the bell rings — it continues through every scroll, swipe, and story.
Key Takeaways
Area
What to Focus On
Example
Content Creation
Make lessons visual and concise
Use Reels and carousels
Engagement
Use polls, Q&A, and challenges
“Fun Fact Friday” series
Collaboration
Encourage teamwork via hashtags
#EcoChallenge2025
Digital Citizenship
Teach safe online behavior
No sharing without consent
Analytics
Use data to improve content
Track saves and shares
Final Thought
Instagram is a mirror of modern communication — fast, visual, and interactive. By embracing it, educators aren’t diluting education; they’re amplifying it. When teachers speak the language of their students — memes, videos, and visuals — they don’t lose authority; they gain connection.
And that connection is the true foundation of learning. 🌟
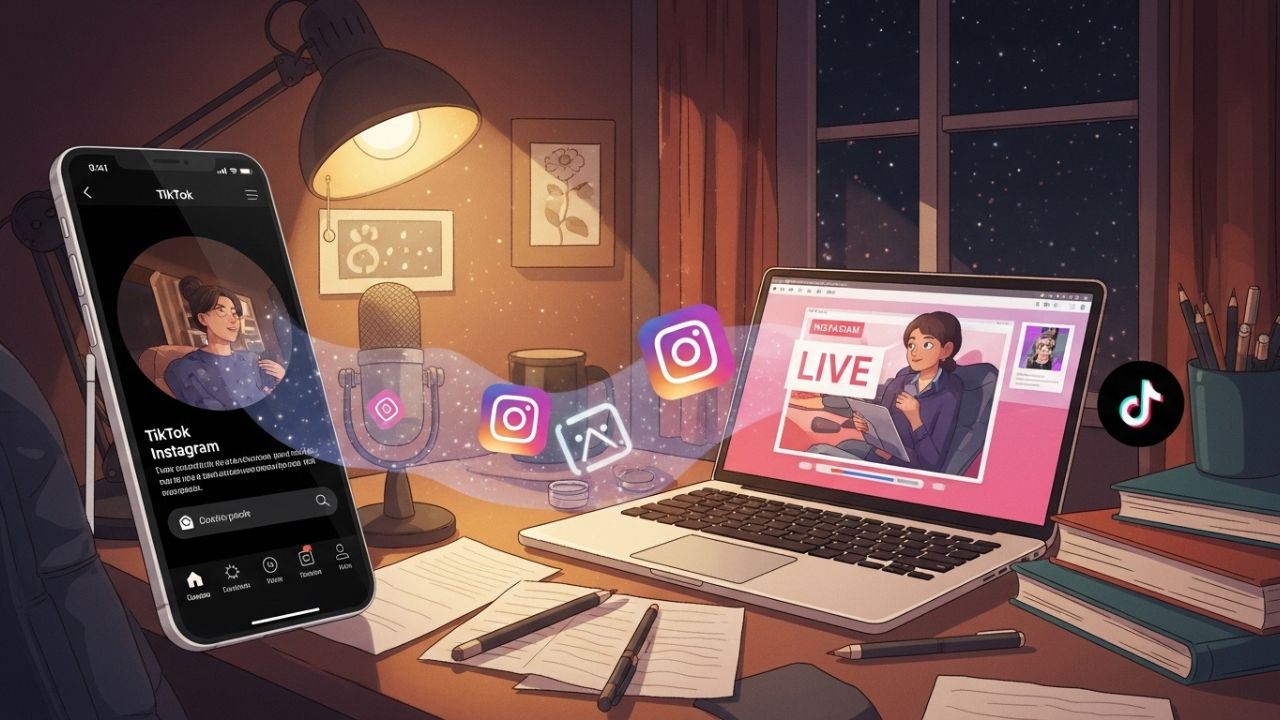
In today’s fast-moving world of social media, authors are no longer just writers—they are brands, personalities, and content creators. Instagram and TikTok have become two of the most powerful platforms for writers to build communities, promote their books, and share their creative journeys. But while Instagram has been around longer and offers a more polished, community-oriented environment, TikTok’s virality and algorithmic reach make it an indispensable platform for authors who want to grow their audiences fast.
So what happens when you’ve already spent time creating thoughtful, engaging Instagram Lives—and you want that content to go further? The answer: repurposing.
Repurposing Instagram Live videos for TikTok is a strategic move that allows authors to save time, expand their audience, and breathe new life into existing content. Instead of letting your recorded Lives sit untouched in your archive, you can turn them into bite-sized, viral-ready TikToks that attract thousands of new readers.
In this guide, we’ll explore exactly how to do that—from the why to the how, including tips on editing, captions, storytelling, and engagement strategies. By the end, you’ll have a full framework for transforming your Instagram Lives into powerful TikTok content that sells books and builds community.
1. Why Repurposing Content Matters for Authors
Before we dive into the technical side, let’s understand the “why.”
Authors are storytellers. Every Instagram Live, whether it’s a Q&A, a writing session, a character discussion, or a behind-the-scenes chat, is filled with stories and insights that resonate deeply with your audience. But if those stories only live on Instagram, you’re missing out on a massive audience on TikTok—a platform where book-related content is booming.
TikTok’s algorithm doesn’t care how many followers you have; it cares how engaging your content is. That means even new authors can reach millions of people if they present their content in an engaging, native format. Repurposing Instagram Lives into short, fast-paced TikToks lets you tap into that virality without needing to constantly create from scratch.
In essence:
Save time by using what you’ve already made.
Expand reach by meeting audiences where they are.
Build brand consistency by sharing your story across multiple platforms.
Boost engagement by offering bite-sized, digestible insights.
For authors who are balancing writing, marketing, and personal life, repurposing is the ultimate productivity hack.
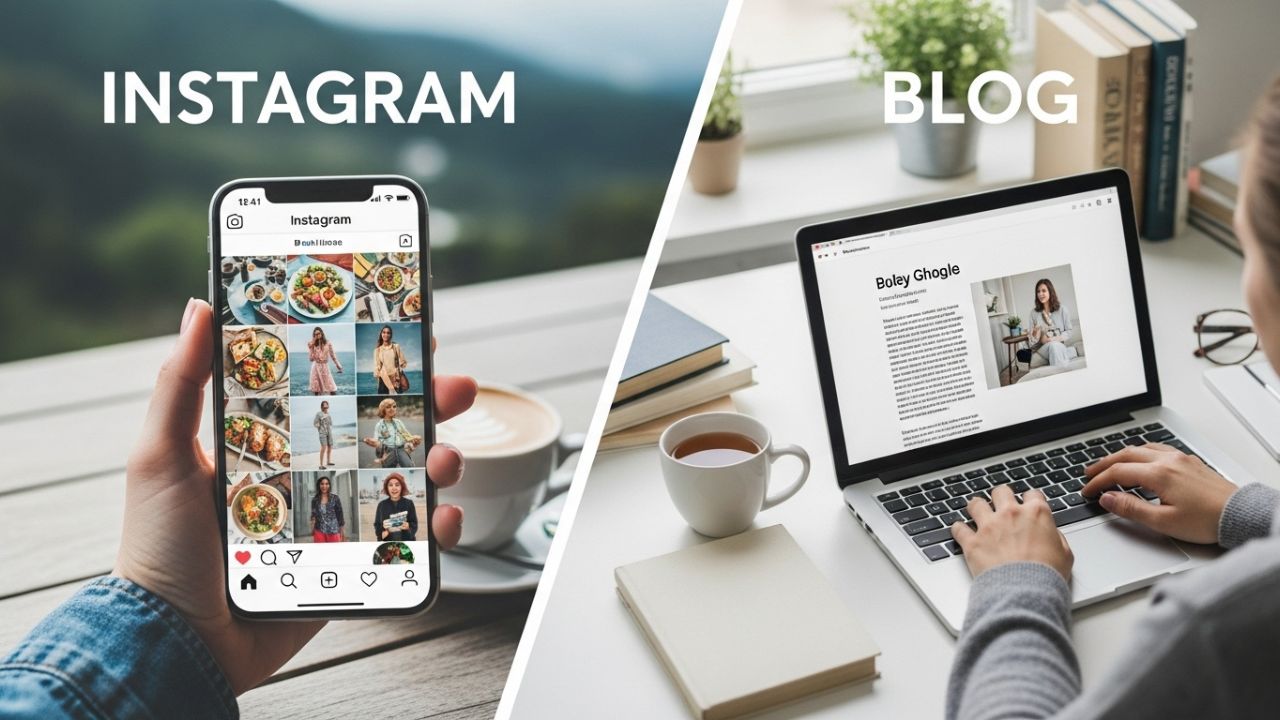
2. Understanding the Differences Between Instagram Live and TikTok
To effectively repurpose your content, you first need to understand the cultural and technical differences between Instagram and TikTok.
Feature
Instagram Live
TikTok
Format
Long-form (10–60 min)
Short-form (15–90 sec)
Tone
Conversational, casual, community-driven
Fast-paced, attention-grabbing, trend-oriented
Audience
Followers and loyal fans
Algorithmic discovery—new people
Aesthetic
Polished, cohesive feed
Raw, authentic, creative editing
Goal
Connection and conversation
Entertainment and discovery
What this means for authors: your Instagram Live videos are perfect sources of deep, meaningful content—but TikTok is where you transform those insights into hooks, highlights, and moments that make people stop scrolling.
You’re not just reposting; you’re reimagining your content for a different environment.
3. Choosing the Right Instagram Live to Repurpose
Not every Live will make a great TikTok. You’ll need to choose wisely based on a few factors.
Ask yourself:
Did this Live generate strong engagement (comments, questions, saves)?
Did I share memorable insights, quotes, or emotional moments?
Did I discuss something that aligns with current trends or hashtags (e.g., #BookTok, #AuthorLife, #WritersOfTikTok)?
Does this Live have clear segments or highlights that can stand alone?
Some of the best Lives to repurpose include:
Q&A sessions – where you answered reader questions.
Writing tips – useful snippets like “how I overcome writer’s block” or “how I plan my book endings.”
Book readings – excerpts from your novel or poetry that resonate emotionally.
Behind-the-scenes – insights into your creative process, workspace, or publishing journey.
Collaborations – interviews or joint discussions with other authors.
Once you identify strong Lives, download them and prepare to break them down into their most powerful moments.
4. Step-by-Step: How to Repurpose Instagram Live for TikTok
Here’s the full process—from downloading your Live to uploading your finished TikTok.
Step 1: Download Your Instagram Live
If you saved your Live to your camera roll after streaming, you’re already halfway there. If not:
Go to your Instagram profile.
Tap “Menu” → “Archive” → “Live Archive.”
Select the Live you want.
Tap “Download” (this saves it to your device).
Note: Lives are usually saved in vertical format, which works perfectly for TikTok.
Step 2: Identify Key Moments
TikTok thrives on short, impactful clips. Watch your Live and take notes on:
Moments with strong emotion or humor.
Quotable phrases or writing advice.
Audience reactions or your responses.
Storytelling moments with a clear hook.
A good TikTok moment should make viewers feel something—inspiration, curiosity, or empathy.
Step 3: Trim and Edit
Use tools like:
CapCut (free and perfect for TikTok-style edits)
InShot
Adobe Premiere Rush
Keep each clip between 15 and 60 seconds, and add:
Captions (many watch without sound)
Text overlays highlighting key quotes
Background music that fits the tone
Smooth cuts to maintain attention
Pro tip: Start your video with a hook within the first 2 seconds—something like:
“Every writer makes this one mistake…”
“Here’s how I finally finished my first novel…”
“Let me tell you what my editor taught me about rejection.”
Step 4: Adapt for TikTok’s Aesthetic
TikTok users prefer authenticity over perfection. If your Instagram Live feels too “polished,” don’t worry—make it more relatable:
Add subtitles manually for accessibility.
Use TikTok filters lightly or add trending sounds.
Add quick transitions or jump cuts to keep the pace.
Step 5: Upload Strategically
When uploading to TikTok:
Write an intriguing caption (e.g., “This advice changed how I write my endings ✍️ #WritingTips #BookTok”)
Include relevant hashtags like:
#AuthorTok
#BookTok
#WritersCommunity
#IndieAuthor
#WritingJourney
Post when your audience is active (typically evenings and weekends).
Remember: TikTok rewards consistency. Post repurposed clips regularly, maybe 2–3 times per week.
5. How to Turn Long Lives into a Series
One Instagram Live can generate dozens of TikToks if you plan wisely.
Here’s how:
Break the Live into themes – For example, a 30-minute Live on “How I Build Characters” could become:
TikTok 1: “3 Ways to Make Readers Care About Your Protagonist”
TikTok 2: “How I Name My Characters (and Avoid Clichés)”
TikTok 3: “The Secret to Writing Realistic Villains”
Label your series – Add numbers like “Part 1,” “Part 2,” etc. This encourages binge-watching.
Link your videos – In your caption, say “Watch Part 2 on my profile!”
Repurpose viewer questions – Each audience question in the Live can become a new TikTok segment.
This turns one 30-minute session into weeks of content, maximizing every word you spoke.
6. Tips for Optimizing Engagement on TikTok
Even if your clips are great, TikTok’s algorithm values certain behaviors. To ensure your repurposed content performs well, follow these engagement strategies:
Use Captivating Hooks
Your first line determines if viewers stay. Examples:
“I made this mistake in my first novel—don’t repeat it.”
“Every author needs to hear this.”
“This scene almost got cut from my book.”
Encourage Interaction
Ask questions like:
“Writers—how do you handle rejection?”
“Would you read a story like this?”
“What’s your favorite writing ritual?”
This sparks conversation and boosts comments (a key signal for TikTok’s algorithm).
Leverage Trending Sounds
Find a sound that matches your video’s emotion (inspirational, nostalgic, mysterious) and use it quietly in the background. Even subtle use of trending audio can boost reach.
Add Value in the Caption
If you gave advice in the video, summarize or expand on it in the caption. People often save posts for later reading.
Be Consistent
Posting regularly (2–5 times a week) helps TikTok’s algorithm learn who to show your content to. Consistency builds familiarity, and familiarity builds trust.
7. Examples of Repurposing for Different Author Types
1. Fiction Authors
Turn Lives about your writing process into short TikToks showing:
How you developed your main character.
Sneak peeks into your world-building notes.
Emotional readings of book excerpts.
2. Nonfiction Authors
Highlight key takeaways from your Lives:
Life lessons.
Personal development insights.
Real-life experiences that inspired your book.
3. Poets
Your Live readings can become powerful, emotional TikToks. Add captions, gentle background music, and dim lighting to create intimacy.
4. Self-Published Authors
Show the reality of indie publishing:
Your book cover design journey.
How you formatted your manuscript.
Your honest sales and marketing tips.
By tailoring your repurposing style to your genre and personality, you’ll attract the right kind of readers who appreciate your authenticity.
8. Tools and Apps to Make the Process Easier
Here’s a quick list of tools to streamline your repurposing workflow:
Purpose
Tool
Why It’s Useful
Editing
CapCut, InShot, VN Editor
Easy trimming, captions, TikTok-friendly features
Transcription
Otter.ai, Descript
Converts your Live audio into text to find quotable parts
Scheduling
Later, Metricool
Plan posts across Instagram and TikTok
Thumbnail creation
Canva
Design consistent cover images
Analytics
TikTok Creator Studio
Track performance and engagement
If you plan ahead with the right tools, you can turn your Instagram Live library into a long-term TikTok content strategy.
9. The Storytelling Mindset: From Long Form to Short Form
The hardest part for many authors is condensing deep, reflective ideas into short-form content. But think of TikTok as micro-storytelling. Each clip should deliver one clear idea with emotional impact.
For example:
In your Live, you might have talked for 10 minutes about overcoming writer’s block.
For TikTok, distill that into 20 seconds: “The reason you can’t write isn’t because you’re lazy—it’s because you’re scared of writing something bad. Write badly first. That’s how good writing begins.”
It’s not about losing depth—it’s about distilling truth.
10. Using TikTok to Drive Readers Back to Instagram (and Your Books)
Repurposing goes both ways. Once your TikToks gain traction, use them to bring people back to Instagram and your author platform.
Include call-to-actions like:
“Watch the full Live on my Instagram.”
“Check my link in bio for my latest book.”
“Follow me on Instagram for more behind-the-scenes.”
This creates an ecosystem between platforms—TikTok brings new eyes, Instagram deepens relationships, and your website or Amazon page converts readers into buyers.
11. Common Mistakes to Avoid
Even great authors can make missteps when repurposing. Avoid these pitfalls:
Posting full-length Lives on TikTok – Too long, not engaging enough.
Ignoring captions – Accessibility and attention matter.
Reposting without editing – Adapt visuals and pacing.
Overusing filters or effects – Keep it natural.
Forgetting storytelling – Even in short clips, there must be a beginning, middle, and end.
12. Bonus: How to Repurpose TikTok Back to Instagram
Once you’ve edited great short videos for TikTok, don’t stop there! Upload those same clips to:
Instagram Reels
Stories
Your feed
This multiplies your visibility without extra effort. Just remove the TikTok watermark (tools like “SnapTik” can help) to keep Instagram’s algorithm happy.
13. The Long-Term Benefits for Authors
Repurposing Instagram Lives for TikTok is more than a marketing trick—it’s a sustainable content ecosystem. Over time, this strategy:
Builds brand authority in your niche.
Creates a consistent content stream without burnout.
Expands your audience beyond one platform.
Increases book sales through storytelling and connection.
Ultimately, you’re transforming your Live sessions into timeless pieces of inspiration that continue to reach new readers every day.
14. Final Thoughts
Social media is no longer optional for authors—it’s a storytelling extension of your voice. Instagram gives you depth and connection; TikTok gives you reach and virality. Together, they create a powerful synergy that no traditional book tour could ever match.
Repurposing your Instagram Lives for TikTok is not just smart marketing—it’s creative recycling. It allows you to give your stories new shapes, new rhythms, and new audiences.
So go back to your Live archive, find that golden moment where you said something raw, true, or inspiring—and turn it into your next viral TikTok. Your future readers are scrolling right now, waiting to discover you.
In the vast digital landscape of modern marketing, Instagram has emerged as a cultural and commercial powerhouse. What began as a simple photo-sharing app in 2010 has evolved into one of the most influential platforms in the world — shaping art, culture, and even literature. For authors, Instagram is no longer just a place to share snippets of daily life; it’s a thriving ecosystem where words meet visuals, and stories take on new dimensions through creativity, community, and influence.
One of the most fascinating phenomena driving this ecosystem is the rise of micro-influencers. While celebrity endorsements and mega influencers once dominated brand partnerships, the shift toward authenticity has ushered in a new era — one where small creators with loyal, engaged followings wield tremendous power. For authors, these micro-influencers can be the key to building genuine connections with readers and creating sustainable book promotion strategies.
This article explores the essential role of micro-influencers on Instagram, focusing on how authors can leverage their potential to expand audiences, boost engagement, and create meaningful literary communities online.
1. Understanding the Power of Instagram for Authors
Instagram has become a visual storytelling platform where creativity thrives. While writing is a primarily textual craft, Instagram encourages writers to think beyond the page — to pair words with visuals, videos, and interactive media that evoke emotion and connection.
For authors, this means developing a personal brand that transcends their books. Readers today don’t just buy a novel; they buy into a creator’s world. They want to know the person behind the prose — their inspirations, daily habits, challenges, and triumphs. Instagram allows this connection to flourish through:
Quotes and excerpts that showcase an author’s voice
Reels and Stories that give personality to their brand
Book aesthetics and mood boards that visually express their stories
But where do micro-influencers fit into this dynamic?
2. What Are Micro-Influencers?
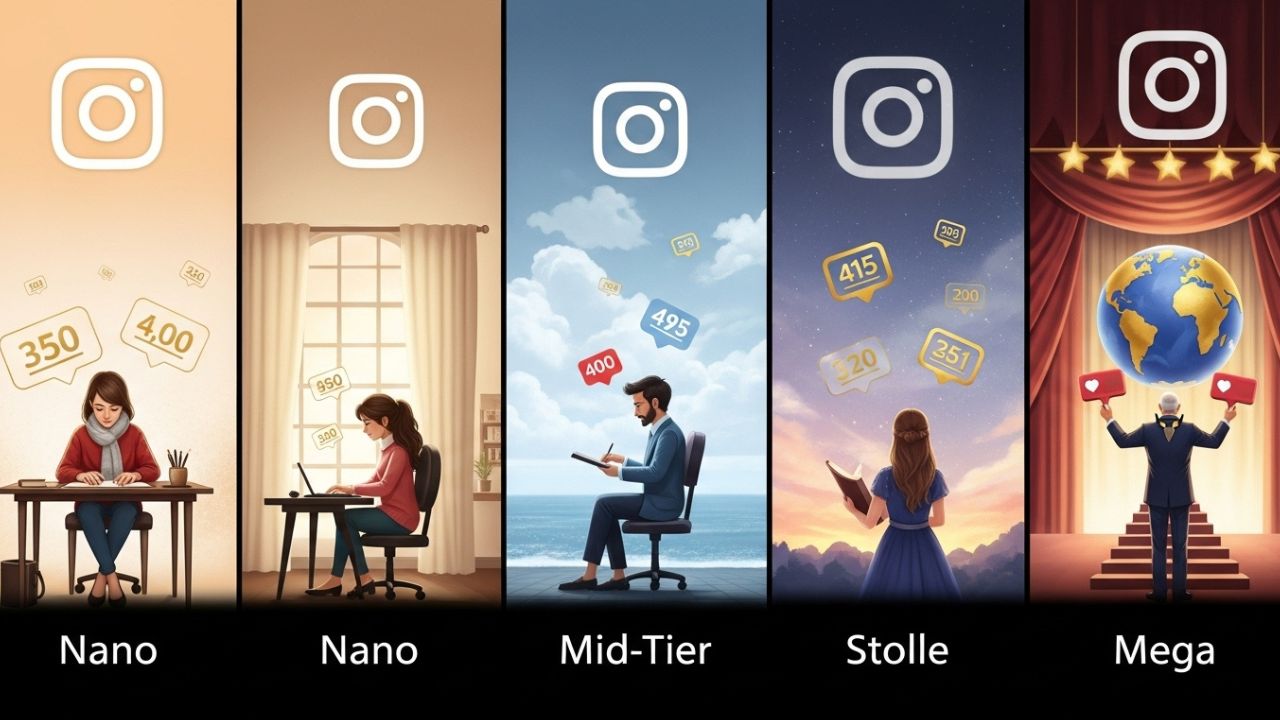
A micro-influencer typically refers to a social media user with a following between 1,000 and 100,000 followers. Unlike mega-influencers or celebrities, micro-influencers are known for their niche focus and high engagement rates. Their followers trust their opinions because they feel authentic, relatable, and grounded.
Micro-influencers thrive in specific interest areas — and within the book world, that could mean communities like:
Bookstagrammers (book lovers who review and photograph books)
Poetry influencers
Fantasy readers and reviewers
Writing coaches and creative mentors
Self-publishing advocates
Their influence lies not in numbers but in depth of connection. When a micro-influencer recommends a book, their audience listens. Their engagement often feels like a friend’s suggestion rather than a marketing pitch.
3. Why Micro-Influencers Matter for Authors
For authors, particularly those in independent or small publishing, visibility can be an uphill battle. Traditional advertising campaigns often require budgets beyond reach, while the crowded digital landscape makes organic discovery increasingly difficult.
Here’s where micro-influencers become invaluable:
a) Authentic Word-of-Mouth Marketing
Micro-influencers are modern-day word-of-mouth machines. Their followers value their opinions and are more likely to act on their recommendations. A sincere book review on Instagram can spark curiosity and inspire others to buy or share.
b) Cost-Effective Promotion
Partnering with micro-influencers is often far more affordable than paying for ads or celebrity endorsements. Some may even collaborate in exchange for free books, early access, or a simple mention — especially within literary circles that value community over commerce.
c) Niche Targeting
Authors benefit from working with influencers who specialize in their genre. For example, a romance novelist can partner with influencers who post about romantic fiction, while a sci-fi author might collaborate with creators who celebrate futuristic worldbuilding.
d) Higher Engagement Rates
Micro-influencers often have engagement rates between 5% and 10%, significantly higher than the 1% or less typical of larger accounts. This means more likes, comments, shares, and saves — real interactions that build momentum.
e) Community Building
Micro-influencers are relationship builders. They interact with followers through comments, DMs, and discussions. By working with them, authors can tap into these micro-communities — creating fans who don’t just read but advocate for their work.
4. How Authors Can Collaborate with Micro-Influencers
The process of collaboration should feel organic and mutually beneficial. Authors shouldn’t simply view influencers as advertising tools but as creative partners in storytelling and brand building.
Here’s a step-by-step approach:
Step 1: Identify Relevant Influencers
Look for influencers who align with your book’s genre, tone, and values. Search hashtags like:
#Bookstagram
#IndieAuthor
#BookReview
#WritersOfInstagram
#PoetryCommunity
Analyze their audience — do they engage meaningfully in comments? Do their followers fit your target reader profile?
Step 2: Engage Before Pitching
Before sending collaboration requests, spend time interacting with their content. Like, comment, and share their posts genuinely. Building rapport increases the likelihood of a successful partnership.
Step 3: Create a Collaboration Proposal
When you reach out, be specific. Propose what you can offer (free book copy, exclusive content, affiliate link, giveaway collaboration) and how it benefits their audience.
Example message:
“Hi [Name], I’ve been loving your posts about fantasy novels! I think your audience would really enjoy my new release, The Moonlight Prophecy. I’d love to send you a copy and see if you’d be interested in sharing your thoughts or creating a themed post together.”
Step 4: Encourage Creative Freedom
Micro-influencers know their audiences best. Allow them to express your book in their style — whether that’s through photography, reels, storytelling, or humor. Authenticity drives trust.
Step 5: Build Long-Term Relationships
Instead of one-off promotions, focus on nurturing ongoing collaborations. A sustained partnership reinforces brand consistency and makes your book part of a larger literary conversation.
5. Types of Instagram Content That Work for Authors
Authors can experiment with various content formats to boost engagement:
Content Type
Description
Example
Reels
Short videos highlighting writing routines, book trailers, or storytelling snippets.
A 15-second clip of an author reading a line dramatically from their book.
Carousels
Multi-image posts that tell a visual story or offer writing tips.
“5 Lessons I Learned While Writing My First Novel.”
Stories
Temporary posts for behind-the-scenes updates or Q&A sessions.
Sharing morning writing rituals or book-cover reveals.
Lives
Real-time sessions to connect with readers or other authors.
Joint Instagram Live with a micro-influencer discussing favorite book tropes.
Giveaways
Collaborative contests to attract followers.
“Tag a friend who loves thrillers and win a signed copy!”
Aesthetic Posts
Beautiful flat lays or digital art inspired by the book.
Coffee, candles, and your novel in the frame with #BookAesthetic.
These formats not only humanize the author but also attract collaborations from influencers who appreciate visual storytelling.
6. Case Studies: Successful Use of Micro-Influencers
While each author’s path differs, several trends illustrate the impact of micro-influencer marketing:
📚 Indie Authors and Bookstagram
Self-published authors have found enormous value in the #Bookstagram community. By sending early review copies to micro-influencers, many have generated hundreds of posts within weeks — boosting Amazon rankings and reader awareness organically.
🖋️ Poets and Minimalist Creators
Modern poets often collaborate with influencers who design visual quotes and minimalist imagery. These collaborations blur the line between art and marketing, helping poetry thrive in visual spaces.
🌍 Diverse Voices and Niche Communities
Micro-influencers who champion underrepresented voices — LGBTQ+, Indigenous, or neurodiverse creators — are powerful allies for authors exploring similar themes. Their communities are often loyal and passionate, valuing inclusivity and authenticity.
7. Tools and Strategies for Managing Influencer Campaigns
Authors don’t need big marketing teams to manage influencer partnerships. There are accessible tools to streamline collaborations:
Canva – Create visually cohesive assets for influencer posts.
Later or Planoly – Schedule collaborative posts and track performance.
Notion or Trello – Organize influencer lists, contact info, and campaign progress.
Instagram Insights – Analyze which influencer collaborations drive traffic and engagement.
To measure effectiveness, track metrics like:
Engagement rate (likes + comments ÷ followers)
Follower growth after a campaign
Number of clicks on book links
Sales correlated with specific posts
Over time, these insights help refine your approach and choose the right partners for your author brand.
8. The Psychology Behind Micro-Influencer Impact
At the heart of micro-influencer success lies trust. Consumers have become skeptical of traditional advertising. They crave authenticity, shared values, and human connection — and micro-influencers provide exactly that.
For readers, a recommendation from a micro-influencer feels intimate. They’ve followed this person’s book opinions for months, maybe years. They trust that the influencer wouldn’t recommend something unless they truly loved it.
This parasocial relationship — the sense of friendship formed with a media personality — is the engine of influence. When authors align their messages with trusted voices, they tap directly into emotional credibility.
9. Ethical Collaboration and Transparency
As influencer marketing matures, transparency has become essential. Authors and influencers should clearly disclose partnerships using tags like #ad, #sponsored, or #gifted.
Ethical collaborations protect both parties’ reputations and reinforce trust among audiences. It also aligns with Instagram’s guidelines, ensuring that promotional efforts remain honest and professional.
Moreover, authors should approach diversity and representation thoughtfully. Collaborating with influencers from various backgrounds can amplify marginalized voices and foster inclusivity within the literary community.
10. Future Trends: Micro-Influencers and the Evolution of Literary Marketing
Looking ahead, micro-influencers are set to become even more central to book marketing. Emerging trends include:
AI-driven influencer discovery, helping authors find ideal matches based on data.
Audio and video storytelling, integrating reels and live readings.
Community-driven crowdfunding, where influencers mobilize readers to support indie projects.
Interactive reading clubs, powered by Instagram group chats and virtual meetups.
The boundary between author, influencer, and reader will continue to blur — forming an interconnected creative ecosystem where every voice contributes to the conversation.
Conclusion
Instagram has transformed how authors engage with readers. It’s no longer enough to write a great book; one must also build a relatable, visual, and interactive presence. Micro-influencers play a vital role in this transformation — bridging the gap between creativity and connection, art and audience.
For authors, embracing micro-influencers isn’t just a marketing strategy; it’s a philosophy. It’s about valuing authenticity over algorithms, relationships over reach, and storytelling over selling.
In the ever-evolving world of Instagram, micro-influencers remind us of something deeply human: that stories, when shared with sincerity, still have the power to move hearts — one follower at a time.
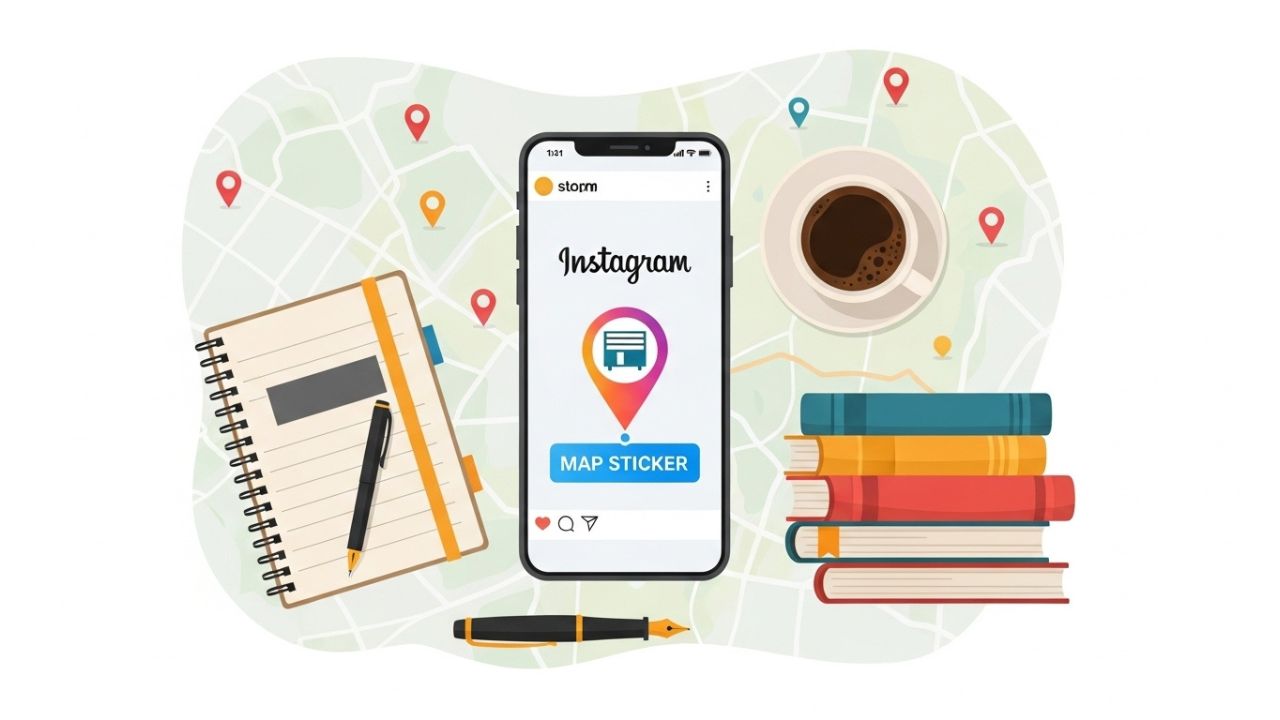
Instagram has become one of the most powerful tools for authors to build their personal brand, engage readers, and promote book events. While most writers focus on captions, hashtags, and Reels, one underrated feature that can amplify your local presence is Instagram’s Map Stickers.
If you’re an author looking to strengthen your connection with your community — whether for book signings, local bookstore partnerships, or creative networking — this guide will help you unlock the power of Map Stickers to boost visibility and engagement in your area.
Let’s dive deep into what Map Stickers are, why they matter, and how authors can use them strategically to grow both local and global audiences.
🌍 What Are Instagram Map Stickers?
Map Stickers are interactive location tags that you can add to your Instagram Stories. When viewers tap the sticker, they can see the exact location on a map, explore nearby posts from that area, and even get directions to visit it.
These stickers essentially connect your content to a physical place — which is perfect for authors who want to root their digital presence in the real world.
Imagine this: you’re hosting a book signing at an independent bookstore in Austin, Texas. You post a Story of the event, add the Map Sticker, and suddenly your Story becomes discoverable to anyone exploring that location or searching for posts nearby.
It’s a subtle yet powerful form of local SEO within Instagram.
📚 Why Map Stickers Matter for Authors
Authors often focus on storytelling — but every good story needs a setting. Map Stickers allow you to extend your story beyond your book and into your real-world journey as a writer.
Here’s why they’re especially powerful for authors:
Local Discovery People exploring a specific neighborhood or bookstore can stumble upon your content if you’ve tagged the location.
Authenticity Readers love to see the behind-the-scenes journey — where you write, where you do readings, or where your book is available. Map Stickers make those moments feel grounded and real.
Event Promotion Perfect for book launches, author signings, library visits, or workshops. The sticker acts like a digital flyer that points people directly to your venue.
Networking with Local Businesses Tagging local bookstores, cafés, or libraries can start collaborations and cross-promotions.
Community Building You can encourage fans to visit the same places, share their experiences, and even tag your favorite spots. It’s a creative way to create local reader communities.
🧭 The Basics: How to Add Map Stickers to Your Stories
If you’ve never used a Map Sticker before, here’s how it works step by step:
Create a Story Take a photo or record a video related to your author journey — maybe you’re at your writing desk, a local library, or a signing event.
Open Stickers Menu Tap the sticker icon (the square smiley face) at the top of the screen.
Select the Location Sticker Choose the “Location” or “Map” sticker.
Type Your Location Start typing the name of your venue — a bookstore, café, or city. Instagram will suggest verified locations.
Customize the Design You can change the sticker style, color, and placement.
Post the Story Once it’s live, viewers can tap the sticker to see the location on Instagram’s map.
✍️ Practical Ways Authors Can Use Map Stickers
Here are multiple scenarios showing how authors can creatively use Map Stickers for local promotion and storytelling:
1. Book Launch Events
If you’re launching a new book at a local venue, use a Map Sticker on your Stories leading up to the event.
Post teasers of the venue setup.
Add the sticker so followers can see exactly where it’s happening.
Include a call to action: “Join me at The Book Loft this Saturday!”
This helps potential attendees quickly locate the event and boosts engagement with local readers who might be browsing Stories in that area.
2. Bookstore Signings and Appearances
Every time you do a signing or reading, make sure to tag the location with a Map Sticker.
Not only will it help your followers find you, but it also promotes the bookstore itself, which can create goodwill and lead to future collaborations.
Example caption:
“So excited to meet readers at @LiteraryCornerBooks today! Tap the location tag to see where we are 📍”
3. Writer’s Journey: Behind the Scenes
Readers love the human side of writing — the cozy cafés, park benches, or library corners where your inspiration strikes.
You can post a Story like:
“Plotting chapter 12 at my favorite writing spot ☕📖” and add a Map Sticker for that café.
This approach humanizes your author brand and helps you connect with followers who might live nearby or share your favorite haunts.
4. Promoting Local Bookstores
Tagging independent bookstores with a Map Sticker does double duty — it promotes the shop and also signals to local readers that your book is available there.
For example:
“You can find The Midnight Letters at @PageTurnerBooks! Support local 📚”
Your followers can tap the sticker, find the store, and visit in person.
5. Writing Retreats or Workshops
If you’re hosting or attending a writer’s retreat, workshop, or conference, Map Stickers can help document your participation and show your professional growth.
Share short video clips of panels or nature scenes.
Tag the retreat location or hotel.
Encourage other participants to use the same tag for shared visibility.
6. Library Visits and Talks
Libraries are natural hubs for literary audiences. By tagging the library on your Story, you tap into their existing community.
Libraries often repost local events, which can get your Story featured to a much wider audience.
7. Connecting with Local Media and Influencers
Journalists and bookstagrammers often explore local map content to find stories or events nearby. By using Map Stickers, you increase your chances of being noticed by local media or influencers.
8. Encouraging Readers to Visit Key Book Settings
If your novel takes place in real-world locations, you can bring them to life through Instagram. Share posts from those settings and tag them with Map Stickers.
It’s a fun way to make your story tangible. For example:
“Standing where my main character finally discovers the truth — right here at Central Park 🗽📍”
📈 Strategy: How to Turn Map Stickers into Local Marketing Tools
Using Map Stickers creatively is about more than tagging locations — it’s about strategy. Here’s how to turn them into a long-term local growth tool.
1. Consistency is Key
Don’t just use Map Stickers once in a while. Make them a regular part of your Story strategy, especially during book tours or new releases.
Instagram’s algorithm rewards consistent, location-based activity by making your posts more discoverable in local feeds.
2. Mix with Hashtags
Combine your Map Sticker with local or niche hashtags, such as:
#BookSigningAustin
#WritersOfLondon
#IndieAuthorsNYC
This increases your visibility both geographically and thematically.
3. Collaborate with Local Businesses
If you tag a café or bookstore, send them a quick message afterward. Many small businesses love to repost customer Stories, which helps you reach their local audience for free.
Example message:
“Hi! I tagged your shop in my Story today — I’m an author promoting my new book and love your space!”
4. Analyze Engagement
Check your Story insights to see how many people tapped the location sticker. Over time, you’ll learn which areas and events attract the most attention.
If certain cities or venues perform well, prioritize them for future events.
5. Create Local-Themed Story Highlights
After your Stories expire, save them to a Highlight titled “Events,” “Bookstores,” or “My City.” This creates a permanent section on your profile dedicated to your local presence.
6. Pair with Reels and Posts
While Map Stickers are primarily for Stories, you can tag locations in your Reels and feed posts too. This reinforces your visibility in that area’s search results.
💡 Creative Ideas: Map Stickers as Storytelling Tools
Authors are storytellers by nature. Let’s look at some creative, narrative-driven ways to use Map Stickers that go beyond simple promotion.
1. A “Writing Map” Series
Turn your Instagram Stories into a visual diary of your creative journey. Each post features a location where you wrote or found inspiration — complete with a Map Sticker and short reflection.
Example:
“Chapter 3 came to life right here, overlooking the sea 🌊”
“This café napkin holds the first line of my next novel ☕✍️”
By connecting multiple Stories across different locations, you build a geographic timeline of your writing process — something readers love to follow.
2. Reader Meetups
Encourage your followers to meet you (or each other) at local spots. Use the Map Sticker to guide them. Even informal gatherings, like coffee chats or reading circles, can strengthen your bond with your audience.
3. “Book Journey” Highlights
Document the journey of your book from draft to launch across different places — libraries, printers, bookstores — and tag each one. When compiled into a Highlight, it becomes a visual storytelling map.
4. Location-Based Contests
Create a giveaway for local readers:
“Visit @BookHaven and tag me with the Map Sticker to win a signed copy!”
This turns Map Stickers into engagement tools that boost both foot traffic and online visibility.
5. Cultural or Setting Exploration
If your novel features real cities or landmarks, visit those locations and tag them. Share background about how those places inspired your story.
It’s an immersive, multimedia experience for your readers.
📊 Example Scenario: How a Local Author Can Grow Using Map Stickers
Let’s imagine an author named Sophie Lane, who just released her romance novel Letters by the Lake.
Here’s how she could use Map Stickers over one month:
Week
Action
Example Story
Outcome
1
Introduce book signing
“Book launch at @BrightBooks 📍 Lakeview Mall”
Followers tap the sticker and find directions
2
Behind-the-scenes
“Editing my next book at @CaféMarina ☕📍”
Readers comment about the café, increasing engagement
3
Collaborate with bookstore
“Signed copies available at @BrightBooks!”
Bookstore reposts Story, exposing Sophie to new local followers
4
Community event
“Join me for a poetry night at @LunaLibrary 📍”
Builds connections with local literary community
After consistent posting, Sophie’s engagement rate doubles, and her followers begin to identify her as a local literary figure.
🧩 Integrating Map Stickers with Broader Author Branding
Map Stickers shouldn’t exist in isolation. They can tie into your wider author brand strategy.
Combine with:
A consistent visual theme (use similar filters or tones).
Your author hashtag (e.g., #SophieLaneWrites).
Location-based captions (mentioning cities or landmarks in text).
This cohesion helps create a recognizable author identity both online and offline.
🗺️ Future Potential: Instagram Maps as a Local Discovery Tool
Instagram is steadily expanding its Map Search feature, allowing users to explore nearby businesses and events directly from the app.
For authors, this means Map Stickers might soon influence map-based discovery the same way Google Maps influences search visibility.
Being proactive now — tagging every event, café, and bookstore — ensures that your content is indexed in these local searches as the platform evolves.
⚙️ Quick Checklist for Authors Using Map Stickers
Here’s a concise summary to keep you organized:
Step
Action
✅
Always tag a location when relevant (bookstores, cafés, libraries)
🕓
Use Map Stickers regularly, not occasionally
📈
Review Story insights to track performance
🤝
Collaborate with tagged locations
📍
Encourage readers to tag the same places
🌟
Save your best Stories into Highlights
🧠 Pro Tips for Maximum Impact
Post During Local Peak Hours Post your Map Sticker Stories when your local audience is most active — typically 6–9 p.m.
Geo-Target Your Ads If you run Instagram ads for your book, combine them with geo-targeting to align with the locations you tag.
Use Reels + Map Tags for Longevity Since Stories disappear after 24 hours, back them up with Reels tagged with the same location.
Reply to Local Followers When someone replies to a location-tagged Story, engage! You never know when a casual follower might turn into a loyal reader or event attendee.
Monitor Nearby Competitors and Opportunities Explore Instagram’s Map feature to find other authors or book-related events in your city. You can connect, collaborate, or learn what works locally.
💬 Conclusion
Instagram’s Map Stickers are more than just a fun aesthetic — they’re a bridge between your digital storytelling and your physical presence as an author.
They help you turn your literary journey into a map that readers can follow, both online and in real life.
By tagging the places that inspire you, host your events, and sell your books, you’re not just sharing posts — you’re building a literary ecosystem around your local world.
Whether you’re a debut author trying to build an audience or a seasoned writer seeking deeper connections, Map Stickers offer an authentic, visual, and interactive way to grow your brand.
So next time you post that cozy café shot or bookstore signing, remember: one little sticker can open up a world of discovery.
The relationship between authors and social media has evolved dramatically over the past decade. Once, a writer’s success depended solely on publishers, bookstores, and literary agents. Today, the power has shifted — and platforms like Instagram have become essential tools for visibility, connection, and creative expression.
As we approach 2026, Instagram continues to evolve rapidly, blending social interaction, artificial intelligence, and immersive visual experiences. For authors — both indie and traditionally published — understanding these changes is critical. This guide explores the top Instagram trends for authors in 2026, how to leverage them effectively, and what kind of content resonates most with readers in a visually driven world.
1. The Evolving Role of Instagram for Authors
Instagram is no longer just a photo-sharing app. It has transformed into a storytelling ecosystem that merges video, visuals, text, and community engagement. For writers, this means the platform can serve as both a creative outlet and a marketing powerhouse.
In 2026, readers crave authenticity. They no longer want polished promotional posts alone — they want to feel like they’re part of an author’s journey. The most successful writers on Instagram aren’t just selling books; they’re building literary communities.
Here’s why Instagram remains indispensable for authors:
Collaborations and live sessions foster cross-promotion.
Authors who learn to use these tools effectively will thrive in the 2026 digital ecosystem.
2. Trend #1: The Rise of AI-Powered Content Creation
Artificial Intelligence has quietly become the co-author of Instagram. In 2026, more creators — including authors — are using AI to generate, plan, and personalize content.
AI assistants can now help writers:
Draft captions in the author’s tone.
Suggest post ideas based on trending reader interests.
Generate visuals and typography aligned with a book’s aesthetic.
Analyze engagement patterns to optimize posting times.
For example, an author releasing a fantasy novel can use AI to:
Create magical landscapes for teaser posts.
Generate AI-character portraits for reels.
Craft emotionally resonant quotes that align with their writing voice.
The key is to use AI as a collaborator, not a replacement. Readers value the human touch, so blending automation with authenticity is essential.
Pro tip: Showcase your AI-assisted creative process. Readers love behind-the-scenes peeks, especially when they involve futuristic tools.
3. Trend #2: Micro-Video Storytelling (Reels 2.0)
Instagram Reels continue to dominate — but in 2026, micro-videos have evolved. They’re shorter, smarter, and more cinematic. With attention spans shrinking and competition growing, authors must master the art of miniature storytelling.
Some powerful Reels ideas for authors:
“Book in 10 Seconds” summaries with strong visuals.
Writing sessions in time-lapse, paired with ambient music.
Quotes that move, where the author’s words animate across the screen.
Mood Reels — visual montages that capture a book’s tone or world.
Micro-videos allow authors to condense narrative energy into a few seconds. Instead of merely saying “buy my book,” you’re showing emotion, conflict, and curiosity — all within a visual experience.
In 2026, Instagram’s algorithm rewards high retention and emotional resonance. The best-performing Reels often make viewers stop scrolling, rewatch, and comment — not just like.
4. Trend #3: The “BookTok” Crossover Culture
Although TikTok’s influence began with #BookTok, Instagram has caught up through cross-platform storytelling. Now, #Bookstagram and #BookTok communities are blending — and authors who adapt both visual and narrative trends can multiply their reach.
In 2026, Instagram’s integrated short-form video tools make it easy to recycle TikTok-style content — but with a literary twist:
Dual-screen “reaction” videos to book reviews.
“Aesthetic edits” showcasing book covers and character art.
Mini-interviews with AI avatars of fictional characters.
Author reaction Reels to fan art or theories.
This crossover culture has blurred the lines between writer and reader. Fans feel they can contribute creatively to the author’s universe — and authors who embrace that energy will gain organic virality.
5. Trend #4: Virtual Launch Parties and Live Collaborations
Instagram Live has evolved into immersive virtual spaces by 2026. Through integrations with AR (Augmented Reality) and AI filters, authors can now host interactive events where readers feel physically present.
Imagine:
Hosting a virtual book launch where the background transforms into the book’s setting.
Conducting a Q&A session inside a virtual library.
Collaborating live with illustrators, narrators, or musicians.
The most successful authors in 2026 will treat Instagram Lives as mini-events, not casual chats. Promoting these events ahead of time, using teaser clips and interactive countdowns, keeps engagement high.
Bonus tip: Collaborate with other authors or influencers for shared live sessions — it doubles your reach and introduces your work to new audiences.
6. Trend #5: Community-Driven Storytelling
One of the biggest shifts in 2026 is from solo storytelling to collective narrative experiences. Readers now want to co-create.
Authors are inviting their followers to:
Vote on character decisions.
Suggest names or plot twists.
Participate in polls about story outcomes.
Contribute fan art that becomes part of official promotional content.
This community-driven model transforms passive readers into active participants. It not only strengthens loyalty but also creates continuous engagement between releases.
Instagram’s newer features — like “Collaborative Collections” and “Reader Circles” — allow authors to curate private spaces for their most dedicated followers. Think of them as digital book clubs powered by direct author interaction.
7. Trend #6: The “Aesthetic Author Brand”
Visual branding has become more important than ever. In 2026, the strongest author brands are multi-sensory — combining color palettes, typography, mood, and even sound design.
An author’s Instagram grid is no longer a random collection of posts; it’s a cohesive story world.
Tips for building your 2026 author aesthetic:
Choose a signature color palette (e.g., deep forest greens for fantasy, minimalist whites for literary fiction).
Maintain consistent font use for quotes and book titles.
Integrate ambient sounds or theme music into video posts.
Align your profile picture and highlights with your book’s tone.
Readers recognize visual consistency subconsciously. It helps them associate your writing style with a particular mood or energy. This emotional branding increases long-term recognition — even beyond Instagram.
8. Trend #7: Sustainable and Purpose-Driven Storytelling
In 2026, audiences value not only what authors write, but what they stand for. Social consciousness has become a defining trait of modern branding.
Authors who use Instagram to share meaningful messages — about sustainability, inclusivity, mental health, or literacy — tend to build deeper trust.
Some examples:
Sharing eco-friendly printing practices.
Promoting literacy campaigns.
Highlighting underrepresented voices in literature.
Hosting “charity readathons” via Instagram Live.
Purpose-driven storytelling aligns personal values with creative work, making readers feel good about supporting the author’s career. Authentic advocacy — not performative marketing — is the key.
9. Trend #8: The Return of Long-Form Captions
In a world obsessed with brevity, something surprising has happened: long captions are back.
By 2026, Instagram’s reading-friendly formatting (with AI-enhanced scrolling and readability tools) encourages users to engage with longer texts again. This gives authors a new opportunity to do what they do best — write.
Instead of posting superficial quotes, authors now share:
Personal reflections on the writing process.
Micro-essays on creativity or mental health.
“Story behind the story” narratives.
Exclusive deleted scenes or alternate endings.
Long-form captions help bridge the gap between social media and literature. They remind readers that beyond the visuals, there’s a storyteller with depth and insight.
10. Trend #9: Monetization Through Reader Memberships
By 2026, Instagram’s subscription and membership tools have matured. Authors can now earn directly from their followers through:
Exclusive serialized stories.
Early access to book chapters.
Private writing workshops.
Members-only livestreams.
This transforms Instagram from a marketing platform into an income stream. Authors no longer depend entirely on book sales — they can monetize their storytelling directly through loyal fans.
Imagine releasing your next novella in episodes via exclusive Instagram posts. Readers subscribe, engage, and support — all within one ecosystem.
11. Trend #10: The Integration of Augmented Reality (AR) Books
One of the most exciting innovations for 2026 is the rise of AR-enhanced book marketing. Using Instagram filters, authors can bring their stories to life in three dimensions.
Examples include:
Pointing your camera at a book cover to unlock a short AR animation.
Creating interactive character filters (e.g., “Which character are you?”).
Allowing readers to explore digital settings from the novel.
These AR experiences merge literature and technology, appealing to a generation that values immersion. Authors who invest in AR storytelling stand out as innovators.
12. Trend #11: Cross-Platform Consistency
Instagram may be an author’s visual hub, but in 2026, success depends on maintaining cross-platform harmony. Your tone, message, and story world should be recognizable whether someone finds you on YouTube, TikTok, or Threads.
Authors can achieve this by:
Creating unified content calendars.
Reusing video content with platform-specific tweaks.
Keeping the same bio structure and visual identity across profiles.
Encouraging cross-platform migration (“Catch the full story on Instagram!”).
Readers appreciate consistency — it makes them feel anchored in your world.
13. Trend #12: Data-Driven Creativity
In 2026, Instagram analytics have become more granular than ever. Authors can now track not just likes or comments, but emotional responses, scroll time, and reading patterns.
This allows writers to:
Discover which themes resonate most.
Identify audience demographics (by genre preference, not just location).
Test new book concepts before publication.
Tailor marketing campaigns for different reader segments.
Data doesn’t replace intuition — it enhances it. The most successful authors combine analytics with creative instinct to refine their message without losing authenticity.
14. The Future of Author-Reader Relationships on Instagram
As technology grows more advanced, one thing remains timeless: the human connection between storyteller and audience. Instagram’s evolution reflects this balance between innovation and intimacy.
In 2026, the authors who thrive on Instagram are those who:
Stay adaptable to new tools.
Maintain an authentic voice.
Balance visual storytelling with literary depth.
Value readers as collaborators, not consumers.
The future of author marketing isn’t about algorithms — it’s about relationships. Every comment, like, and share is an opportunity to deepen a bond that transcends the digital screen.
15. Final Thoughts: Turning Trends into Timeless Impact
Trends come and go, but storytelling endures. Instagram’s new technologies — from AI to AR — offer exciting possibilities, but they all serve the same purpose: to connect, inspire, and move people.
For authors, 2026 is the perfect year to merge creativity with strategy:
Use AI for inspiration.
Use Reels to express emotion.
Use captions to reveal your soul.
Use Lives to invite your community into your world.
The future belongs to those who dare to experiment — who see Instagram not as a distraction, but as an extension of their art.
Your words have power. Your stories can shape worlds. And in 2026, Instagram gives you the stage to let them shine.
Instagram is no longer just a place for travel photos, food shots, and lifestyle snapshots. Over the last decade, it has also transformed into a powerful educational hub where creators simplify complex topics—from science to law to finance. For finance bloggers, Instagram represents one of the most dynamic platforms to spread financial literacy, build a personal brand, and grow an audience hungry for trustworthy, digestible money content.
But what exactly makes Instagram so effective for finance creators? And more importantly, what types of content work best to attract, educate, and convert followers into loyal readers, clients, or customers?
This article will walk you through a deep exploration of Instagram’s potential for finance bloggers, along with more than 100 content ideas, strategy frameworks, templates, and inspiration. You’ll learn how to structure posts for maximum engagement, how to use visuals to enhance financial learning, and how to use Instagram as a powerful engine for audience growth.
Whether you’re a seasoned finance professional, a personal finance enthusiast, or a money coach looking to expand your reach, this guide will serve as your complete roadmap. Grab a fresh cup of coffee ☕️ and dive in!
🌟 Why Instagram Works for Finance Bloggers
Instagram’s algorithm and format lean toward three key strengths that benefit finance creators:
1. Visual Storytelling Makes Finance Less Intimidating
Finance can be complicated—or at least people believe it is. By presenting financial information through:
infographics
charts
short videos
carousels
animations
…you reduce friction and make your content feel friendly rather than overwhelming. Visual learning simplifies topics like compound interest, investing strategies, credit scores, taxes, and budgeting.
2. High Shareability = Organic Growth
People love to share content that:
teaches them something
makes them feel smart
inspires them
helps others
Finance content checks all these boxes. A strong carousel or infographic can go viral simply because it’s useful, saving people time and giving them “aha” moments. Posts about budgeting tips, debt payoff hacks, and saving strategies are among the most widely shared pieces of content across finance niches.
3. Perfect for Relationship Building
Instagram’s features—DMs, Stories, Live sessions, pinned posts, comments—serve as powerful tools to create authentic relationships. Money is personal, and your audience wants to trust you before applying your advice.
4. Monetization Opportunities
You can turn your growing audience into income through:
affiliate links
digital products
sponsorships
course launches
coaching
book sales
newsletter expansion
Instagram becomes a funnel feeding your broader business ecosystem.
🔍 Setting Up a Strong Foundation
Before you start posting, make sure your Instagram profile is optimized for clarity and impact.
📌 1. Choose Your Finance Niche
A focused niche makes it easier for Instagram’s algorithm and for people to understand what you do. Examples:
Good branding boosts credibility and helps people instantly recognize your posts.
💡 Mega List: 100+ Instagram Content Ideas for Finance Bloggers
Below you’ll find categorized ideas from short-form to long-form, beginner to advanced, fun to serious. Each category contains multiple unique posts you can adapt.
🧊 1. Foundational Personal Finance Education
These posts target beginners—one of the largest segments on Instagram.
Carousel Ideas
“The 5 Steps to Start Taking Control of Your Money Today”
“How to Build a Budget That Actually Works for You”
“The Difference Between Needs vs. Wants (With Real Examples)”
“10 Hidden Expenses You Didn’t Know Were Draining Your Budget”
Static Posts
A simple pie chart showing recommended budget percentages
A quote about financial empowerment
Before/after comparison of someone applying your advice
Reels Ideas
“The simplest budgeting trick I wish I knew earlier”
“What I would do at 18 to build wealth”
“Stop doing this with your money!” (myth-busting format)
📈 2. Investing Concepts
Investing is one of the most popular finance topics on Instagram because people want to grow their money—but without feeling overwhelmed.
Carousel Ideas
“Index Funds vs. ETFs Explained with Pictures”
“What $100 Invested Monthly Turns Into Over 30 Years”
“An Intro to Dividend Investing”
“The 8 Biggest Investing Mistakes Beginners Make”
Infographic Ideas
Compound interest visual examples
Risk vs. reward spectrum
Asset allocation breakdown
Reels TikTok-Style
“Investing terms you should know”
“What I’d invest in if I started today”
“ETF deep-dive in 30 seconds”
💰 3. Saving Money & Smart Spending
People love money-saving tips that feel instantly actionable.
Post Ideas
“20 Small Money-Saving Swaps That Add Up”
“Why your grocery bill keeps increasing (and how to stop it)”
“3 things you should buy in bulk vs. not buy in bulk”
“How much you should have in savings by decade”
Fun Post Ideas with Emojis
“10 Frugal Habits That Don’t Feel Cheap 😎💸”
“The $5 Daily Habit That Helps You Save Thousands”
📊 4. Finance Data Insights
Turn complex financial trends into digestible visuals.
Ideas
Inflation explained
Interest rate changes
Market trends simplified
Tax bracket visuals
These posts tend to perform well when they are:
simple
neutral
visual
tied to everyday life
💼 5. Entrepreneurship & Side Hustles
Many finance audiences are interested in building extra income streams.
Content Ideas
List of profitable digital side hustles
How to start freelancing
Realistic earnings breakdowns
Passive income truth vs. myth
Digital product ideas
Business expenses you can write off
Reels Ideas
“Side hustles nobody talks about”
“3 ways to earn money online in 2025”
🧾 6. Taxes
Taxes confuse everyone—this is your opportunity.
Carousel Ideas
“Tax Basics Every Adult Needs to Know”
“What You Can and Can’t Deduct as a Freelancer”
“The Biggest Tax Mistakes People Make”
Reels Ideas
“One tax tip that can save you $$$”
“How tax brackets actually work” (use sliders or animations)
🤝 7. Collaborations & Community Content
Boost your reach with co-created content.
Ideas
Finance Q&A Lives with another creator
“Reacting to money advice online” posts
Duets with other educators
Guest infographic from an accountant or advisor
😄 8. Humor & Relatable Finance Content
Finance doesn’t always need to be serious. Relatable humor spreads quickly.
Ideas
Money memes
“Finance red flags 🚩”
“Things that feel illegal but aren’t” money edition
“Me trying to save money vs. me ordering takeout”
Humor builds connection and makes you memorable.
🧠 9. Money Mindset & Behavioral Finance
People love introspective money content.
Ideas
“Money beliefs you need to unlearn”
“Scarcity vs. abundance mindset”
“Money anxiety: causes & solutions”
“How your childhood shapes your financial habits”
🧩 10. Advanced Finance Education
For more sophisticated audiences.
Ideas
Asset classes & diversification
Retirement accounts explained
How to read a stock chart
Financial statements for beginners
Debt strategy frameworks
Real estate investing fundamentals
📚 11. Long-Form Educational Carousels
Carousel posts are powerful for deep, step-by-step teaching.
Examples
“How to Build Wealth Step-by-Step”
“Beginner’s Guide to Building an Emergency Fund”
“The Complete Intro to Credit Scores”
📅 12. Series-Based Content
Series increase return viewership.
Examples
Money Tip Monday
Wealth Wednesday
Finance Mythbusters
Investing 101 series
30 Days of Budget Tips
📐 13. Use Tables for Clarity
Tables perform well in carousels and infographics. Here are examples you can use:
Table 1 — Types of Finance Content & Best Formats
Content Type
Best Format
Why It Works
Budgeting Tips
Carousel, Reel
Easy to save/share
Investing Basics
Infographic, Reel
Visualizes complex ideas
Tax Tips
Carousel
Clear step-by-step teaching
Side Hustles
Reel
High curiosity factor
Mindset
Static Post
Short, reflective, shareable
Data Trends
Infographic
Quick insights
Table 2 — Posting Frequency Suggestions
Experience Level
Ideal Posting Frequency
Notes
Beginner
3x weekly
Focus on consistency
Intermediate
5x weekly
Mix carousels + reels
Advanced Creator
Daily
Requires batching & scheduling
Table 3 — CTA Ideas for Finance Bloggers
CTA Type
Example CTA
Purpose
Save
“Save this for your next budgeting session”
Boosts engagement
Share
“Share this with someone trying to improve their finances”
Drives reach
Comment
“What’s your #1 money goal?”
Encourages discussion
Click
“Grab the free starter guide in my bio”
Lead generation
🧭 How to Structure High-Performing Finance Posts
Here’s a formula for designing engaging Instagram finance content.
1. The Hook (First Slide or 3 Seconds of Reel)
Examples:
“Stop wasting money on this.”
“The 5 money mistakes keeping you broke.”
“This is how wealthy people think differently.”
A strong hook makes viewers stop scrolling.
2. Clear, Simple Explanations
Use:
icons
arrows
short sentences
real examples
Finance content should feel welcoming, not technical.
3. Visual Aids
Great visuals include:
charts 📊
graphs 📈
lists
diagrams
color-coded steps
4. Practical Takeaways
Every post should leave the viewer feeling smarter.
5. A Strong CTA
Don’t forget:
Save this
Share this
Comment
Follow for more
⚙️ Instagram Strategy for Finance Bloggers
1. Use Carousels for Deep Dives
Finance thrives with structured educational steps. Carousels guide the reader through a small lesson.
2. Use Reels for Visibility
Reels bring in new people. Carousels turn viewers into followers.
3. Post Story Polls
Great poll ideas:
“Do you budget?”
“Do you prefer saving or investing?”
“Do taxes confuse you?” Engagement signals push your content higher.
4. Use Highlights as Mini-Courses
Example highlight folders:
Budgeting
Investing
Taxes
Tools
Free Resources
FAQs
5. DM Funnel Strategy
Offer:
a free budgeting sheet
an investing checklist
a money goals worksheet
…in exchange for followers DMing you a keyword.
🎨 Visual Aesthetic Tips for Finance Bloggers
Finance creators who succeed on Instagram often share similar design elements:
Use clean, modern design
Stick to:
2–3 brand colors
sans-serif fonts
minimalistic layouts
Use icons & emojis thoughtfully
They make info digestible:
💸 money
📈 investing
💳 credit
🧠 mindset
📊 charts
Add your signature style
Choose something that makes your content instantly recognizable.
🔄 Repurposing Content Across Formats
You can turn one long blog post into:
3 reels
2 carousels
1 infographic
multiple story slides
a newsletter
a LinkedIn post
Repurposing saves you time and boosts reach.
🧲 Lead Magnet Ideas for Finance Bloggers on Instagram
To convert followers into email subscribers or clients, use:
Free budgeting templates
Investing glossary
PDF on saving strategies
Expense tracker
Tax season checklist
Mini e-book on wealth basics
These convert exceptionally well.
⭐️ Advanced Tips to Accelerate Growth
Use trending audio in finance reels
Use storytelling (“Here’s how I paid off $20k of debt…”)
Share your journey
Create viral-style hooks
Collaborate with other creators
Batch content for consistency
Optimize posting times
🚀 Conclusion
Instagram is an incredibly powerful platform for finance bloggers—not just for building an audience, but for making financial education approachable, fun, and accessible to everyone. Whether you teach investing, budgeting, money mindset, taxes, or entrepreneurship, the key is to present your content clearly, visually, and consistently.
Use the content ideas in this guide to create a robust content pipeline that positions you as a trusted authority. Over time, your Instagram account becomes not just a social media profile but a full-scale educational resource—and a business engine capable of transforming your influence and your income.
Keep posting with passion, clarity, and creativity—and watch your impact grow. 💸📈🔥
In the digital age, authors no longer rely solely on publishers, bookstores, or press tours to reach their audience. Instagram has evolved into a vital storytelling platform—one that goes far beyond simple photo sharing. With over two billion active users, it’s a stage where writers can showcase their creativity, personality, and connection with readers.
But standing out requires more than posting random photos or quotes. It demands a clear, consistent, and authentic brand voice—a personality that readers can recognize instantly.
This article will walk you through the process of developing your Instagram brand voice as an author, exploring strategy, tone, aesthetics, storytelling techniques, and engagement tips that help you turn casual scrollers into loyal fans.
1. What Is a Brand Voice and Why Authors Need One
Your brand voice is the distinct personality and tone of your communication across all platforms. It’s how you express your values, beliefs, and emotions. On Instagram, this voice shapes your captions, visuals, comments, and even how you interact with your audience through Stories or DMs.
For authors, a brand voice is especially important because readers crave authenticity and emotional connection. They want to know the person behind the pages—not just the title on the spine.
A strong Instagram brand voice helps you:
Build trust and relatability.
Differentiate yourself from other authors in your genre.
Create consistency across your social presence.
Enhance your storytelling beyond your books.
Encourage engagement and loyalty among your followers.
Imagine Neil Gaiman’s dark whimsy, Elizabeth Gilbert’s spiritual optimism, or Colleen Hoover’s heartfelt realism. Each one has a distinct brand voice that seeps into their captions, quotes, and visual tone. That’s the kind of recognition you want.
2. Understanding Your Author Identity
Before crafting your Instagram voice, you need to define who you are as an author and what emotional space you want to occupy in readers’ minds.
Ask yourself:
What themes define my writing?
What emotions do I want to evoke?
Who is my target reader?
What values matter most to me?
How do I want readers to feel when they see my posts?
Let’s take examples from different author archetypes:
Author Type
Example Voice Traits
Content Style
Romance Author
Warm, heartfelt, encouraging
Quotes about love, behind-the-scenes of writing romance scenes, personal reflections
Fantasy Author
Mysterious, adventurous, poetic
Worldbuilding posts, visual art of characters, myth-inspired quotes
By pinpointing your author identity, you give structure to your content and tone. You’re no longer just “posting”—you’re curating an emotional experience.
3. Crafting Your Instagram Tone and Style
Once you understand your identity, it’s time to shape your tone—the emotional flavor of your voice.
Tone can range across a spectrum:
Professional vs. Conversational
Inspirational vs. Informative
Playful vs. Serious
Mysterious vs. Transparent
The key is consistency. If your novels are poetic and melancholic, your captions shouldn’t sound like a sales pitch. Likewise, if your nonfiction is about bold self-improvement, your tone should feel energetic and motivational.
Here’s how tone translates into caption writing:
Tone
Example Caption
Warm and friendly
“Just finished Chapter 10, and my heart’s a mess. Anyone else cry when writing their own scenes?”
Mysterious and poetic
“The moon knows the truth about the shadows we hide. 🌕 #WritersLife”
Educational and confident
“If you’re struggling with writer’s block, try writing for 10 minutes without editing. The words will flow again.”
Your followers should instantly recognize your tone, even without seeing your name.
4. Visual Language: Matching Aesthetic with Voice
Instagram is a visual-first platform, and your visual language must reinforce your brand voice.
Here’s how to align your aesthetic with your writing style:
a. Color Palette
Romance authors: soft pinks, creams, and pastels
Fantasy authors: deep blues, golds, blacks, and forest greens
Nonfiction authors: clean whites, neutrals, and accent colors
Polls (“Should my next character survive this chapter?”).
Countdown stickers for book releases.
Reels:
Voiceovers reading your favorite excerpts.
Quick writing advice.
Aesthetic “Day in the Life” clips.
Humorous trends adapted to author life.
Even in video, your tone should stay consistent. A dark fantasy author can add ambient music and shadowy lighting; a romance writer might prefer warm, cozy tones.
7. Hashtags and Captions That Reflect Your Voice
Hashtags are extensions of your voice—they connect your work to a community. Use them to stay discoverable while maintaining authenticity.
His tone: whimsical and humble, often humorous. Visuals: glimpses into his creative world and writing insights. Voice impact: feels like a conversation with a friend who tells stories for a living.
3. Colleen Hoover (@colleenhoover)
Tone: candid, funny, emotional. Visuals: personal photos and fan interactions. Voice impact: deeply human, making readers feel part of her journey.
Studying voices like these helps refine your own—not to copy, but to understand how alignment between tone, visuals, and story creates emotional stickiness.
13. Step-by-Step Guide to Creating Your Instagram Brand Voice
Here’s a practical roadmap:
Define Your Core Message → What do you want readers to remember about you? Example: “Stories that heal through heartbreak.”
Establish Visual Consistency → Choose filters, colors, and typography.
Create a Content Mix
Behind-the-scenes (20%)
Writing advice (20%)
Personal reflections (20%)
Book promotion (20%)
Reader interaction (20%)
Write a Brand Bio Keep it short and aligned: “Author of stories about love, loss, and resilience 🌿 | Sharing my writing journey one page at a time.”
Post with Rhythm and Intention Set a schedule that feels sustainable—quality over quantity.
Engage with Purpose Be present in your community. Follow, comment, and support other writers.
14. The Long-Term Benefits of a Strong Brand Voice
Developing a powerful Instagram brand voice pays off beyond likes and followers.
It helps you:
Attract literary agents and publishers who see you as marketable.
Build anticipation for your next releases.
Sell books organically, without heavy marketing.
Grow cross-platform (e.g., YouTube, newsletters).
Create legacy. A distinct voice can live on long after each book launch.
Your Instagram can evolve into a portfolio of your authentic literary self.
15. Final Thoughts: Your Voice Is Your Brand
As an author, you already understand the power of words. Instagram simply gives you a new medium to use them—visually, emotionally, and interactively.
Your brand voice is not a costume you wear online; it’s an extension of your inner writer. The key lies in alignment—between what you write, what you feel, and what you post.
When done right, your Instagram becomes a living reflection of your artistry—a place where stories don’t end with “The End,” but continue through every caption, image, and comment.
Key Takeaways
✅ Authenticity beats perfection. ✅ Consistency creates recognition. ✅ Emotion drives engagement. ✅ Your Instagram is your creative mirror—make it reflect your truest voice.
Instagram, one of the most influential visual platforms in the world, has continuously evolved from being a simple photo-sharing app into a global ecosystem for creators, businesses, and influencers. Its latest leap — NFT integration — marks a profound shift in how creators can express, monetize, and authenticate their digital work.
For authors and literary creators, this is an unexpected yet thrilling development. NFTs (Non-Fungible Tokens) are not just for visual artists anymore; they open new avenues for writers to tokenize their words, sell limited-edition digital works, and engage with their readers in revolutionary ways. This article explores Instagram’s NFT integration, what it means for creators — particularly authors — and how to make the most of this new digital landscape.
1. What Are NFTs and Why Should Authors Care?
NFTs are unique digital assets stored on a blockchain, representing ownership or proof of authenticity of a digital or physical item — whether that’s art, music, video, or text. Unlike cryptocurrencies such as Bitcoin, which are fungible (interchangeable), NFTs are one-of-a-kind.
For authors, this means:
You can mint your writing (poems, short stories, quotes, or full chapters) as NFTs.
You can prove ownership and originality of your text.
You can sell exclusive access to digital editions, signed e-books, or “first print” versions.
You can earn royalties every time your NFT is resold.
Instagram’s integration of NFTs brings all these opportunities directly to where your audience already is — social media.
2. How Instagram’s NFT Integration Works
Instagram’s NFT integration began rolling out in 2022 through its parent company, Meta, as part of its larger metaverse initiative. The goal: make NFTs accessible, mainstream, and easy to use for creators of all types — including writers.
Here’s how it functions:
a. Connecting Your Digital Wallet
To start, creators connect a crypto wallet (like MetaMask, Coinbase Wallet, or Dapper) to their Instagram account. This wallet holds both your cryptocurrencies and your NFTs.
b. Displaying NFTs
Once connected, Instagram scans for any NFTs you own and allows you to showcase them directly on your profile grid. These appear as digital collectibles, marked with a special shimmer effect and verified through blockchain data.
c. Minting NFTs
Creators can also mint (create) new NFTs directly through Instagram, without needing to leave the app or understand complex blockchain code. Instagram simplifies the process with guided tools.
d. Selling and Earning Royalties
Instagram allows creators to list NFTs for sale, set prices, and receive royalties automatically upon resale — a game-changer for writers who want to sustain income through their digital works.
3. Why Instagram Chose to Embrace NFTs
Instagram’s decision wasn’t random. It’s part of Meta’s broader vision to build the creator economy of the future, where digital ownership and identity matter as much as likes and followers.
Key motivations include:
Empowering creators to monetize beyond ads or brand partnerships.
Encouraging innovation by merging creativity with blockchain technology.
Establishing authenticity — NFTs can confirm that a piece of content genuinely belongs to its creator.
Building the metaverse, where art, writing, and digital assets form the basis of new experiences.
For authors, this means being part of the next wave of storytelling — one that combines creativity, technology, and direct reader engagement.
4. Opportunities for Authors: Writing Meets Blockchain
a. Limited Digital Editions
Authors can publish limited-edition NFT versions of short stories, chapters, or poems. Imagine releasing a “1 of 100” digital collectible edition of your new novel’s first chapter, with each buyer receiving a unique, signed version.
b. Collectible Quotes
Iconic quotes from your works can be minted as NFTs, designed with custom visuals or typography. Each becomes a piece of literary art.
c. Tokenized Writing Access
NFT ownership can serve as a key to exclusive content — like hidden chapters, early access to drafts, or behind-the-scenes notes.
d. Reader Engagement
NFTs can act as membership passes for book clubs or exclusive online events. Fans who hold your NFT could join live Q&A sessions, receive future book discounts, or even vote on story directions.
e. Collaboration with Visual Artists
Writers can partner with illustrators to create NFT collections that merge literature and art — digital poetry cards, illustrated short stories, or novel-based artwork.
5. Step-by-Step: How Authors Can Start Using Instagram’s NFT Tools
Step 1: Set Up a Crypto Wallet
Choose a wallet compatible with Instagram (MetaMask or Coinbase Wallet). This is where your NFTs and funds will live.
Step 2: Connect It to Instagram
Open Instagram → Go to Settings → Digital Collectibles → Connect Wallet.
Step 3: Choose or Mint an NFT
If you already own NFTs, Instagram will detect them. To create one, you’ll select “Mint New,” upload your content, set metadata, and confirm it on your wallet.
Step 4: Add Descriptions
Write compelling captions that describe the meaning or rarity of your NFT. Think like an author — tell a story around your collectible.
Step 5: Share It
Post your NFT to your feed or stories. Followers can view blockchain verification details like ownership, creator name, and edition number.
Step 6: Sell or Gift It
Decide if your NFT will be available for sale, what platform (Polygon, Ethereum, etc.) it will use, and whether it includes royalties.
6. The Blockchain Behind Instagram’s NFTs
Instagram initially supported Ethereum and Polygon, with later support added for Solana and Flow. For creators, Polygon has become the preferred option because:
It’s eco-friendly, using minimal energy.
It’s low-cost, with small transaction fees.
It’s fast, allowing near-instant minting.
This is important for authors who want to reach a sustainability-conscious audience or avoid high gas fees.
7. The Benefits of NFT Integration for Authors
Benefit
Description
Ownership Proof
NFTs provide immutable proof of authorship.
New Revenue Streams
Sell collectibles, special editions, or memberships.
Community Engagement
Reward loyal readers through NFT-based perks.
Royalties on Resales
Continue earning even after the first sale.
Cross-Platform Exposure
NFTs can exist on Instagram, OpenSea, or other markets.
Innovation Branding
Being an early adopter enhances your image as a forward-thinking creator.
8. The Risks and Challenges
While exciting, NFTs aren’t risk-free. Authors should be aware of potential pitfalls.
a. Market Volatility
NFT prices fluctuate with crypto markets. Value can drop quickly.
b. Environmental Concerns
Some blockchains use significant energy, though Polygon and Flow are more sustainable options.
c. Scams and Plagiarism
Fake NFTs and unauthorized minting remain issues. Always verify your works’ rights before minting.
d. Legal Uncertainty
Copyright law is still catching up with NFTs. Clarify ownership terms in your sales descriptions.
e. Technical Learning Curve
Blockchain and crypto wallets can be intimidating for beginners, though Instagram’s interface simplifies much of it.
9. Instagram’s Role in Democratizing NFTs
Before Instagram’s integration, NFT creation was largely limited to tech-savvy users familiar with blockchain marketplaces. Instagram changes that by making NFT creation social and accessible.
Over 2 billion monthly users now have access to NFT tools.
The app offers educational resources to teach creators the basics.
NFTs are integrated naturally into Instagram’s feed, not hidden behind technical jargon.
This move could normalize NFTs in mainstream culture — especially in creative industries like writing and publishing.
10. Future Outlook: The Next Chapter for Authors on Instagram
Instagram’s NFT integration is still evolving, but Meta’s roadmap points to a larger metaverse ecosystem. Authors could one day host virtual book launches in immersive spaces, sell NFT “tickets” to readings, or offer interactive digital books that adapt based on user behavior.
Possible future features include:
Cross-app NFT compatibility (sharing collectibles between Facebook, Threads, and Instagram).
AI-generated storytelling tools tied to NFT ownership.
Integrated NFT analytics, tracking reader engagement and collector data.
NFT-based fan clubs, where ownership equals membership.
As these tools evolve, early adopters will hold the advantage. Just like writers who were first on Kindle Direct Publishing or Substack, those who embrace NFTs early can shape how literature lives in the Web3 era.
11. Real-World Examples: Writers Using NFTs Successfully
Neil Strauss, best-selling author, experimented with NFT-based writing drops, offering access to exclusive unpublished content.
Emily Segal, novelist and artist, used NFTs to fund her literary projects through tokenized sales.
Publishing collectives are emerging that mint short stories or anthologies as NFTs, giving royalties directly to writers and contributors.
These pioneers show that blockchain isn’t just a fad — it’s a new creative frontier.
12. Tips for Authors Entering the NFT Space
Start small — Mint one poem or story to test the process.
Tell a story behind each NFT — The narrative adds value.
Collaborate — Partner with artists, musicians, or designers.
Engage your audience — Educate readers about NFTs and offer benefits for holders.
Stay transparent — Clearly explain what buyers receive and the rights they hold.
Promote ethically — Avoid hype; emphasize creativity and authenticity.
Diversify — Use NFTs as one part of your creative strategy, not your entire income stream.
13. The Ethical Side: Sustainability and Inclusion
Authors concerned about environmental impact can choose blockchains like Polygon, which operate on proof-of-stake, drastically reducing energy consumption. Inclusivity also matters — NFTs can empower underrepresented writers globally to earn directly from their audiences without traditional publishing gatekeepers.
Instagram’s ease of use democratizes this even further, helping marginalized voices find recognition in the digital realm.
Conclusion: Writing the Future with Instagram NFTs
Instagram’s NFT integration is more than just a tech update — it’s a creative revolution. For authors, it transforms the relationship between creator and reader, bringing literature into the age of verified digital ownership. Whether you’re a poet, novelist, or essayist, NFTs can redefine how your work is shared, valued, and experienced.
The key is not to fear technology, but to embrace storytelling in new forms. The future of writing may not just be published — it may be minted.
In the age of digital storytelling, social media platforms are no longer just for influencers or brands—they’re essential tools for authors who want to connect with their readers, share their creative process, and build a strong online presence. Among the many features Instagram offers, one that’s particularly powerful for authors is the Remix feature.
Originally introduced as a way for users to interact creatively with Reels, Instagram Remix has evolved into a versatile engagement tool that allows you to collaborate, respond, or reinterpret existing content. For authors, this is an incredible opportunity to connect directly with fans, book bloggers, publishers, and even fellow writers in innovative and meaningful ways.
In this comprehensive guide, we’ll dive into everything authors need to know about Instagram’s Remix feature—from how it works and how to use it strategically, to creative ideas, algorithm insights, and examples that can help you grow your literary brand.
1. What Is the Instagram Remix Feature?
Instagram’s Remix feature allows users to create new content using existing posts or Reels. Essentially, you can “remix” someone else’s video or photo by adding your own video, commentary, reaction, or creative spin beside it or after it.
Think of it like a digital duet—just as musicians can collaborate on a song, authors can collaborate on stories, book reviews, or writing challenges. This feature is perfect for authors because it opens the door to interactive storytelling and community building.
When you remix someone’s content, the original creator is credited automatically, ensuring transparency and giving credit where it’s due. You can remix:
Reels
Feed posts
Photos
Carousels
Stories (through the “Add Yours” sticker)
This gives you a wide range of creative opportunities to engage your audience and participate in trends while keeping your literary identity front and center.
2. Why Authors Should Use the Remix Feature
As an author, you might wonder: “Why would I remix someone else’s post?” or “How can this help me sell more books?” The answer lies in visibility and engagement.
The Instagram algorithm rewards interaction. Remixing is not only a form of engagement—it’s one of the most organic ways to reach new audiences, especially those interested in literature, writing, and book-related communities.
Here’s how it can benefit you:
2.1. Increase Visibility
Remixes often appear in both your feed and the original creator’s content suggestions. This dual exposure gives your profile a visibility boost, especially if you’re remixing popular accounts like book bloggers, publishers, or bookstagrammers.
2.2. Show Personality and Creativity
Writing is a creative art—but showing that creativity visually can sometimes be tricky. Remixing lets you showcase your sense of humor, storytelling skills, and literary perspective through engaging short-form videos or interactive posts.
2.3. Connect with Readers
When readers post reactions, reviews, or fan art, remixing their posts is a great way to acknowledge and appreciate them. This strengthens your connection with fans and encourages others to share similar content.
2.4. Collaborate with Other Authors
Remixes can serve as collaborations. Two authors could respond to each other’s writing prompts, discuss writing advice, or react to book release news—creating a cross-promotional effect for both audiences.
2.5. Leverage Trends
Many Instagram trends begin as remix challenges. By joining them early, you can ride the wave of virality while adding your own authorial twist.
3. How to Use the Remix Feature: Step-by-Step Guide
Let’s break down how you can use this feature on Instagram effectively.
3.1. Remixing a Reel
Open a Reel you’d like to remix.
Tap the three dots (…) on the bottom right.
Select Remix this reel.
Choose your preferred layout:
Side-by-side: your video appears next to the original.
After original: your video plays right after the original.
Record your reaction or add a pre-recorded video.
Edit with text, stickers, filters, and audio.
Post your Remix with a caption, hashtags, and location tags.
Tip: Always tag the original creator and add a call to action like “Check out this amazing review!” or “Here’s how I wrote this scene.”
3.2. Remixing a Photo or Feed Post
Instagram expanded Remix to static posts too. To remix a photo:
Tap the three dots on a post.
Choose Remix this photo.
Record a Reel that reacts to or comments on it. This is especially fun for authors who want to react to book reviews, cover art reveals, or reader photos.
3.3. Remix Permissions
Not every post can be remixed. Users can disable Remixing in their settings or for specific posts. To control your own Remix permissions:
Go to Settings > Privacy > Reels and Remix
Choose who can remix your content (everyone, followers, or no one)
4. Best Practices for Authors Using Remix
To truly make Remix a growth tool, strategy is key. Below are the top practices to maximize its effectiveness.
4.1. Add Value
Don’t remix for the sake of remixing. Add something valuable—insights, humor, emotion, or a creative twist that enriches the original content.
4.2. Stay On-Brand
Your remixes should reflect your author brand. Whether you write fantasy, romance, or thrillers, let that personality shine through. Readers love consistency.
4.3. Use Captions Wisely
Captions are storytelling tools. You can:
Share a short quote from your book.
Ask a question to boost engagement.
Include relevant hashtags like #BookTok, #AmWriting, #IndieAuthor, or #WritersOfInstagram.
4.4. Keep It Authentic
Audiences on Instagram value authenticity more than polished perfection. Don’t be afraid to show your writing struggles, rejections, or creative processes through remixed content.
4.5. Monitor Analytics
Use Instagram Insights to track which remixes perform best. This data helps refine your content strategy and focus on what your readers love most.
5. Creative Ideas for Authors Using Remix
Now, let’s explore some actionable ideas to get your creative juices flowing.
5.1. React to Book Reviews
If a reader posts a video review or photo of your book, remix it with a personal thank-you message or commentary on what inspired that scene.
5.2. Join Writing Challenges
When writing challenges trend on Reels, remix the challenge post with your version of the story or prompt. This helps you join the writer community and attract like-minded followers.
5.3. Compare Book Covers
Remix a post about book cover trends or fan art to share your own cover creation process or thoughts behind your design choices.
5.4. Author Q&A or Myth Busting
Remix popular posts that spread myths about publishing, writing routines, or book marketing. Give your professional take.
5.5. Celebrate Milestones
When your book hits a milestone (like “1 Year Since Publication”), remix an old video or post with your reactions today. It shows growth and gratitude.
5.6. Collaborate with Book Influencers
Team up with Bookstagrammers or BookTokers for collaborative remixes—like reacting to their “Top 5 Reads” list when your book is included.
5.7. Share Behind-the-Scenes Moments
Remix trending Reels (like “How it started vs. how it’s going”) to showcase your writing journey or editing process.
5.8. Encourage Fan Participation
Ask readers to create Reels about your book (favorite quotes, characters, endings) and remix their videos as appreciation. This fosters an engaged fandom.
6. How Remix Affects the Algorithm
Understanding how the Instagram algorithm treats Remix content helps you strategize more effectively.
Shared Engagement: Remixes often appear under both creators’ audiences, boosting exposure for both parties.
High Watch Time: The algorithm rewards videos that keep users watching. Reaction-style remixes usually have strong watch retention.
Fresh Audio: Remixing trending sounds can place your video in relevant discovery feeds.
Hashtag Synergy: Using similar hashtags as the original creator increases the chance of being shown alongside them.
Authentic Engagement: Comments and saves on your Remix also affect the original post’s performance, encouraging collaboration rather than competition.
7. Common Mistakes to Avoid
Even though Remix is fun and dynamic, there are a few pitfalls to watch for:
Overusing trends – Don’t remix just to follow a trend; always connect it to your author persona.
Ignoring permissions – Respect creators who disable Remix.
Skipping credit – Always tag the original creator, even if Instagram does it automatically.
Neglecting captions – A strong caption doubles engagement.
Forgetting call-to-actions – Ask viewers to comment, follow, or check out your book link in bio.
8. Tools and Resources to Elevate Your Remix Content
To make your Remixes visually appealing, use creative tools:
Purpose
Tool Recommendation
Description
Video Editing
CapCut / InShot
Easy editing with templates for Reels
Subtitles
AutoCaptions / VEED.io
Add auto-generated captions
Design
Canva
Create intro or outro visuals
Hashtag Research
Flick / Hashtagify
Find niche-specific hashtags
Scheduling
Later / Buffer
Plan and auto-post Reels
Combining these tools with Instagram’s in-app features—like stickers, text effects, and music—will give your Reels a professional yet personal touch.
9. Case Studies: Authors Using Remix Successfully
Let’s look at a few examples of how real authors are using the Remix feature:
Case 1: Indie Author Reacts to Fan Art
An indie fantasy author remixed a fan’s illustration of her main character. Her enthusiastic reaction led to a surge of fan art submissions and a 15% follower increase in one week.
Case 2: Romance Writer Joins a Writing Challenge
A romance novelist remixed a viral “30-Day Writing Prompt” challenge with snippets from her upcoming book. Each video teased a new scene, driving pre-orders.
Case 3: Nonfiction Author Collaborates with Podcasters
A self-help author remixed short clips from podcast interviews that mentioned her work, adding her responses and reflections. This built authority and drove book sales.
10. Advanced Strategies: Building a Remix Campaign
If you want to go beyond casual use, you can launch a Remix Campaign to generate buzz for your upcoming release.
Step 1: Start a Trend
Create a Reel challenge like “#RemixMyPlot” or “#RewriteTheEndingChallenge” and invite followers to remix your video.
Step 2: Reward Participation
Feature the best remixes in your Stories or offer book giveaways to top creators.
Step 3: Track Engagement
Use a consistent hashtag to monitor participation and measure campaign success.
Step 4: Cross-Promote
Share the best remixes on other platforms (like TikTok or YouTube Shorts) to extend reach.
11. The Future of Instagram Remix for Authors
Instagram is increasingly prioritizing interactive and collaborative content. For authors, this means new ways to tell stories, invite audience participation, and redefine digital book marketing.
The Remix feature represents a shift from broadcasting to co-creating—transforming the relationship between writer and reader into something dynamic and interactive. As AI-driven recommendations continue to evolve, engagement tools like Remix will only become more central to author branding.
Whether you’re a debut novelist or a seasoned writer, embracing Remix is embracing the future of literary storytelling in the digital age.
Conclusion
Instagram’s Remix feature is more than just a social tool—it’s a creative stage for authors to engage readers, expand their audience, and showcase their imagination beyond the written page.
By using Remix strategically—reacting to fan content, collaborating with peers, joining writing trends, and maintaining a consistent author voice—you can transform your Instagram presence into a living, interactive extension of your writing career.
So the next time you scroll through Reels, don’t just watch—remix. Your next creative breakthrough might start with a single click.
In the visually driven world of beauty, Instagram has become one of the most powerful tools for brand storytelling, customer engagement, and community building. Whether you’re an indie skincare label or a global cosmetics powerhouse, tutorials are the golden ticket to attracting attention and transforming followers into loyal customers. But not just any tutorial — creative, authentic, and visually stunning content that captures the essence of your brand.
In this comprehensive guide, we’ll explore how beauty brands can create impactful tutorials on Instagram, from concept to execution. You’ll learn the best strategies for tutorials that educate, entertain, and convert — and how to make your brand shine in the algorithmic crowd.
🌟 Why Tutorials Are Essential for Beauty Brands on Instagram
Before diving into tutorial ideas, it’s important to understand why this content format is so effective.
1. They Demonstrate Product Value
Beauty is a sensory industry — people want to see results before they buy. Tutorials show real-time transformation and teach users how to achieve specific looks, helping them visualize themselves using your products.
2. They Build Trust and Authority
When you teach your audience how to use your products effectively, you become a credible source of expertise. This kind of educational content fosters trust — especially when paired with authentic testimonials or behind-the-scenes insight.
3. They Encourage Engagement
Tutorials spark interaction. Followers comment with questions, share tips, tag friends, or even post their own results using your product — extending your reach organically.
4. They Boost Retention and Conversion
The more time users spend watching your videos, the more likely they are to purchase. Tutorials increase watch time, which improves algorithmic performance and keeps your brand at the top of feeds.
📱 Choosing the Right Format for Instagram Tutorials
Instagram offers multiple formats to experiment with. The key is choosing the one that matches your content goals and your audience’s behavior.
Format
Best For
Key Benefit
Tips
Reels
Short, catchy tutorials
High discoverability
Use trending audio and captions
Stories
Step-by-step demos or Q&A
High engagement and authenticity
Add polls and stickers
Carousel Posts
Detailed photo tutorials
Saves and shares
Include clear step-by-step visuals
Live Streams
Real-time tutorials
Builds community and trust
Invite a makeup artist or influencer
Guides
Curated collections of tutorials
Long-form value
Organize by skin tone, product type, or occasion
Each of these formats has unique advantages. A balanced content strategy includes all of them — mixing short, viral Reels with educational carousel posts and authentic live sessions.
💄 Tutorial Ideas for Beauty Brands on Instagram
Now that you know why tutorials matter and which formats to use, let’s explore practical and creative ideas to inspire your next campaign.
1. The Classic Product Application Tutorial
This is the bread and butter of beauty marketing. Demonstrate how to apply your product for best results.
Example:
Title: “How to Apply Our New Velvet Matte Lipstick Without Cracks 💋”
Format: Reels (15–30 seconds)
Structure:
Show the product up close (packaging & texture)
Apply on camera with tips (“Use the edge of the applicator for precision”)
Show final look and a confident smile
Add caption: “Tag a friend who loves bold lips!”
Tip: Use macro shots and ASMR-style sounds (like brush strokes or packaging clicks) to enhance the sensory experience.
2. “Get the Look” Celebrity or Trend Tutorial
Capitalize on trending celebrity looks or viral makeup styles.
Example:
“How to Get Hailey Bieber’s Glazed Donut Skin ✨”
“Euphoria-Inspired Glitter Eye Tutorial 💜”
Best Practices:
Use before/after transitions.
Mention all products used in captions.
Include skin prep steps to add depth.
These tutorials help your brand stay culturally relevant and appeal to trend-conscious users.
3. Skincare Routine Demonstration
This is perfect for skincare brands. People crave guidance on layering, timing, and product combinations.
Example: “Morning Glow Routine Using Our Vitamin C Serum 🍊”
Step 1: Cleanse
Step 2: Apply serum
Step 3: Lock in moisture with our Hydrating Gel
Step 4: Apply SPF
Include timestamps and product tags. Bonus: Turn it into a carousel with each step as a slide.
4. Ingredient-Focused Mini Tutorials
Modern consumers are ingredient-savvy. Highlight the science behind your product in short, educational videos.
Example:
“What Makes Hyaluronic Acid So Powerful?”
“Why Niacinamide Reduces Redness”
Show visuals of the ingredient, explain the benefits in layman’s terms, and end with your product as the hero solution.
5. Seasonal or Event-Based Tutorials
Tie tutorials to holidays, weather changes, or major events.
Examples:
“Glowy Skin Tutorial for Summer Weddings 💐”
“Winter Lip Care Routine ❄️”
“Valentine’s Day Red Lip Masterclass ❤️”
These time-sensitive tutorials drive urgency and shareability.
6. Transformation Tutorials
Everyone loves a good before-and-after. These are particularly effective for hair and skincare brands.
Example:
“Watch This Dry Hair Turn Silky in 30 Seconds 💆♀️”
“From Dull to Dewy: The Power of Our Brightening Mask 🌿”
Use split-screen visuals or smooth transitions for dramatic effect.
7. “Mistake & Fix” Tutorials
Teach followers what not to do — and how your product solves it.
Example:
“Stop Doing This with Your Eyeliner 👀 (Try This Instead!)”
“Why Your Foundation Looks Cakey — and How to Fix It”
These educational posts are relatable and build authority.
8. Mini Masterclasses with Experts
Collaborate with makeup artists, dermatologists, or influencers for quick masterclasses.
Ideas:
“How to Blend Like a Pro (ft. @MakeupByJess)”
“The Science Behind Perfect Skin Texture”
This approach merges credibility with entertainment and expands reach through cross-promotion.
9. Tutorials for Different Skin Tones and Types
Representation matters. Create inclusive tutorials that show your products on diverse models.
Example:
“3 Ways to Rock Our Nude Lipstick — on Fair, Medium, and Deep Skin”
“Foundation Tips for Oily vs. Dry Skin”
This not only showcases your range but also makes followers feel seen and valued.
10. Sustainable Beauty Tutorials
Eco-conscious consumers appreciate content about sustainable habits.
Example:
“How to Recycle Our Product Packaging ♻️”
“Zero-Waste Skincare Routine Using Our Refill System”
Show the environmental impact of your brand’s choices and align with conscious beauty trends.
🎥 Production Tips: How to Make Tutorials Look Professional
Great tutorials don’t require Hollywood budgets — just attention to detail.
1. Lighting
Natural light works best, but if indoors, use a ring light or softbox for even brightness.
2. Background
Keep it simple. A clean vanity, pastel wall, or neutral backdrop helps your product stand out.
3. Camera Setup
Use a tripod or smartphone stand. Shoot vertically for Reels and Stories.
4. Editing
Add text overlays, captions, and quick transitions. Use apps like CapCut, InShot, or Adobe Premiere Rush.
5. Music & Audio
Trending sounds boost discoverability, while ASMR audio can enhance sensory appeal.
🧠 Captions and Hashtags: Your Tutorial’s Secret Weapon
Your visuals grab attention — but your caption converts interest into action.
Effective Caption Formula:
Hook + Value + CTA
Example:
“Struggling with uneven eyeliner? ✨ Watch how our precision pen fixes it in one swipe. Save this for your next makeup look! 💖 #EyelinerTips #BeautyHacks”
Top Hashtags for Beauty Tutorials: #MakeupTutorial #SkincareTips #CleanBeauty #MakeupInspo #BeautyReels #GlowUp #NaturalMakeup #VeganBeauty #BeforeAndAfter
💬 Engagement Ideas: Make Tutorials Interactive
Encourage conversation to boost reach and foster community.
“Comment your favorite summer skincare step 🌞”
“Tag a friend who needs to see this look 💄”
“Which shade should we feature next? Vote below!”
Use polls, quizzes, and question stickers in Stories for extra engagement.
📊 Measuring Success: How to Track Tutorial Performance
Use Instagram Insights to evaluate what’s working.
Metric
What It Shows
Why It Matters
Views
How many people watched your tutorial
Gauges content reach
Engagement Rate
Likes, comments, saves, shares
Indicates relevance
Retention
How long users watch before skipping
Tests pacing and interest
Saves
Users storing for later reference
Shows long-term value
Profile Visits
Clicks to your bio or website
Measures conversion potential
Adjust your content based on these insights to keep improving.
💡 Advanced Tutorial Strategies for Beauty Brands
1. Create Tutorial Series
Turn your tutorials into serialized content — like “Foundation Fridays” or “Self-Care Sundays.” Regular themes build anticipation and loyalty.
2. Collaborate with Micro-Influencers
Micro-influencers often deliver higher engagement and authenticity. Have them create tutorials using your products.
3. Incorporate User-Generated Content
Feature customer tutorials in your feed to celebrate your community and encourage more participation.
4. Use Instagram Shopping
Tag products directly in tutorials to enable instant purchase.
5. Experiment with AR Filters
Create custom filters that align with your brand — such as “try-on lipstick” or “glow meter” filters.
🧴 Case Studies: Brands Doing Tutorials Right
1. Fenty Beauty
Fenty’s Reels often feature diverse models showing product application in natural light, with upbeat editing and inclusivity messaging.
2. Glossier
Glossier champions authenticity by using user-generated tutorials in Stories and Reels — often filmed casually, but always polished.
3. The Ordinary
Their tutorial Reels focus on ingredient education and simple, scientific visuals — perfect for their minimalist brand.
4. Rare Beauty
Selena Gomez’s brand leverages empathy and realness in tutorials, showing imperfections and emotional connection.
🚀 Conclusion: Turn Viewers into Brand Believers
Instagram tutorials are more than marketing — they’re a bridge between your products and the people who love them. Whether you’re teaching a new eyeliner hack, unveiling the science behind your serum, or sharing a sustainable skincare ritual, every tutorial builds trust, inspires creativity, and strengthens your brand identity.
With the right mix of creativity, consistency, and authenticity, your tutorials can become the heartbeat of your beauty brand’s online presence — turning casual scrollers into lifelong fans.
Instagram has evolved far beyond being just a photo-sharing platform. Today, it’s a dynamic storytelling tool that empowers authors to build communities, expand readership, and connect emotionally with their audience. Among the most engaging strategies for authors is running a vacation-themed Instagram campaign.
Why vacations? Because vacations evoke imagery, emotion, and escapism—three elements that align beautifully with storytelling. Whether you’re a fiction writer wanting to transport readers into your book’s exotic settings, or a non-fiction author wishing to showcase the inspiration behind your travels, a vacation-themed campaign can elevate your brand, boost engagement, and attract new readers.
This comprehensive guide will walk you through the process—from concept to content creation—showing you how to build a cohesive, visually appealing, and emotionally engaging Instagram vacation campaign as an author.
1. Understanding the Power of a Vacation Theme
Before diving into logistics, it’s crucial to understand why a vacation theme works so well for authors.
Vacations symbolize freedom, discovery, rest, and inspiration—exactly the same feelings that great literature can awaken. Readers who follow authors on Instagram often crave a peek behind the curtain: Where does the inspiration come from? What do you see, hear, and feel when you write?
When authors share vacation-themed content, they allow followers to live vicariously through their adventures. It humanizes you as an author, connects emotionally with readers, and strengthens your brand identity.
Key Benefits:
Human Connection: Readers love seeing the “real” person behind the books.
Visual Storytelling: Travel images naturally fit Instagram’s visual nature.
Brand Consistency: A recurring theme of exploration and inspiration enhances your brand.
Promotion Opportunity: You can tie your books or upcoming projects into travel moments.
2. Setting Goals for Your Vacation-Themed Campaign
Like any marketing initiative, clarity of purpose is essential. Ask yourself:
Do you want to increase follower engagement?
Are you aiming to promote a new book inspired by travel?
Or do you want to build anticipation for an upcoming writing retreat or event?
Example Goals:
Goal Type
Example
Awareness
Showcase your author brand as adventurous and creative.
Engagement
Encourage followers to share their favorite travel books or destinations.
Conversion
Lead traffic to your Amazon author page or email newsletter.
Community Building
Create a hashtag campaign like #VacationWithMyBook.
A clear goal defines the tone, format, and type of content you’ll share.
3. Developing Your Vacation Campaign Concept
Once you’ve set your goals, you’ll need a strong concept that ties your posts together.
Example Concepts:
“Chapters Around the World” – Share destinations that mirror scenes from your books.
“Writing from Paradise” – Document your real travels while highlighting writing rituals.
“Reading Escapes” – Feature your books in picturesque vacation settings, like beaches or mountains.
“Imaginary Journeys” – If you’re not traveling, create thematic posts that blend your fictional worlds with dream destinations.
Your campaign should feel cohesive and narrative-driven, much like a good book. Each post acts as a chapter, and your overall feed tells the story of your journey.
4. Planning Your Content Calendar
A well-structured campaign relies on consistency. Create a simple editorial calendar that outlines:
Posting Dates
Post Type (photo, carousel, video, story, reel)
Caption Idea
Hashtags
Call to Action
Example 7-Day Mini Campaign:
Day
Theme
Content Type
Example Post
1
“Departure”
Carousel
“Every story begins with a journey. Mine starts here.”
2
“Inspiration”
Reel
Short clip of writing on a beach, with narration.
3
“Local Flavor”
Photo
Capture local food or culture with book reference.
4
“Reading Moment”
Story
Share a follower reading your book on vacation.
5
“Book Setting”
Carousel
Compare a real location to a fictional scene.
6
“Author’s Reflection”
Video
Talk about how travel inspires creativity.
7
“Return Home”
Photo + Caption
Reflect on what you’ve learned and thank followers.
This type of narrative flow keeps your followers engaged and anticipating each new post.
5. Crafting the Visual Aesthetic
A successful Instagram campaign is visually cohesive. Decide early on what mood or tone your visuals should have.
Possible Aesthetic Directions:
Warm & Sunlit: Perfect for beach or summer vacation vibes.
Cool & Misty: Great for mountain or winter-themed retreats.
Vintage Film Look: Works well for nostalgic or literary journeys.
Minimalist & Clean: Ideal for non-fiction authors or travel essayists.
Use consistent editing filters, fonts for Stories, and similar color palettes across posts.
Tip: Use tools like Lightroom, VSCO, or Canva to maintain visual consistency.
6. Writing Engaging Captions That Tell a Story
Your captions should reflect your writer’s voice—authentic, thoughtful, and poetic. Instead of simply describing a photo, weave a short story around it.
Example Caption Styles:
Descriptive: “The sea was calm, but my mind raced with ideas for my next chapter.”
Reflective: “Every journey reminds me that stories exist in the spaces between moments.”
Interactive: “If your favorite book could take you anywhere, where would you go?”
Promotional (Soft Sell): “This view inspired Chapter 5 of Waves of Time. Available now!”
Always include a call to action—even if it’s subtle. Encourage comments, shares, or link clicks.
7. Incorporating Reels and Video Content
Instagram heavily favors video content. For authors, this is an excellent opportunity to add dimension to your campaign.
Ideas for Reels:
“Day in the Life of a Traveling Author” – Combine clips of travel, writing, and reading.
“Behind the Scenes” – Show how travel influences your creative process.
“Book Came to Life” – Match real-world locations with book excerpts.
“Packing Inspiration” – Display items you always take when writing on the road.
Use trending sounds subtly or create your own narration—perhaps reading a poetic line or book excerpt.
8. Using Hashtags and Geo-Tags Strategically
Hashtags connect your content to broader audiences, while geo-tags make your posts discoverable to travelers and locals alike.
Suggested Hashtags:
#AuthorLife
#WritersOnInstagram
#Bookstagram
#TravelWriter
#VacationReading
#ReadingNookAbroad
#WritingInspiration
#WanderlustBooks
#AdventureReads
Combine high-volume tags (#Bookstagram) with niche ones (#WritersOnHoliday) to reach both broad and targeted audiences.
9. Collaborating with Other Creators
Partnerships amplify reach. Team up with:
Other authors for a cross-promotional travel challenge.
Travel influencers to feature your book in their vacation photos.
Local bookshops or cafes for in-location photoshoots.
You can even host joint giveaways: “Win a signed copy of my book + travel journal set!”
Collaboration not only expands your audience but adds authenticity to your campaign.
10. Engaging with Followers Through Stories
Stories are perfect for daily updates that feel spontaneous. Use them to:
Share behind-the-scenes moments.
Ask travel-related polls (“Beach or mountains?”).
Use quizzes about your book’s settings.
Highlight readers’ vacation photos featuring your book (User-Generated Content).
Stories disappear after 24 hours, but you can save them as Highlights like “My Travels” or “Book Adventures” to keep your campaign evergreen.
11. Hosting a Vacation-Themed Giveaway
Giveaways spark engagement and can significantly boost visibility.
Example Giveaway Concept:
“Where would you take my book on vacation?” Ask followers to post a creative photo with your book and tag your profile using a custom hashtag like #VacationWithMyBook.
Prize Ideas:
Signed copies
Personalized postcards from your travels
Travel-themed bookmarks
A video call Q&A session
Make sure to set clear rules and a timeline, and use Stories to announce the winner.
12. Using Instagram Ads to Expand Reach
A small paid boost can go a long way. Promote your best-performing post or reel to targeted audiences like:
Readers of your genre
Book club members
Travel enthusiasts
Users who follow similar authors
Use strong visuals and captions that invite curiosity, like: “Escape with a story that takes you further than any vacation ever could.”
13. Measuring the Success of Your Campaign
Use Instagram Insights to monitor:
Engagement rate (likes, comments, shares, saves)
Follower growth
Website or bio link clicks
Story views and interactions
Track which posts perform best. This helps refine your next campaign.
Example Metrics Table:
Metric
Target
Achieved
Notes
Engagement Rate
5%
6.8%
Strong post interaction
Follower Growth
+10%
+12%
Exceeded target
Link Clicks
200
175
Consider stronger CTA
Story Views
3,000
2,950
Consistent engagement
14. Extending the Life of the Campaign
After the campaign ends, don’t let the content fade away.
Create a Highlight Reel summarizing the best posts.
Convert Stories into a short IGTV or YouTube video.
Use top-performing captions for email newsletters.
Write a blog post about the experience and tag your Instagram posts in it.
The goal is to repurpose and keep the story alive beyond social media.
15. Example Vacation-Themed Campaign for Authors
Here’s a practical example to visualize the full strategy:
Author: Emily Rivers, romance novelist Goal: Promote her new novel “Sunset Letters” Concept: “Love Across Destinations” Aesthetic: Warm, pastel tones with handwritten captions Campaign Title: #LettersFromParadise
Execution Plan:
Teaser Post: “Every love story begins with a journey…”
Reel: Emily writing a scene in a seaside café.
Story Poll: “Would you fall in love abroad?”
Photo: The novel on a beach chair with a handwritten letter beside it.
Giveaway: A signed copy + a travel-themed candle.
Live Session: Q&A from a tropical location about how travel shaped her writing.
Results:
25% increase in followers
600+ comments on campaign posts
Novel became her best-selling title that quarter
This demonstrates how emotional storytelling and visual consistency can transform a simple travel idea into a powerful brand moment.
16. Common Mistakes to Avoid
Over-Promotion: Don’t make every post about your book; balance with lifestyle content.
Inconsistency: Avoid random filters or unrelated posts.
Neglecting Engagement: Always reply to comments and DMs.
Ignoring Accessibility: Add alt text to images and captions for inclusivity.
Remember, authenticity wins. Followers can sense genuine passion versus forced marketing.
17. Final Thoughts
A vacation-themed Instagram campaign allows authors to merge storytelling and lifestyle marketing in a seamless, artistic way. It transforms your profile from a static promotional page into a living narrative—a reflection of your creativity both on and off the page.
Whether you’re walking through cobblestoned streets in Lisbon or writing from a cozy home office imagining tropical skies, the goal is the same: to connect, inspire, and share the art of storytelling.
So pack your creativity, grab your favorite book, and let your next campaign take your readers on a vacation they’ll never forget—without ever leaving Instagram.
For modern authors, Instagram is more than a social media platform — it’s a storytelling tool, a community builder, and a bookstore window all at once. Yet, simply posting beautiful photos of your book cover or a poetic caption isn’t enough. To truly grow your readership and transform followers into loyal fans, you need to understand the data behind your content.
That’s where Instagram Analytics comes in. Analytics reveal what your readers love, how they engage, and when they’re most active. For authors, this data is a goldmine — it helps you refine your storytelling strategy, improve post performance, and even tailor your marketing campaigns around reader behavior.
In this deep dive, we’ll explore the key Instagram metrics that matter most to authors — from engagement rates to story insights — and show you how to use them to grow your literary brand authentically.
1. Understanding Instagram Analytics for Authors
Instagram Analytics (also known as Insights) provides quantitative and qualitative data about how your content performs and how users interact with it.
As an author, you’re not just selling books — you’re selling your voice. So, the most important metrics are those that measure connection, storytelling impact, and community engagement.
Here’s how analytics can support your author journey:
🧠 Understand your readers — Discover who engages most with your posts (age, gender, location, and interests).
🕰️ Optimize timing — Post when your audience is most active.
📈 Track growth — See if your literary community is expanding.
💬 Measure engagement — Evaluate how readers respond to your words and visuals.
💡 Refine your creative strategy — Identify which types of posts resonate most (quotes, reels, book photos, behind-the-scenes moments, etc.).
2. Accessing Instagram Insights
Before diving into the metrics, make sure your account is set up correctly.
You need a Professional Account — either a Creator or Business profile. Authors typically choose Creator, as it offers detailed analytics and messaging tools tailored for individual creators.
How to access Insights:
Go to your profile.
Tap the Menu (☰) in the upper-right corner.
Select Insights.
Explore three main sections:
Overview: Account reach, engagement, and audience growth.
Content You Shared: Posts, Stories, Reels, and Lives.
Audience: Demographics and activity.
3. Key Metrics That Matter for Authors
Let’s unpack the most relevant analytics categories for writers.
A. Reach and Impressions
Reach = Number of unique accounts that saw your content.
Impressions = Total number of views, including repeat views.
👉 Why it matters for authors: Reach helps you understand how far your message travels beyond your immediate followers. If you’re running a book launch, for instance, tracking reach shows whether your promotional content is expanding your visibility.
Example: If your post announcing a new novel has 10,000 impressions but only 3,000 reach, it means your existing followers viewed it multiple times — which can indicate high interest.
Pro Tip:
Use relevant hashtags like #Bookstagram, #WritersOfInstagram, or #PoetryCommunity to increase reach organically.
Collaborate with other authors or book reviewers to tap into new audiences.
B. Engagement Rate
This metric combines likes, comments, shares, and saves relative to your total followers or reach.
👉 Why it matters: High engagement means your audience is emotionally connecting with your words.
For authors, engagement signals that:
Your writing resonates.
Your readers are inspired to interact.
Your community is active and loyal.
What to look for:
Posts with quotes from your books often perform well.
Reels showing your writing process or book aesthetics usually spark curiosity.
Behind-the-scenes content (like coffee shop writing sessions) feels personal and relatable.
C. Profile Activity
These insights include:
Profile visits
Website clicks
Email button taps
Follows
👉 Why it matters: These actions indicate conversion — readers moving from Instagram to your book links, website, or newsletter.
Pro Tip:
Include your book link in bio using tools like Linktree or Beacons.
Use Call-to-Actions (CTAs) in captions: “Read more about my new book in the link in bio!”
D. Audience Demographics
This section gives data about:
Top locations
Age range
Gender split
Active times
👉 Why it matters for authors: Knowing your audience helps you craft more personalized content.
Example: If most of your followers are aged 18–24 and located in New York or London, your tone can be more contemporary. If they’re 35+, you might post more in-depth reflections or excerpts.
Pro Tip: Use peak hours (found in “Most Active Times”) to schedule posts for maximum engagement.
E. Content Type Insights
Different formats perform differently for authors.
Content Type
Best For
Key Metrics
Example Idea
Posts
Sharing book quotes, writing reflections
Likes, Saves, Comments
“A line from my upcoming novel 💭”
Stories
Daily updates, polls, Q&A
Views, Replies, Exits
“What chapter should I read next live?”
Reels
Book trailers, time-lapses, storytelling snippets
Plays, Shares, Watch Time
“A day in the life of an author ✍️”
Lives
Readings, Q&A, interviews
Peak Viewers, Duration, Comments
“Join me for a live poetry reading!”
Tip: Experiment with formats. Readers love variety, and Instagram’s algorithm rewards accounts that use multiple content types.
4. Advanced Analytics: Going Beyond the Basics
Once you understand basic metrics, dig deeper into advanced ones that reveal behavioral patterns.
A. Save Rate
The save button is one of the most powerful signals to Instagram. If users save your posts, it means your content is valuable.
Why it matters for authors: A quote post saved frequently means it emotionally resonates. A writing tip post saved often indicates educational value.
Goal: Aim for at least 10–15% save rate on quote or tip-style content.
B. Share Rate
Shares increase reach exponentially — especially via Stories or DMs.
Why it matters: When followers share your content, they’re essentially recommending you to their friends — just like word-of-mouth book marketing.
Boost shareability by:
Posting relatable quotes.
Using humor or emotion in captions.
Creating mini poetry or “author advice” snippets.
C. Reel Watch Time and Completion Rate
For Reels, don’t just look at views — check average watch time and completion rate.
Why it matters: These indicate storytelling strength. A Reel watched until the end suggests your narrative pacing or visuals held attention — a skill directly tied to your writing craft.
Pro Tip:
Keep Reels under 20 seconds for maximum retention.
Add captions or on-screen text to highlight key phrases from your book.
5. How to Analyze Data Like a Pro Author
Collecting data isn’t enough — interpretation is key.
Here’s a simple 4-step method for authors:
Step 1: Identify Top-Performing Content
Look for patterns in your top 5 posts by engagement. What do they have in common — topic, tone, format, or timing?
Step 2: Ask “Why?”
If your post about writer’s block outperformed your book promo, why? Maybe it felt more personal or relatable.
Step 3: Adjust Strategy
Plan your next month’s content based on insights. More relatable posts? More storytelling reels?
Step 4: Track Over Time
Growth is long-term. Create a monthly spreadsheet of metrics: reach, engagement rate, saves, and follower growth.
6. Tools to Supercharge Your Analytics
While Instagram Insights are powerful, external tools can provide more detailed or visualized reports.
Tool
Best For
Features
Meta Business Suite
Multi-account management
Post scheduling, message tracking, and analytics overview
Later
Visual planners
Engagement rate reports, best posting times
Iconosquare
In-depth analytics
Follower demographics, performance graphs
Hootsuite
Cross-platform data
Compare Instagram with Facebook or Twitter
Not Just Analytics
Audience credibility
Growth trends, fake follower detection
Pro Tip: Combine Instagram Insights with one of these tools to get both real-time data and historical performance tracking.
7. Using Analytics for Book Launch Campaigns
When preparing to launch a book, analytics can guide your promotional timeline.
Example Strategy:
Phase
Duration
Goal
Key Metrics
Pre-launch (4 weeks before)
Build anticipation
Story reach, Reel views
Launch Week
Drive sales
Profile visits, Link clicks
Post-launch (4–6 weeks after)
Maintain momentum
Engagement rate, Saves, Shares
Data-driven tips for book campaigns:
Test multiple cover reveal posts to see which design gets higher engagement.
Use Story polls to let readers vote on favorite quotes or character names.
Track website clicks to see how effective your “link in bio” is at converting readers to buyers.
8. Turning Data into Creative Decisions
Analytics doesn’t kill creativity — it fuels it.
Think of data as feedback from your readers. It helps you understand what emotions or ideas resonate most. For instance:
If your audience saves your motivational posts, create a series around that theme.
If your followers engage most on Sundays, schedule your story updates then.
If your Reels about “writing life” outperform promos, lean into authenticity.
Your analytics become a storytelling compass.
9. Common Mistakes Authors Make with Instagram Analytics
Avoid these pitfalls:
Chasing vanity metrics. Likes aren’t everything. Focus on meaningful engagement like saves, comments, and profile visits.
Ignoring audience insights. Posting without knowing your followers’ habits means wasted potential.
Copying other authors. Use data as your guide, not someone else’s. What works for one author may not work for your audience.
10. A Monthly Analytics Checklist for Authors
Task
Metric to Track
Why It Matters
Evaluate post performance
Engagement rate
Measure connection
Analyze audience growth
Followers gained
Track momentum
Review best posting times
Activity hours
Optimize reach
Assess link clicks
Website taps
Monitor conversions
Study content saves
Save rate
Identify evergreen value
Compare content formats
Post vs. Reel vs. Story
Diversify strategy
Conclusion: Let Data Guide Your Storytelling
Instagram Analytics isn’t just about numbers — it’s about narrative understanding. Each metric tells a story: who your readers are, what moves them, and how they engage with your voice.
When authors combine creativity with data, magic happens. Your posts become not just beautiful, but strategically powerful. You don’t just gain followers — you build a community of readers who feel seen, inspired, and connected.
So, treat your analytics like your editor: sometimes critical, always helpful, and ultimately guiding you toward your best storytelling self.
Instagram has evolved far beyond being a platform for sharing photos — it’s now a storytelling stage, a marketing hub, and a community builder. For authors, especially in the digital era, it provides an opportunity to connect directly with readers, create conversations around books, and humanize the person behind the words.
But Instagram isn’t only about self-promotion. It can also be a meaningful space for giving back. One of the most underrated features for this purpose is the Fundraiser Sticker (also known as the Donation Sticker). This tool allows users to raise money for verified nonprofits directly from their Instagram Stories or Lives.
For writers, using this sticker isn’t just about charity — it’s about building a deeper connection with readers, strengthening an author brand that stands for something real, and using storytelling power to inspire action.
This article explores how authors can use Instagram’s Fundraiser Sticker effectively, including step-by-step setup, creative campaign ideas, storytelling strategies, and how to align the feature with your personal brand as an author.
Why Authors Should Use Instagram’s Fundraiser Sticker
1. Build Emotional Connection with Readers
Readers love stories — and not just in books. They also care about the story behind the author. When you use the Fundraiser Sticker to support a cause you believe in, you’re letting your audience see your values in action. You’re saying, “This matters to me.” That honesty fosters emotional connection and strengthens loyalty.
For example, if you’re a fiction writer who often explores themes of resilience, mental health, or compassion, you could support related organizations. Your readers will feel the authenticity and see your work as an extension of your values.
2. Strengthen Your Author Brand
An author brand isn’t just a logo or color palette — it’s the emotional experience people associate with your name. Supporting causes aligned with your stories helps shape that perception. You become not only a writer but a voice for change.
Imagine readers recognizing you as “the author who advocates for literacy” or “the poet who supports environmental restoration.” That connection between your books and your actions makes your brand more memorable.
3. Create Interactive and Engaging Content
Fundraisers on Instagram aren’t passive posts. They’re interactive. When you add a donation sticker, your audience can tap directly to contribute. People are more likely to engage with content that involves action — especially when that action feels purposeful.
It’s also a break from the usual self-promotion. Instead of constantly saying, “Buy my book,” you’re saying, “Let’s do something meaningful together.” That shift invites empathy and participation, not just transactions.
4. Increase Visibility
Fundraisers tend to get higher engagement rates on Stories, and people are more likely to share a cause than a product. When followers repost your Story with the donation sticker, your reach naturally expands. That means more potential readers discover you — through shared values, not advertising.
How to Set Up the Fundraiser Sticker in Stories
Here’s how authors can use Instagram’s Fundraiser Sticker step-by-step.
Open Instagram and go to create a Story. You can swipe right from your feed or tap your profile photo.
Choose your visual. Record a video or upload an image — ideally something meaningful, like a behind-the-scenes writing clip, your book on a desk, or a photo representing the cause.
Add the Fundraiser Sticker. Tap the sticker icon (the square smiley face on top of the screen) and choose “Fundraiser” or “Donation.”
Select the nonprofit. Search for an official organization you want to support — such as a literacy charity, mental health foundation, or environmental group.
Customize the sticker. Change the color, move it around the screen, or add your own text overlay like “Tap to Donate” or “Let’s Support Literacy Together.”
Add supporting visuals and hashtags. Include elements like arrows pointing to the sticker, your book cover, or relevant hashtags like #AuthorsForChange or #ReadAndGive.
Publish your Story. When you’re ready, share it to your Story or Close Friends. Don’t forget to save it as a Highlight titled “Fundraisers” or “Giving Back” so it stays visible longer.
Engage after posting. Reply to people who donate or share. Gratitude builds community and encourages others to join.
Using Fundraiser Feature During Instagram Live
For authors who enjoy live interactions — readings, Q&As, book discussions — the Fundraiser in Live is even more powerful.
Go Live from your Instagram account. Before starting, you’ll see an option to “Add a Fundraiser.” Tap it and choose your nonprofit.
Talk about the cause during your Live. Explain why it’s meaningful to you. For example: “My novel explores loss and recovery, and this organization helps families dealing with grief. I’d love for us to support them together today.”
Encourage donations naturally. Don’t be pushy. Simply remind viewers that they can donate by tapping the icon below.
Show gratitude in real time. Thank donors by name (if visible), and talk about the progress of the fundraiser as it grows.
Wrap up with follow-up content. After ending the Live, post a Story thanking everyone and summarizing what you achieved. Transparency builds credibility.
Creative Campaign Ideas for Authors
Let’s explore creative, author-specific ways to use Instagram’s Fundraiser Sticker.
1. Book Launch Fundraiser
When launching a new book, dedicate part of your campaign to a cause that connects with your story. Example:
“For every copy sold this week, I’ll personally donate $1 to [organization], and you can also donate directly through my Story sticker.”
This aligns your creative work with your compassion, turning your launch into a movement.
2. “Read and Give” Challenge
Invite your readers to join a reading challenge where they read one chapter of your book (or any book) and donate a small amount. Encourage them to share their own Stories with your hashtag and tag you.
This builds a reading community around generosity.
3. Themed Fundraisers
If your novel touches on specific themes — education, wildlife, equality — link those to relevant causes. For instance:
Fantasy author: Fundraise for forest conservation.
Romance author: Support mental health and relationships charities.
Children’s author: Support literacy or school libraries.
4. Collaborative Author Event
Partner with other authors and go Live together for a joint reading session. Each author selects a cause, and you encourage viewers to donate to all through Stories. Collaboration multiplies reach.
5. Fundraising Milestones
Gamify your campaign. For example:
“If we reach $500, I’ll read a bonus poem live.” “At $1000, I’ll reveal an unreleased chapter.”
This keeps the experience exciting and gives followers something to look forward to.
6. Annual Giving Tradition
Make giving part of your yearly brand. Perhaps every December, you raise funds for a literacy project. Readers come to expect and look forward to this. Consistency builds legacy.
Storytelling Techniques for Fundraising
Authors are natural storytellers — and storytelling is exactly what makes fundraising powerful. Here’s how to use your narrative skills to make your campaign resonate.
1. Start with a Personal Story
Why did you choose this cause? What’s your emotional connection? Example:
“When I was a child, books were my escape. That’s why I’m supporting programs that bring books to children who don’t have access.”
Authenticity inspires empathy.
2. Use Emotional Arcs
Think of your fundraiser as a short story: beginning (the cause), conflict (the challenge it faces), climax (the collective action), and resolution (the result or goal). Readers will emotionally invest in that arc.
3. Combine Visuals and Words
Don’t rely on plain text. Pair short captions with strong visuals — your face, your book, your workspace, or imagery representing the cause. Emotion is best expressed visually.
4. Make the Reader the Hero
Instead of saying, “I’m raising money,” say, “Together, we can change this.” Your followers become part of the story, not just observers.
5. Express Gratitude Publicly
After the fundraiser, dedicate a Story or post to thanking participants. Gratitude nurtures connection and reinforces a sense of shared purpose.
Practical Tips and Best Practices
Align your cause with your brand. Choose nonprofits that match your values and themes as an author.
Keep it simple. Don’t overwhelm viewers with too much information. A short sentence and one clear call-to-action is enough.
Use Highlights. Fundraiser Stories disappear after 24 hours, but Highlights keep them visible indefinitely.
Create a Consistent Aesthetic. Use your brand colors, fonts, and tone. Even your donation campaigns should visually feel like you.
Engage actively. Reply to DMs, repost supporter Stories, and thank donors. Personal connection drives participation.
Track results. Look at your Story Insights to understand what visuals and messages performed best. Use that knowledge for next time.
Be transparent. After your campaign, share how much was raised and what it supports. Readers appreciate honesty.
Integrating Fundraisers into Your Long-Term Strategy
The key to using fundraisers effectively is to integrate them into your broader author identity. Don’t treat them as one-time stunts — make them part of your storytelling journey.
During book promotions: Combine storytelling and giving.
Between releases: Use fundraisers to maintain audience engagement when you’re not selling something.
For milestone celebrations: Use birthdays, book anniversaries, or publication dates as opportunities to give back.
To diversify content: Readers appreciate variety; alternating between creative posts, writing tips, and fundraisers keeps your profile dynamic.
The long-term goal is to be known as an author who writes with heart and gives with purpose.
Common Mistakes to Avoid
Choosing unrelated causes. Support organizations that connect logically to your writing or personal story. Random causes can feel inauthentic.
Not following up. A successful campaign doesn’t end with the last Story. Always follow up with a thank-you post and impact update.
Overloading your Stories. Too much text or too many stickers distract from your main call to action.
Ignoring your audience. Interact with donors and supporters; don’t treat it like a one-way announcement.
Running fundraisers too often. Too many campaigns can cause fatigue. Plan them periodically for bigger impact.
Example Fundraising Timeline for Authors
Here’s an example of a one-week campaign:
Day 1 – Tease the Cause: Post a Story saying, “Something special is coming tomorrow — a chance for us to do good together.”
Day 2 – Launch the Fundraiser: Post your first Story with the Fundraiser Sticker and explain your motivation in one or two sentences.
Day 3 – Behind the Scenes: Share a video from your writing space or reading nook. Connect it to your cause: “This is where my stories come to life — let’s help others find theirs.”
Day 4 – Go Live: Host a reading or Q&A session and use the Live Fundraiser feature.
Day 5 – Share Progress: Show how much you’ve raised and thank everyone. Post screenshots or graphics to visualize it.
Day 6 – Final Push: Post a “Last Day to Donate!” reminder.
Day 7 – Gratitude Post: Share a thank-you video, Story, or carousel summarizing the campaign and its impact.
The Emotional Power of Fundraising as an Author
Writers have one of the most powerful tools on Earth — words. The same storytelling that brings characters to life can ignite compassion and action in real life.
When you use your platform to advocate for causes, your audience doesn’t just see a writer; they see a human being who feels, cares, and acts. That’s what transforms followers into lifelong supporters.
Each fundraiser becomes another chapter in your author journey — not written on paper, but written in hearts.
Conclusion
Using Instagram’s Fundraiser Sticker isn’t about turning your profile into a charity hub. It’s about authentic storytelling with purpose.
You, as an author, already know how to move people with words. The same empathy, narrative flow, and creativity you bring to your writing can be harnessed to inspire real-world change.
With this feature, you can:
Align your books and beliefs.
Engage readers in meaningful action.
Strengthen your author brand through authenticity.
Use your influence to make a difference.
So next time you plan your content calendar, consider adding a Fundraiser Story. Let your readers see the person — and the purpose — behind your prose. Together, you can write stories that change lives both on and off the page.
In today’s hyper-connected world, an author’s success extends far beyond the printed page. Whether you’re a self-published novelist, a traditionally published writer, or an aspiring poet, your online presence can shape your career just as much as your words do. Social media platforms — especially Instagram — have transformed into essential tools for personal branding, audience engagement, and professional networking.
But among Instagram’s many features, there’s one that remains surprisingly underused by writers: the Instagram Nametag.
Think of the Nametag as your digital business card. It’s a scannable code that allows others to find and follow you instantly. For authors attending book fairs, writing workshops, or even online events, this little tool can open doors to meaningful connections. Yet, many writers don’t know how to use it strategically.
This article dives deep into how you can leverage Instagram’s Nametag for professional networking, build genuine relationships, and grow your author brand in a smart, organic way.
What Is the Instagram Nametag?
The Instagram Nametag is a customizable, scannable image that represents your Instagram profile. Instead of spelling out your username or typing it manually, someone can simply scan your Nametag with their Instagram app and instantly land on your profile.
It’s similar to a QR code, but designed specifically for the Instagram ecosystem. You can access your Nametag directly from your Instagram profile and personalize it with colors, emojis, or even your selfie.
For writers, this is a powerful tool to simplify connections in both digital and physical spaces — from literary conferences and meetups to podcasts and book tours.
Why Authors Should Care About the Nametag
You might be wondering, “Isn’t a simple username enough?” Technically, yes — but the Nametag adds a visual and frictionless element to networking.
Here are a few reasons authors should embrace it:
Instant Connections at Events: When you meet other writers, editors, or readers at live events, time is limited. Instead of exchanging phone numbers or typing usernames, simply show your Nametag and let them scan it. One tap — and you’re connected.
Professional Impression: Having a personalized Nametag conveys that you understand digital marketing. It signals organization and professionalism — traits that publishers, agents, and readers respect.
Cross-Promotion: You can include your Nametag on business cards, book covers, or even within your ebook. It’s a subtle yet effective way to funnel readers toward your Instagram content.
Networking Beyond Borders: The Nametag works globally. If you meet international writers online or at global literary events, language barriers don’t stop a simple scan.
Setting Up Your Instagram Nametag
Setting up your Nametag is a quick process, but as an author, it’s worth doing it with intent. Here’s how:
Step 1: Access Your Nametag
Open the Instagram app.
Go to your profile.
Tap the three lines (menu icon) at the top right corner.
Select “QR Code” (formerly “Nametag”).
Step 2: Customize It
Instagram allows you to personalize your Nametag with:
Color gradients — match it with your author branding.
Emojis — choose ones that represent your writing genre (📚✍️🌌).
Selfie stickers — for a personal touch, ideal for author meetups.
Step 3: Save and Share
Once you’ve customized your Nametag:
Tap “Save” to download it.
Add it to your email signature, website, book pages, or printed materials.
💡 Pro tip: Create a few versions of your Nametag — one minimalist, one colorful, and one with your logo — so you can adapt to different contexts (literary conferences vs. online promotion).
Using Your Nametag in Real-World Networking
The Nametag shines most when used strategically in real-life settings. Below are several ways authors can integrate it into networking activities:
1. At Book Signings and Launch Events
Display your Nametag on your signing table or banner. Readers can scan it while waiting in line. It encourages immediate engagement — they can follow you on Instagram, post about the event, and tag you in their stories.
2. Writer’s Conferences and Workshops
Whether it’s NaNoWriMo meetups or the AWP Conference, networking can be overwhelming. Having your Nametag on your badge or printed card makes connecting effortless. It’s especially effective for introverted writers who prefer letting technology handle the first step.
3. Collaborations with Other Authors
If you co-host an Instagram Live or podcast, show your Nametag on screen or in the video description. It’s a visual shortcut for your audience to find you.
4. Within Book Clubs and Reader Groups
Readers love exclusive access to authors. By sharing your Nametag in virtual book club chats or discussion posts, you make it easy for members to follow your creative journey.
Digital Integration: Beyond Physical Events
The Nametag isn’t only for in-person encounters. Here’s how authors can integrate it across their online presence:
1. Email Signatures
Add your Nametag image below your sign-off line:
“Follow my writing journey on Instagram 📖👇” (Insert Nametag image)
This subtly drives organic followers from your professional email correspondence — like interactions with publishers, reviewers, and fans.
2. Author Websites
Embed your Nametag on your “About” or “Contact” page with a CTA like:
“Scan my Nametag to follow me on Instagram!”
It adds visual interest and a modern feel to your author website.
3. Ebooks and Print Books
Include your Nametag in the “About the Author” section. Modern readers appreciate the instant connection — especially if they’ve just finished your book and want to engage more.
4. Social Media Cross-Promotion
Share your Nametag as an Instagram Story highlight or post it on platforms like X (Twitter), Facebook, or Threads. This unifies your digital presence.
How to Use the Nametag for Strategic Networking
Having a Nametag is one thing; using it strategically is another. Let’s explore how authors can transform it into a genuine networking powerhouse.
1. Connect with Industry Professionals
At literary events, use your Nametag to instantly connect with:
Publishers and editors
Cover designers and illustrators
Literary agents
Fellow authors
Once connected, nurture these relationships through thoughtful engagement — comment on their posts, share their work, and show authentic interest.
2. Create “Scan-to-Connect” Campaigns
If you’re promoting a new release, create a printable or digital poster with your Nametag and a message like:
“Scan to join my book launch journey 📚✨”
This approach merges offline and online engagement, ideal for libraries or community boards.
3. Networking in Writing Communities
Instagram hosts vibrant writing communities — from #Bookstagram to #AmWriting. When meeting these users virtually, your Nametag serves as a bridge between online and offline relationships. Include it in your DMs or story replies when relevant.
4. Host Networking Events
If you organize local author meetups or writing circles, encourage attendees to bring their Nametags. This practice can turn simple gatherings into efficient networking hubs.
Advanced Tips: Personal Branding Meets Technology
To truly stand out, authors must fuse creative branding with Instagram’s technology. Here’s how to elevate your Nametag strategy.
1. Design a Brand-Aligned Nametag
Your Nametag should visually echo your author identity. For example:
Romance authors might use soft pink hues and heart emojis.
Thriller writers might choose darker tones and minimalist design.
Fantasy authors could integrate symbols like 🌙🗡️📖.
Use consistent aesthetics across all platforms — including your website, email newsletter, and book covers.
2. Incorporate Augmented Reality (AR)
Some writers use AR filters to display their Nametag creatively. You can overlay it on your face or your book cover in Instagram Stories, turning your Nametag into interactive art.
3. Gamify Your Nametag
Create scavenger hunts or digital quests where followers scan your Nametag for exclusive reveals — like sneak peeks, discount codes, or signed book giveaways.
4. Use Analytics to Track Growth
While Instagram doesn’t provide direct Nametag analytics, you can track performance through indirect metrics:
Follower growth after events
Engagement rate spikes post-sharing
Website traffic from Instagram bio links
Keep notes in a spreadsheet to understand when and where your Nametag is most effective.
Case Studies: Authors Who Mastered Nametag Networking
1. The Self-Published Success Story
A self-published romance author, Sarah T., began including her Instagram Nametag in her paperbacks and email newsletters. Within six months, her Instagram following tripled. Her posts about writing challenges, reader polls, and fan art helped her build a loyal audience that boosted pre-orders for her next book.
2. The Workshop Facilitator
Michael J., a writing coach and fantasy novelist, printed his Nametag on workshop slides. Instead of writing his Instagram handle on a whiteboard, he asked participants to scan it. This created an instant digital community, where students later shared feedback and kept in touch.
3. The Literary Agent’s Network
A literary agent began using her Nametag during author consultations at book fairs. By scanning it, potential clients followed her account for submission tips, upcoming openings, and publishing advice — transforming casual conversations into long-term professional relationships.
Mistakes to Avoid
Even a useful tool can lose its potential if misused. Here are common pitfalls to avoid:
Overloading the Design Keep your Nametag clean. Overuse of emojis or distracting backgrounds can confuse scanners.
Forgetting to Update Branding If you rebrand (e.g., change your author name or color palette), update your Nametag accordingly.
Using Low-Resolution Files Always export your Nametag in high quality to ensure scannability.
Not Promoting It Enough Many authors create their Nametag but never use it. Remember: visibility matters! Incorporate it into your marketing strategy.
The Future of Author Networking on Instagram
Instagram continues to evolve, adding tools that merge storytelling with social interaction. The Nametag may seem small, but it represents a shift toward seamless digital identity.
For authors, the future of networking lies in creating accessible, meaningful, and consistent touchpoints. As readers increasingly seek authentic engagement, a well-utilized Nametag can become more than just a shortcut — it’s a symbol of your readiness to connect.
Imagine walking into a writer’s retreat, holding your book, and having your digital presence just a scan away. No apps, no typing, no delay — just a direct line between your story and the people who want to hear it.
That’s the beauty of the Instagram Nametag.
Conclusion: Turning Scans into Stories
The art of networking for authors has always been about relationships. Whether it’s connecting with fellow writers, editors, or your readers, authenticity remains the most valuable currency.
Instagram’s Nametag bridges the gap between your physical and digital presence — between the book in someone’s hands and the person behind the words. By customizing, sharing, and strategically using your Nametag, you’re not just collecting followers — you’re nurturing a community.
So, before your next literary event or social media campaign, take a moment to design your Nametag thoughtfully. Because every scan could lead to your next collaboration, review, or even book deal.
Quick Checklist for Authors Using Instagram Nametag
Goal
Action
Tip
Build a professional presence
Customize your Nametag with brand colors
Keep it visually consistent with your book covers
Network at events
Print or display your Nametag
Place it near your signing table or workshop slides
In the digital age, authors are no longer confined to traditional publishing or static websites to connect with readers. Platforms like Instagram have become powerful storytelling tools, enabling writers to share insights, promote books, and build loyal communities. Among the features Instagram offers, Guides stand out as a unique way to deliver structured, blog-like content directly within the app.
However, this brings up an important question for modern authors: Should you focus on Instagram Guides, or are traditional blog posts still the better way to engage your audience?
In this comprehensive guide, we’ll explore the pros and cons of Instagram Guides versus blog posts, analyze how each can serve your author brand, and offer practical strategies to make both work together effectively.
📖 Understanding Instagram Guides
Instagram Guides were introduced in 2020 as a way to create long-form, curated content inside the app. Think of them as a mix between a blog post and a Pinterest board — visually appealing, but also informative.
For authors, Guides can organize content into themes such as:
Writing tips
Character development advice
Book reviews or reading lists
Behind-the-scenes insights
Thematic discussions (e.g., feminism in fantasy, the art of dialogue, etc.)
Each Guide can include a title, commentary, and multiple posts or Reels that link back to original content.
📝 Understanding Blog Posts
Blog posts, on the other hand, have been a cornerstone of author marketing for over two decades. Whether hosted on your personal website or platforms like Medium or Substack, blog posts give writers full control over their content, SEO visibility, and format.
One of the biggest advantages of Instagram Guides is the platform’s built-in audience. If you already have followers who enjoy your book-related posts, they’ll naturally see and engage with your Guides.
Moreover, since Instagram’s algorithm prioritizes active engagement, well-structured Guides can appear in the Explore tab, reaching readers who have never heard of you before.
1.2. Visual Appeal
Authors often struggle with making text-based content stand out on social media. Guides solve this by combining visuals and text seamlessly. You can incorporate:
Eye-catching cover images
Illustrations of book characters
Quotes from your writing
Photos of your creative process
This creates an emotional connection that plain text blogs sometimes lack.
1.3. Ease of Creation
Creating an Instagram Guide doesn’t require coding, plugins, or a hosting platform. You simply select posts, add commentary, and publish.
This simplicity helps authors focus on writing and connecting, not on web maintenance or SEO complexities.
1.4. Real-Time Engagement
Unlike blog posts, which often rely on visitors discovering your site, Instagram Guides live where your readers already spend time. You can instantly get likes, shares, and comments — valuable for authors who want immediate feedback.
1.5. Integration with Reels and Stories
Guides can reference your Reels or posts, making it easy to create thematic collections like:
“My 5 Favorite Books That Inspired My Novel”
“World-Building Tips for Fantasy Writers”
“How I Developed My Protagonist Over Time”
This turns your Instagram profile into an interactive mini-website.
Section 2: Cons of Instagram Guides for Authors
2.1. Limited SEO Value
Instagram content isn’t indexed by Google. That means your carefully written Guide won’t appear in search results, severely limiting long-term discoverability.
2.2. Restricted Formatting
Guides are simple — but sometimes too simple. You can’t:
Embed videos or external links (beyond tagging posts)
Customize layout or typography
Include downloadable resources
For authors who enjoy creative formatting or multimedia storytelling, this can feel restrictive.
2.3. Platform Dependency
If Instagram changes its algorithm or removes the Guides feature (as it has done with other features like IGTV), your content might lose visibility overnight.
In contrast, blog posts on your website remain fully under your control.
2.4. Shorter Lifespan
Instagram’s fast-paced nature means your Guides can quickly get buried beneath new posts. While blogs continue to attract organic traffic months or years later, Guides often rely on initial engagement.
2.5. Limited Analytics
Instagram’s built-in analytics for Guides are basic. You can see engagement, but not advanced data like:
Time spent reading
Traffic sources
Conversion rates
For authors trying to measure the ROI of their content marketing, that’s a drawback.
Section 3: Pros of Blog Posts for Authors
3.1. Search Engine Visibility
Blog posts are indexed by Google and other search engines, allowing readers to discover you through queries like:
“How to write realistic dialogue”
“Best fantasy books with strong female leads”
This provides long-term discoverability — something Instagram can’t replicate.
3.2. Ownership and Control
When you write a blog post on your own website, you own it. You can update, repurpose, or monetize it however you want. Instagram, in contrast, owns your data and can change its terms anytime.
3.3. Deeper Storytelling
A blog gives you space for long-form expression — 1,000, 3,000, even 10,000 words if needed. You can add:
Research links
Sample excerpts from your books
Audio narration
Downloadable resources for readers or aspiring writers
This depth is perfect for building authority and trust.
3.4. Monetization Opportunities
Through blogs, authors can earn passive income from:
Affiliate links (e.g., Amazon book links)
Newsletter sign-ups leading to paid content
Online courses or writing workshops
Instagram’s monetization features are limited and algorithm-driven.
3.5. Email List Integration
Blogs are often the backbone of email marketing funnels. You can include signup forms, offer lead magnets like free chapters, and build direct relationships with your readers — no middleman required.
Section 4: Cons of Blog Posts for Authors
4.1. Higher Maintenance
Running a blog involves technical aspects like:
Domain management
Hosting
SEO optimization
Regular updates
For authors who prefer to focus solely on creative writing, this can feel overwhelming.
4.2. Slower Engagement
Unlike Instagram, where you get instant reactions, blog posts often take time to gain traction. Comments may be fewer, and the sense of community less immediate.
4.3. Need for Promotion
A blog won’t promote itself. You must share links on social media, send newsletters, or use SEO strategies to attract traffic. Without consistent promotion, even excellent posts can remain unseen.
4.4. Visual Limitations
Unless you’re skilled in design, blog layouts can look less dynamic compared to Instagram’s highly visual interface.
4.5. Competition
The internet is saturated with blogs. Standing out requires unique branding, consistent posting, and SEO know-how.
Section 5: How Authors Can Combine Instagram Guides and Blogs
Instead of choosing one, smart authors use both platforms strategically. Here’s how to make them complement each other:
Goal
Best Platform
Integration Strategy
Attract new readers quickly
Instagram Guides
Use Guides as teasers linking to full blog posts
Build SEO and long-term presence
Blog Posts
Embed Instagram posts or Reels to enrich your articles
Strengthen community
Instagram Guides
Encourage comments and discussions within the app
Offer in-depth educational content
Blog Posts
Expand on Instagram topics in more detail
Showcase visuals (book art, cover reveals)
Instagram Guides
Create themed Guides around your books
Capture email subscribers
Blog Posts
Include CTAs like “Join my writing newsletter”
For instance, an author might post a Guide titled “How I Created My Fantasy World”, linking to various Reels about world-building. At the end of the caption, they can direct readers to their blog for a full-length article, adding more context, maps, and behind-the-scenes notes.
Section 6: Best Practices for Authors Using Instagram Guides
Focus on Themes, Not Random Posts Curate Guides around coherent topics (e.g., “Writing Tips,” “Poetry Prompts,” “Book Recommendations”). Readers love structured content.
Use Eye-Catching Covers Design your Guide covers to align with your brand colors and fonts — consistency builds recognition.
Add Personal Insights Don’t just repost content. Add reflections, anecdotes, or lessons learned. Readers want your perspective.
Cross-Promote in Stories Use Stories to announce new Guides and include “See More” links when possible.
Engage in Comments Reply thoughtfully. Engagement boosts algorithm visibility and strengthens relationships.
Section 7: Best Practices for Authors Writing Blog Posts
Optimize for SEO Use keywords naturally in titles, headings, and meta descriptions.
Include Visuals Add images of your writing process, book covers, or quotes to break up text.
Use Calls-to-Action (CTAs) Encourage readers to download a freebie, join your newsletter, or follow your Instagram for more insights.
Repurpose Blog Content for Instagram Turn each blog post into smaller posts or Reels to maintain a consistent content pipeline.
Keep a Consistent Schedule Whether weekly or monthly, regular updates help retain loyal readers.
Social media has transformed the way authors connect with readers, promote their work, and build their personal brand. Among all social media platforms, Instagram stands out as one of the most visual and engaging spaces for creative professionals. And for authors—especially those looking to build anticipation for book launches, events, or exclusive reveals—the Countdown Sticker on Instagram Stories is an invaluable tool.
This guide will show you how authors can use Instagram’s Countdown Sticker strategically to grow engagement, build excitement, and strengthen their relationship with readers.
📖 Why Instagram Matters for Authors
Before diving into the specifics of the Countdown Sticker, it’s important to understand why Instagram remains a crucial platform for authors.
Instagram is not just for fashion influencers or photographers. It’s a storytelling platform. With over 2 billion monthly active users, Instagram allows authors to craft visual narratives around their books, writing process, and personal life.
Through posts, reels, and stories, authors can:
Showcase book covers and aesthetics.
Share snippets of their writing journey.
Interact with readers through polls, Q&A sessions, and countdowns.
Announce pre-orders, book signings, or special events.
The Countdown Sticker, in particular, adds a sense of urgency and excitement—key emotions that drive readers to act, whether that’s pre-ordering your book or joining a live event.
⏳ What Is Instagram’s Countdown Sticker?
The Countdown Sticker is a built-in feature of Instagram Stories that lets you set a timer counting down to a specific date and time.
Followers who view your story can:
See the live countdown.
Tap to set a reminder for when the countdown ends.
Share your countdown on their own stories (great for fan engagement).
It’s a simple feature—but when used strategically, it becomes a powerful marketing tool. For authors, it can turn passive followers into actively engaged readers eagerly waiting for your next release or event.
✍️ How to Add a Countdown Sticker (Step-by-Step)
Here’s how authors can add and customize the Countdown Sticker in Instagram Stories:
Open Instagram Stories Tap your profile photo or the “+” icon and choose Story.
Upload or Capture a Visual You can use:
A photo of your book cover.
A short teaser video.
A behind-the-scenes shot of your writing space.
Tap the Sticker Icon (the smiley face) In the top-right corner, tap the sticker icon to open the sticker tray.
Select “Countdown” Scroll or search for “Countdown.”
Name Your Countdown Give it a catchy name like:
“Book Launch Day 📚”
“Cover Reveal Countdown”
“Next Chapter Release ⏰”
Set the Date and Time You can set it to a specific date and time (for instance, “October 20 at 10 AM”).
Choose Your Colors Tap the color wheel to match your book’s theme or personal brand palette.
Share Your Story Once the countdown is set, post the story for all your followers to see.
💡 Creative Ways Authors Can Use the Countdown Sticker
Let’s explore some practical and creative ways to use this feature as an author.
1. Book Launch Countdowns
Use the countdown sticker to build momentum before your book release. Post it a week or two in advance with daily reminders.
Example:
“Only 5 days until Whispers in the Fog hits the shelves! Set your reminder now ⏳📚”
This keeps your audience excited and creates anticipation. Readers who tap “Remind Me” will get a notification on launch day.
2. Cover Reveals
For authors who plan a big cover reveal, the Countdown Sticker can tease the moment perfectly.
You can post a blurred version of the cover or a close-up of a detail (like part of the title or artwork) with a countdown leading to the full reveal.
3. Pre-Order Announcements
Pre-orders are crucial for authors because they affect visibility on major book platforms.
Use the countdown to remind your followers of the final day to pre-order or to announce when pre-orders go live.
Example:
“Pre-orders open in 3…2…1… 🔥 Tap to get a reminder!”
4. Virtual Book Launches and Events
If you’re hosting an Instagram Live, a book club chat, or a Q&A session, the Countdown Sticker ensures your followers don’t miss it.
Example:
“Join me LIVE this Friday for a cozy chat about The Star Weaver! 🌌 Set your reminder!”
5. Chapter or Excerpt Drops
For serialized authors or writers sharing exclusive content with followers, countdowns can signal when the next chapter or excerpt will be posted.
6. Exclusive Giveaways
Running a giveaway? Build suspense by counting down to the winner announcement.
Example:
“Giveaway ends in 24 hours! ⏳ Enter before it’s too late!”
7. Behind-the-Scenes Moments
Countdown to something more personal, like:
“1 hour until I show you my writing playlist 🎧”
“Tomorrow: Sneak peek at my writing desk setup!”
These small, authentic moments build deeper connections with readers.
🎨 Design Tips for Effective Countdown Stories
A well-designed story draws attention and enhances engagement. Here are design tips specifically tailored for authors:
Element
Tip
Example
Background
Use your book colors or related imagery.
A soft gradient matching your cover design.
Text Overlay
Add a brief call-to-action.
“Set your reminder for launch day!”
Countdown Placement
Center or bottom third for visibility.
Avoid covering important visuals.
Emoji & Fonts
Keep them on-brand.
✍️📚✨
Animations
Subtle movements grab attention.
Use apps like Canva or Mojo.
📊 Why the Countdown Sticker Works (Psychological Insights)
The success of the Countdown Sticker isn’t random—it’s rooted in psychological triggers that drive audience behavior.
1. Scarcity and Urgency
When followers see a timer ticking down, they experience FOMO (Fear of Missing Out). This motivates them to act—pre-ordering, attending, or engaging before it’s “too late.”
2. Commitment and Anticipation
When users tap “Remind Me,” they’re committing mentally to your event or release. It turns passive interest into active participation.
3. Social Proof
When fans share your countdown in their own stories, it amplifies visibility and adds credibility—“Everyone’s waiting for this!”
🧠 Advanced Strategy: Using Countdowns as Part of a Marketing Funnel
For authors serious about book marketing, countdowns can be integrated into a larger promotional strategy.
Step 1: Tease the Event (T-10 Days)
Post a mysterious or exciting image:
“Something magical is coming soon… stay tuned.”
Step 2: Activate the Countdown (T-5 Days)
Start your countdown. Encourage followers to tap “Remind Me.”
Step 3: Daily Updates (T-4 to T-1)
Share story updates showing progress—maybe a stack of books being packed or a sneak peek at an upcoming event.
Step 4: Launch Day (T-0)
Celebrate with a Live session, post your announcement reel, and engage with comments.
Step 5: Post-Event Thank You
Thank your followers for participating, resharing their countdown posts, and building community.
This 5-phase structure keeps engagement consistent while maintaining a natural storytelling arc.
🛠️ Tools and Apps to Enhance Your Countdown Stories
Even though Instagram’s built-in tools are powerful, authors can elevate their visuals using third-party tools:
Tool
Best Use
Features
Canva
Custom Story templates
Fonts, animations, color branding
Mojo
Animated story videos
Countdown-compatible motion effects
Storyluxe
Aesthetic templates
Polaroid and film-style designs
InShot
Video editing
Great for short teasers
UNUM
Visual feed planner
Maintain cohesive Instagram branding
📅 Examples of Countdown Ideas for Authors
Here are realistic examples of how you can incorporate the Countdown Sticker in your author marketing:
Countdown Type
Example
Goal
Book Launch
“Launch Day for The Last Ember! 🔥”
Drive book sales
Virtual Event
“Live Q&A with readers this Sunday”
Boost real-time engagement
Cover Reveal
“Tomorrow: New Cover Drop 👀”
Build suspense
Writing Milestone
“Final draft submission day!”
Personal connection
Fan Giveaway
“Winner revealed in 3 hours!”
Grow followers
Writing Tip Series
“Next tip drops at noon!”
Consistent education
Podcast Appearance
“Listen to my interview on Friday!”
Cross-promotion
🌟 Best Practices for Authors Using Instagram Countdowns
Be Consistent – Use countdowns regularly for launches, updates, or even fun reader events.
Engage After Posting – Respond to DMs or tags from fans who share your countdown.
Collaborate – Partner with other authors or book influencers to share countdowns for cross-promotion.
Measure Engagement – Use Instagram Insights to track how many users interacted with your countdowns.
Stay Authentic – Let your real enthusiasm shine through—don’t make every countdown about selling.
🔍 Common Mistakes to Avoid
Even simple tools can be misused. Here are pitfalls authors should avoid:
Mistake
Why It’s a Problem
How to Fix It
Using too many countdowns
Followers may lose interest
Limit to major events
Not adding context
Viewers won’t know what they’re waiting for
Add clear captions
Forgetting to follow up
Missed engagement opportunity
Post reminders or updates
Poor design
Hurts your brand image
Use templates or visual guides
Wrong time zone
Confuses global followers
Clarify with “10 AM EST” etc.
💬 Real-World Examples from Successful Authors
Let’s look at how some modern authors effectively use countdowns:
Colleen Hoover uses countdowns to build emotional hype for her book launches—mixing personal stories with professional updates.
V.E. Schwab posts beautifully branded countdowns before signing events and exclusive merchandise drops.
Neil Gaiman occasionally uses them for limited Q&A sessions or new audiobook releases.
Each of these authors uses the feature not as a gimmick, but as a genuine way to connect readers to moments that matter.
🔁 Repurposing Countdown Content
Your countdown doesn’t have to disappear after 24 hours. Here’s how to extend its life:
Save to Highlights – Create a “Launch Countdown” or “Events” highlight reel.
Screenshot & Post – Share the countdown on your main feed.
Create a Recap Reel – Combine countdown clips into a short video of the journey to launch day.
🌐 Pairing the Countdown Sticker with Other Instagram Features
To maximize engagement, combine the Countdown Sticker with:
Poll Stickers – “Will you be joining the live event?”
Question Stickers – “What do you think my next book is about?”
Link Stickers – Direct followers to your pre-order page.
Music Stickers – Add thematic soundtracks that match your story’s vibe.
This transforms your countdown from a simple reminder into an immersive storytelling experience.
🎯 Final Thoughts
The Instagram Countdown Sticker might seem like a small tool—but for authors, it can create massive engagement when used with creativity and consistency. It combines storytelling, design, and anticipation into a single, interactive experience.
Whether you’re announcing a book release, exclusive event, or behind-the-scenes update, the countdown sticker helps turn your audience’s curiosity into connection—and your readers into true fans.
In the ever-evolving world of author marketing, timing is everything—and now, you have a visual clock that counts down to your next big literary moment. ⏰✨
Instagram is one of the most powerful platforms for authors, publishers, and creatives looking to build an audience, promote books, and connect with readers around the world. But as the platform evolved, so did its influencer ecosystem. Today, not all influencers are created equal. From Nano influencers to Mega ones, each tier represents a distinct level of reach, influence, and engagement.
In this article, we’ll explore everything you need to know about Instagram influencer tiers — what they mean, how they work, and how authors can use them strategically to grow their presence on the platform.
1. Why Instagram Matters for Authors
For authors, Instagram is not just about sharing pretty book covers. It’s a digital storytelling platform — one that allows you to give readers a glimpse into your creative process, personality, and literary world.
Here are some of the biggest advantages Instagram offers for writers:
Visual storytelling: You can share quotes, aesthetics, and behind-the-scenes peeks at your writing process.
Reader connection: Direct messaging, comments, and lives help authors build loyal reader communities.
Brand partnerships: Publishers, bookstores, and other brands often collaborate with literary influencers.
Organic discoverability: Through hashtags like #Bookstagram, #AuthorLife, and #AmWriting, readers can easily find you.
But to truly thrive, authors must understand influencer tiers — because growth strategies differ drastically between small creators and large-scale influencers.
2. What Are Instagram Influencer Tiers?
Influencer tiers categorize creators based on their follower counts, engagement rates, and overall reach. Each level comes with unique pros and cons, and the right one for you depends on your goals, audience, and authenticity.
Here’s the breakdown:
Tier
Follower Range
Engagement Rate (Average)
Best For
Nano Influencers
1K – 10K
5% – 10%
Building community, niche targeting
Micro Influencers
10K – 50K
3% – 6%
Credibility, strong engagement
Mid-Tier Influencers
50K – 500K
2% – 4%
Balanced reach and relatability
Macro Influencers
500K – 1M
1% – 3%
Broad reach, established personal brand
Mega Influencers
1M+
0.5% – 2%
Massive visibility, celebrity appeal
Each tier plays a different role in Instagram’s ecosystem — and for authors, understanding these roles helps determine your growth path.
3. Nano Influencers (1K–10K Followers): The Authentic Storytellers
Overview
Nano influencers are the grassroots creators of Instagram. With 1,000 to 10,000 followers, they often have small but dedicated audiences that truly care about their content.
For authors, this tier is often the best place to start.
Why Nano Influencers Matter
Their strength lies in authenticity. Followers see them as peers, not celebrities. So, when a Nano influencer recommends a book, people listen.
For Authors
If you’re just starting your author brand, embrace being a Nano influencer. Focus on:
Sharing personal stories about your writing journey.
Engaging with every comment and message.
Joining communities like #Bookstagram or #WritersCommunity.
Example Strategies
Share short videos about your daily writing rituals.
Post “behind the scenes” of editing or publishing.
Collaborate with other small authors for cross-promotion.
Pros
✅ High engagement ✅ Relatable personality ✅ Easy to manage and authentic
Cons
❌ Limited reach ❌ Smaller audience for promotions
Nano influencers win through depth, not width.
4. Micro Influencers (10K–50K Followers): The Niche Leaders
Overview
Micro influencers have slightly larger followings but maintain a strong connection with their audience. They’re often viewed as experts in a specific niche — such as self-publishing, poetry, or fantasy fiction.
For Authors
When authors reach this level, brands and publishers start to take notice. You can partner with other creators or literary products — from stationery brands to writing apps.
Example Strategies
Offer mini writing tutorials or Q&A sessions.
Launch giveaways for signed copies of your books.
Use Instagram Stories to poll followers on cover designs or character ideas.
Pros
✅ Great engagement-to-reach ratio ✅ Attractive to publishers and small brands ✅ Room for steady growth
Cons
❌ Requires consistent posting schedule ❌ Audience still limited compared to macro creators
At this stage, focus on brand consistency — keep your tone, colors, and values aligned.
5. Mid-Tier Influencers (50K–500K Followers): The Rising Voices
Overview
Mid-tier influencers are often recognized outside Instagram — through podcasts, interviews, or features in magazines. They have credibility and reach, making them ideal for book launches and collaborations.
For Authors
This is where many successful indie authors find themselves. They’ve built a loyal fan base and now reach thousands of potential readers with every post.
Example Strategies
Partner with audiobook platforms or writing tools.
Create professional reels about book events or signings.
Run paid ads to boost high-performing posts.
Pros
✅ Significant reach ✅ Opportunities for professional collaborations ✅ Ability to earn through affiliate links or sponsored posts
Cons
❌ Engagement starts to decline ❌ More pressure to maintain aesthetics and professionalism
Mid-tier influencers balance the best of both worlds: authenticity and visibility.
6. Macro Influencers (500K–1M Followers): The Established Personal Brands
Overview
Macro influencers have massive audiences and are often recognized beyond Instagram — perhaps through YouTube, book deals, or media appearances.
They’re less about interaction and more about broadcasting influence.
For Authors
At this level, you may be a bestselling author or a literary personality. Partnerships shift toward major publishers, literary festivals, and international campaigns.
Example Strategies
Collaborate with global publishing houses.
Launch major giveaways with exclusive book bundles.
Partner with charities or literacy campaigns to amplify impact.
Pros
✅ Broad reach ✅ Major brand collaborations ✅ Authority and visibility
Cons
❌ Lower engagement ❌ Less personal connection with followers
Macro influencers shape industry trends, rather than follow them.
7. Mega Influencers (1M+ Followers): The Literary Celebrities
Overview
Mega influencers are digital celebrities — authors or literary figures who’ve transcended the online world. Think of writers like Rupi Kaur, whose poetry and visuals dominate millions of feeds.
For Authors
At this stage, Instagram becomes part of a larger media ecosystem. You’re managing PR teams, marketing professionals, and sponsorship contracts.
Example Strategies
Launch multimedia campaigns across platforms.
Partner with luxury or lifestyle brands.
Collaborate with charities, causes, or other public figures.
Pros
✅ Massive visibility ✅ Potential to influence entire markets ✅ Global recognition
Cons
❌ Minimal intimacy ❌ High expectations from audience and brands
Mega influencers shape culture — they’re not just writers; they’re icons.
8. Engagement Rates vs. Follower Counts
One common mistake on Instagram is assuming more followers = more influence. That’s not always true. Engagement — likes, comments, shares, saves — often matters more.
Tier
Average Engagement Rate
Trust Level
Nano
5–10%
Very High
Micro
3–6%
High
Mid-Tier
2–4%
Moderate
Macro
1–3%
Medium
Mega
0.5–2%
Variable
As an author, you’ll often find Nano and Micro influencers generate more book sales per follower because they have deeper audience trust.
9. How Authors Can Use Influencer Tiers Strategically
If You’re a Nano or Micro Author
Focus on community. Comment on other writers’ posts, respond to DMs, and engage in real conversations. Build authenticity before reach.
If You’re Mid-Tier
Start monetizing your influence. Join affiliate programs (like Amazon Influencer Program), or partner with brands in the writing ecosystem.
If You’re Macro or Mega
Shift to leadership. Use your platform to spotlight smaller authors, advocate for literary causes, and create mentorship opportunities.
10. Collaborating Across Tiers
Authors can also collaborate with influencers at any tier to promote their work.
For example:
A Nano influencer might post a book review in exchange for a free copy.
A Micro influencer might host a giveaway with an author.
A Macro influencer might feature a book in a curated “Top Reads” list.
Each tier adds unique value to your marketing campaign.
11. How to Identify the Right Tier for You
Ask yourself:
How much time can I dedicate to Instagram?
Do I want close connections or wide exposure?
What’s my main goal — community, credibility, or visibility?
If your goal is reader intimacy, Nano and Micro tiers are perfect. If your goal is mass awareness, aim for Macro and beyond.
12. Tips for Moving Up the Tiers
Climbing the influencer ladder requires strategy and patience. Here are proven steps:
Define your niche. Be clear whether you’re a fantasy author, romance writer, or nonfiction coach.
Be consistent. Post 3–5 times weekly. Use Stories daily.
Engage actively. Reply to comments, ask questions, and host lives.
Optimize your bio. Add a call to action (like “Download my free writing guide”).
Leverage hashtags. Use both broad and niche ones like #WritersOfInstagram or #IndieAuthor.
Use Reels strategically. Short video content boosts reach dramatically.
Collaborate. Partner with other writers or influencers in similar tiers.
Remember: engagement builds community, and community builds influence.
13. Monetization by Tier
Different tiers monetize differently:
Tier
Typical Monetization Methods
Nano
Book sales, donations, affiliate links
Micro
Sponsored posts, small brand deals
Mid-Tier
Paid partnerships, writing courses
Macro
Major sponsorships, product lines
Mega
Global campaigns, book adaptations, merchandise
Even Nano influencers can earn — through eBook sales, Patreon, or Substack.
14. The Psychology of Influence on Instagram
Influence on Instagram isn’t just numbers; it’s trust + consistency. People follow authors who:
Tell stories authentically.
Share vulnerabilities (like rejection or writer’s block).
Offer value (inspiration, knowledge, entertainment).
Readers buy from people they emotionally connect with — and that’s something follower count alone can’t buy.
15. Final Thoughts: From Nano to Mega — Every Author Has Influence
No matter where you are on your Instagram journey — from your first follower to your first 100,000 — remember this: influence is built, not bought.
Every comment you reply to, every story you post, every caption you write — they all contribute to the trust economy that defines modern authorship.
Start where you are. Stay consistent. Share your authentic voice.
Because even as a Nano influencer, you might be changing the life of a future reader — one post at a time.
🔖 Key Takeaways
Tier
Follower Range
Best For Authors Who Want To…
Nano
1K–10K
Build community and authenticity
Micro
10K–50K
Grow credibility and connect with brands
Mid-Tier
50K–500K
Expand reach and monetize influence
Macro
500K–1M
Lead literary trends and gain recognition
Mega
1M+
Build global influence and cultural impact
💬 Conclusion
For authors, Instagram is not about follower counts — it’s about connection through creativity. Whether you’re sharing a new book cover, a quote from your novel, or your morning writing routine, each post is a bridge between you and your readers.
And as you move through the influencer tiers — from Nano to Mega — you’ll realize that influence isn’t a number. It’s the story you tell, and the people who feel seen because of it.
In today’s digital publishing era, authors no longer rely solely on book tours or local press to connect with readers. Platforms like Instagram have become essential tools for authors to build global audiences, promote their books, and share their creative journeys.
But there’s one challenge that many writers overlook: language barriers.
Instagram is a truly international space. With more than 2 billion monthly active users, the app hosts communities speaking hundreds of different languages. So, if you want your stories, quotes, and insights to reach readers in Spain, Japan, or Brazil — translation and localization are key.
In this article, we’ll explore how authors can effectively translate Instagram content for global reach, balancing authenticity with accessibility. You’ll learn the best strategies, tools, and examples to help your literary voice resonate across borders.
🌍 Why Translation Matters for Authors on Instagram
1. Global Readership is the New Normal
Publishing isn’t confined to one country anymore. With eBooks, audiobooks, and online bookstores, your readers can come from anywhere. Instagram allows authors to meet those readers directly. However, if your posts are only in English (or your native language), you’re unintentionally excluding millions of potential fans who might love your work — if only they understood it.
2. Cultural Connection Builds Reader Loyalty
Readers don’t just follow authors for book updates — they connect with personalities, values, and lifestyles. When you post in multiple languages, you signal respect and inclusivity toward other cultures. This builds emotional bonds and increases engagement rates. A quote or caption translated thoughtfully can create a sense of intimacy with fans worldwide.
3. Better Engagement and Algorithm Reach
Instagram’s algorithm favors engagement — likes, saves, comments, and shares. If your content is accessible to a wider audience, it naturally generates more interaction. Translated captions, multilingual hashtags, and localized stories improve discoverability, helping your posts appear in international feeds.
📝 What Kind of Instagram Content Should Authors Translate?
Not every post needs translation, but here are the key content types that can benefit from multilingual versions:
Type of Content
Why Translation Helps
Example
Book Quotes
Makes your literary style accessible to foreign audiences.
“The stars only shine for those who dare to dream.” → “Las estrellas solo brillan para quienes se atreven a soñar.”
Author Bio/Introduction
Helps readers know who you are.
“I write stories about love and identity.” → “Escribo historias sobre el amor y la identidad.”
Behind-the-Scenes Posts
Humanizes your process for readers from different cultures.
Translate captions about your writing space, coffee rituals, or inspiration.
Promotional Announcements
Expands reach during launches, signings, or giveaways.
Include localized versions to target international fans.
Stories and Reels
Subtitles and voiceovers ensure global comprehension.
Add auto-generated captions and custom translations.
Even small gestures, like adding a translated sentence or bilingual hashtag, can make your content feel inclusive.
⚙️ Step-by-Step Guide: Translating Instagram Content Like a Pro
Let’s break down the process of creating multilingual posts strategically.
Step 1: Identify Your Target Languages
Start by analyzing your Instagram Insights. Go to:
Profile → Insights → Your Audience → Top Locations
You’ll see where your followers live. If a significant percentage comes from non-English-speaking countries, prioritize those languages. For example:
20% followers in Brazil → translate captions to Portuguese.
15% in Mexico → Spanish version.
10% in France → French captions or hashtags.
If you’re just beginning, choose 1–2 key languages first. Quality matters more than quantity.
Step 2: Choose the Right Translation Style
Different goals require different translation approaches:
Style
Description
When to Use
Literal Translation
Word-for-word accuracy.
When quoting your own text or promotional material.
Creative Adaptation
Keeps the meaning but changes expressions culturally.
For captions, metaphors, or jokes.
Localization
Adjusts visuals, tone, and context for a specific culture.
For book teasers or culturally nuanced posts.
Example: Original: “A storm is coming.” Literal: “Una tormenta se acerca.” Localized: “Prepárate… se avecina una tormenta de emociones.”
Localization brings emotional relevance — and that’s what readers remember.
Step 3: Use Reliable Translation Tools
While machine translation has improved dramatically, human supervision is crucial. Here are trusted tools and methods:
Tool
Best For
Notes
DeepL
Natural, nuanced translations.
Excellent for long captions.
Google Translate
Fast and accessible.
Great for initial drafts, but review manually.
ChatGPT (with proofreading prompt)
Context-aware rewriting.
Can adapt tone for authors.
Native Speaker Collaboration
Most accurate and cultural.
Consider hiring freelancers from Fiverr or Upwork.
💡 Pro Tip: Always read translations aloud or use text-to-speech apps to catch unnatural phrasing.
Step 4: Design Multilingual Captions
There are two main approaches to writing captions for bilingual audiences:
Option 1: Dual-Language Format
Include both languages in the same post:
“Writing is a form of dreaming with open eyes. ✨ Escribir es una forma de soñar con los ojos abiertos.”
Benefits: Clean, inclusive, and instantly readable. Downside: Slightly longer captions.
Option 2: Separate Posts or Carousels
Create two versions of the same post, one per language. This method helps with algorithm segmentation and lets you use language-specific hashtags like:
#EscritoresLatinos
#FrenchAuthors
#BookstagramBrasil
Step 5: Add Multilingual Hashtags
Hashtags are critical for discovery. Don’t limit yourself to English. Combine:
English
Localized
Niche Example
#AuthorLife
#VidaDeEscritor
#EscritorRomântico
#BookLover
#AmanteDeLivros
#LectoresDeCorazón
#WritingCommunity
#ComunidadDeEscritores
#ÉcrivainsFrancophones
Mixing them helps your posts appear in more regional feeds.
Step 6: Translate Text in Images
If you post quote graphics, book covers, or infographics, ensure the text within the image is also translated.
Options:
Create multiple image versions for each language.
Use design tools like Canva, Fotor, or Adobe Express that support multilingual fonts.
Add captions describing the text in the image for accessibility (important for visually impaired users too).
Step 7: Use Subtitles for Reels and Stories
Reels are one of the fastest-growing content formats for authors. If you record a spoken video (e.g., reading an excerpt), subtitles ensure comprehension worldwide.
How to add them:
Enable Instagram’s auto-caption tool.
Export your video and manually add subtitles using apps like CapCut or Veed.io.
Provide translations for key phrases or create multiple versions of the same reel in different languages.
Example:
English reel: “How I write love scenes.”
Portuguese reel: “Como eu escrevo cenas românticas.”
Step 8: Collaborate with International Book Influencers
Partnering with readers or bookstagrammers from other countries is one of the most effective ways to localize organically.
They can:
Translate your captions natively.
Repost your content with localized commentary.
Introduce you to new cultural niches.
It’s a win-win: they get fresh content, and you gain authentic exposure in new markets.
💡 Creative Examples: Authors Who Go Global
📚 1. Paulo Coelho
The Brazilian novelist often posts bilingual captions (Portuguese/English) and uses universally resonant imagery. His quotes reach millions precisely because they transcend linguistic barriers.
🖋️ 2. Lang Leav
The poet combines English text with symbolic imagery that needs minimal translation. When she shares translated poems (often fan-made), engagement skyrockets.
📖 3. Haruki Murakami (Fan Pages)
Though Murakami doesn’t personally manage Instagram, fan pages that translate his quotes into various languages have amassed huge followings — proof that translation builds community.
💬 4. Independent Authors
Indie writers who release bilingual editions (e.g., English–Spanish) often double their international readership. Instagram acts as a testing ground for new audiences before translation investments in full novels.
🔤 The Subtle Art of Preserving Voice in Translation
Authors have unique styles — metaphors, humor, rhythm. Direct translations often flatten those qualities. Here’s how to keep your authorial voice intact:
Challenge
Solution
Idioms don’t translate directly.
Replace with culturally similar sayings.
Humor or irony may get lost.
Add emojis or visuals to convey tone.
Poetic rhythm disappears.
Rewrite creatively in target language.
Wordplay loses meaning.
Add a note or alternate phrasing.
Example: Original: “She had a library in her heart.” Literal: “Ella tenía una biblioteca en su corazón.” Localized poetic: “En su corazón, cada emoción era un libro abierto.”
Translation isn’t about words — it’s about evoking the same feeling.
📈 How Translation Impacts Instagram Analytics
Authors often notice tangible benefits after localizing their content:
Metric
Before Translation
After Translation
Engagement Rate
3.5%
7.2%
Follower Growth (Monthly)
+150
+520
International Audience Share
15%
42%
Localization drives algorithmic diversity — your posts begin appearing on Explore pages in different regions, multiplying organic growth.
🧠 Advanced Tactics: Going Beyond Text
1. Multilingual Highlights
Create Highlight folders labeled by language:
“Quotes 🇬🇧”
“Citas 🇪🇸”
“Frases 🇧🇷”
Organize stories so followers can easily navigate in their preferred language.
2. Language-Specific Story Polls
Example:
“¿Qué libro estás leyendo ahora?” “What book are you reading now?”
This interactive bilingual format encourages participation across cultures.
3. Multilingual Instagram Bios
Use emojis and compact writing:
📚 Author | ✍️ Writing about love & hope 🌎 Available in English | Español | Português
It’s clean, informative, and multilingual at a glance.
4. Auto-Translate Feature Awareness
Instagram already offers “See Translation” for captions. However, manual translations outperform it because they sound more natural and emotional. You can even combine both:
“Follow my journey 💫 (Español abajo 👇)”
🌐 Cross-Platform Strategy for Authors
Your Instagram translations should align with your broader international presence:
Website or blog with multilingual versions.
Amazon Author Page in multiple languages.
Newsletter segments by region.
YouTube or TikTok content with translated subtitles.
This integrated ecosystem amplifies your brand consistency worldwide.
💬 Common Mistakes to Avoid
Mistake
Why It Hurts
Fix
Using machine translation only
Sounds robotic or inaccurate.
Always review or hire native proofreaders.
Mixing too many languages in one caption
Confuses followers and algorithms.
Stick to 1–2 per post.
Ignoring cultural context
Risks offense or misinterpretation.
Research local idioms before posting.
Forgetting image text translation
Visual messages stay untranslated.
Design alternate image versions.
Neglecting comments in other languages
Misses engagement opportunities.
Use quick replies or AI translation tools.
💬 Quick-Reply Templates for International Fans
Here are some ready-to-use multilingual comment replies:
Scenario
English
Spanish
Portuguese
Thanking a reader
“Thank you so much for reading!”
“¡Gracias por leer!”
“Obrigado por ler!”
Responding to compliments
“I’m so glad you liked it!”
“¡Qué alegría que te gustó!”
“Fico feliz que tenha gostado!”
Announcing a launch
“New book coming soon!”
“¡Nuevo libro próximamente!”
“Novo livro em breve!”
Even short replies make a huge difference in reader loyalty.
📚 The Long-Term Benefit: Building a Global Author Brand
Translation is more than a marketing tactic — it’s an act of storytelling empathy. When authors communicate across languages, they bridge cultural divides and invite readers from all backgrounds into their imaginative worlds.
In time, consistent multilingual posting can:
Attract international publishing opportunities.
Boost book sales in new territories.
Strengthen literary reputation.
Create a global fandom around your words.
✨ Conclusion: Your Words Deserve a World Audience
Instagram is not just a photo-sharing platform — it’s a global storytelling stage. For authors, every translated caption is an open door to new readers, friendships, and collaborations. Don’t let language barriers limit your literary reach. With thoughtful translation, creative adaptation, and genuine engagement, your words can travel far beyond borders.
So next time you hit “Post,” remember: 📖 Your story doesn’t just belong to one language — it belongs to the world.
🧭 Quick Summary
Key Takeaway
Action
Analyze follower languages
Use Instagram Insights
Translate important content
Quotes, bios, reels
Use human-edited translations
DeepL + proofreading
Add multilingual hashtags
#AuthorLife + #VidaDeEscritor
Keep your voice authentic
Prioritize tone over literalness
Engage internationally
Reply in multiple languages
Be consistent
Global growth takes time
🔮 Future Trend: AI-Powered Author Localization
Emerging AI tools now let creators translate voice, tone, and style while preserving emotional depth. Soon, authors may post Reels in multiple languages automatically — complete with synthetic voiceovers. This means your future readers could experience your storytelling as if you spoke their language natively.
Until then, start small — translate a few posts, connect with fans abroad, and watch your global author community grow. 🌏✍️
In a world where digital presence is synonymous with visibility, Instagram has become one of the most powerful storytelling platforms for nonprofits. With over 2 billion monthly active users, this image-driven app offers organizations a unique opportunity to share their mission, connect emotionally with audiences, and mobilize supporters through visual storytelling.
This guide dives deep into how nonprofits can use Instagram to tell compelling stories, engage followers authentically, and inspire action that creates real-world impact.
🌍 Why Instagram Matters for Nonprofits
Instagram is not just a photo-sharing app—it’s a storytelling platform where emotions, experiences, and values come alive visually. For nonprofits, it’s a chance to go beyond numbers and statistics and show the faces, places, and lives behind their mission.
Key Benefits:
Humanize your cause: People connect with people, not logos. Instagram lets nonprofits showcase the human side of their work.
Reach younger audiences: Gen Z and Millennials are highly active on Instagram, making it an ideal place to build long-term supporters.
Encourage engagement: The app’s interactive features (polls, questions, DMs, Stories, and Reels) invite active participation.
Drive donations and awareness: With link stickers, donation buttons, and post-sharing, Instagram turns followers into donors and advocates.
🎬 The Power of Visual Storytelling
Storytelling is the soul of nonprofit communication. It transforms abstract causes into relatable human experiences.
Why Storytelling Works:
It triggers empathy — Stories activate parts of the brain related to emotion and understanding.
It builds trust — People are more likely to support causes that communicate with transparency.
It creates memory — Visual stories are easier to recall than text-heavy reports.
Example:
Instead of posting a statistic like “1 in 10 children lack access to clean water,” tell the story of Maria, a 7-year-old girl who walks two miles daily to fetch water. Pair that story with a short video or a carousel post showing how your organization changed her life.
That’s the kind of content that sticks.
🧩 Building a Storytelling Strategy
Effective storytelling on Instagram requires more than posting random photos—it’s about consistency, clarity, and connection.
1. Define Your Core Message
Start by asking:
What is the heart of our mission?
Who are we helping?
What change are we creating?
Condense this into a brand narrative that reflects your nonprofit’s values and goals. Every caption, image, and story should reinforce that message.
2. Identify Story Pillars
Story pillars are themes or categories that guide your content. Examples include:
Impact Stories – showcasing beneficiaries and success cases.
Behind the Scenes – showing your team in action.
Volunteer Highlights – celebrating community heroes.
Educational Content – teaching followers about your cause.
Campaign Updates – fundraising progress, goals, and milestones.
3. Create a Visual Identity
Use a consistent color palette, fonts, and tone. This creates recognition and reinforces your brand identity. Nonprofits like charity: water and WWF master this—every post feels unmistakably “them.”
📸 What to Post: Content Ideas That Inspire Action
Here are some proven types of Instagram content for nonprofits:
1. Impact Stories (Before & After)
Show the tangible results of your work. Use carousels to illustrate transformations—whether it’s restoring a forest, rebuilding homes, or providing education.
2. Behind-the-Scenes Footage
Give followers a look at your daily operations. People love authenticity. Let them see your volunteers, planning sessions, or even the challenges you face.
3. Volunteer Spotlights
Celebrate your volunteers. Share portraits, quotes, or Reels featuring their experiences. It motivates others to get involved.
4. Educational Posts
Use infographics or short videos to teach followers about the issue you’re tackling. Example: “5 Facts About Ocean Pollution” or “How Your $10 Donation Feeds a Family.”
5. User-Generated Content (UGC)
Encourage supporters to share their own posts using your hashtag. Repost them to build a sense of community and inclusion.
6. Event Coverage
Whether it’s a charity run or a cleanup drive, document events live using Stories, Reels, and posts. Tag participants and thank them publicly.
7. Call-to-Action Posts
Use visuals that lead to action: donate, sign up, share, or volunteer. Make it clear what you want people to do next.
🧠 Crafting Captions That Tell a Story
A picture may be worth a thousand words, but your caption gives it meaning.
Tips for Powerful Captions:
Start with emotion: “When we met Ana, her village hadn’t seen rain in 8 months…”
Include a narrative arc: introduce the problem, describe the journey, and highlight the resolution.
Use direct calls to action: “Join us in providing safe drinking water. Link in bio.”
Add hashtags strategically: Use a mix of general (#Nonprofit, #DoGood) and niche tags (#EndHunger, #AdoptDontShop).
Hashtag Formula:
Type
Example
Purpose
Branded
#SaveTheOceans
Build recognition
Cause-specific
#ClimateAction
Join global conversations
Community
#VolunteersOfChange
Encourage UGC
🎥 The Rise of Reels and Video Storytelling
Video content dominates Instagram, and for nonprofits, this means more opportunities to show real stories in real time.
What Works Best for Nonprofits:
Mini-documentaries (30–60 seconds): quick but emotional stories about impact.
Volunteer diaries: let team members record snippets of their daily work.
Time-lapse Reels: show progress, such as building a well or planting trees.
Animated explainer videos: perfect for illustrating complex issues simply.
Pro Tip:
Add subtitles! Many users watch videos without sound, and subtitles make your message accessible to everyone.
💬 Using Instagram Stories for Daily Engagement
Stories disappear after 24 hours, but their impact can last much longer—especially when saved to Highlights.
Story Ideas:
Daily updates or “mission moments.”
Quick facts about your cause.
Polls and quizzes to educate your audience.
Thank-you shoutouts to donors.
Takeovers by volunteers or beneficiaries.
Highlights to Create:
Category
Description
About Us
Your mission and goals
Impact
Real stories of change
Donate
Information on how to contribute
Events
Past and upcoming events
Partners
Collaborations and sponsors
🤝 Collaborations and Partnerships
Partnering with influencers or other nonprofits can dramatically increase reach and credibility.
How to Choose the Right Partner:
Their audience aligns with your mission.
They share your values and tone.
They have authentic engagement (not just high follower counts).
Example Campaign:
A wildlife nonprofit partners with a travel influencer for a Reels series: “Wildlife Encounters That Changed My Life.” The influencer’s reach introduces the cause to a new audience.
💰 Fundraising with Instagram
Instagram now integrates donation tools directly into the app—making it easier than ever for followers to give.
Fundraising Features:
Donation Stickers in Stories.
Fundraiser Posts that let users donate without leaving the app.
Live Fundraisers during virtual events.
Tips for Success:
Tie donations to specific outcomes: “$10 = one meal for a family.”
Show progress visually (e.g., donation thermometers).
Thank donors publicly in Stories.
Always link back to your donation page.
🕵️♀️ Transparency and Trust: Showing the Real Impact
Donors today demand transparency. They want to see where their money goes.
How to Build Trust:
Post detailed progress updates.
Share testimonials from beneficiaries.
Publish annual reports visually (carousels or Reels).
Be honest about challenges—authenticity strengthens credibility.
📅 Planning and Consistency
A good story loses power if told inconsistently. Use a content calendar to plan ahead.
Weekly Example Schedule:
Day
Content Type
Example
Monday
Impact Story
“Meet Aisha: Her New Classroom”
Tuesday
Educational Post
“Why Girls’ Education Matters”
Wednesday
Volunteer Spotlight
“Carlos’ Story of Giving Back”
Thursday
Throwback Post
“Our First Clean Water Project”
Friday
Call to Action
“Join Our Weekend Cleanup!”
Saturday
Behind-the-Scenes
“Our Team in Action”
Sunday
Inspirational Quote
“Together We Can Change the World”
Consistency turns followers into loyal advocates.
🧰 Tools and Apps to Enhance Your Storytelling
Here are some useful tools to help nonprofits create professional-looking content without big budgets:
Purpose
Tool
Description
Graphic Design
Canva
Templates for posts, infographics, and stories.
Video Editing
CapCut / InShot
Easy-to-use mobile video editors.
Scheduling
Later / Buffer
Plan and automate your content calendar.
Analytics
Instagram Insights
Track engagement and growth.
Captions
Grammarly / Hemingway
Improve caption clarity and tone.
📊 Measuring Storytelling Success
To improve your storytelling, track metrics that matter:
Metric
Meaning
Why It Matters
Engagement Rate
Likes + Comments + Shares
Shows how connected your audience feels
Reach
Number of unique viewers
Measures awareness
Click-Throughs
Link clicks or sticker taps
Indicates action taken
Follower Growth
New supporters
Reflects brand momentum
Donations
Direct contributions
Final measure of impact
Regularly review your analytics and adjust your strategy accordingly.
💡 Advanced Storytelling Techniques
If your nonprofit is ready to level up, consider these techniques:
Narrative Sequencing – Tell one story over multiple posts.
Interactive Storytelling – Use polls or quizzes to involve followers in decision-making.
AR Filters – Create cause-based filters (e.g., try-on effects that symbolize support).
Instagram Lives with Experts – Host live Q&As to educate and build community.
❤️ Real-World Examples
1. charity: water
Their Instagram uses vibrant photography and authentic captions to share stories from communities gaining access to clean water. They often use Reels to show progress updates, making donors feel part of the journey.
2. WWF (World Wildlife Fund)
WWF combines breathtaking wildlife imagery with urgent storytelling. Their captions balance beauty and urgency perfectly—encouraging action without guilt-tripping.
3. The Trevor Project
Focused on mental health, their Instagram mixes emotional testimonies, infographics, and empowerment messages to support LGBTQ+ youth.
Each example proves that clarity, consistency, and compassion are key to impactful storytelling.
🧭 Conclusion: Turning Stories into Social Change
Instagram is not just a place to post photos—it’s a space to spark movements. For nonprofits, every image, caption, and story is an opportunity to connect hearts and minds.
By mastering storytelling, you don’t just grow your online presence—you inspire real-world impact. Remember:
Keep it human.
Stay consistent.
Focus on transformation.
And always tell stories worth sharing.
Because the world doesn’t just need more content—it needs stories that move people to act.
✨ Final Takeaway
“People don’t give to organizations. They give to stories that make them feel something.” — Bernadette Jiwa, Brand Storytelling Expert
So, take your audience on that emotional journey—and let Instagram be the bridge between your mission and the world’s hearts.
In today’s digital world, social media has become a cornerstone for authors to connect with readers, promote books, and build a recognizable personal brand. Among all platforms, Instagram stands out for its visual storytelling and engagement potential. But one of the biggest limitations for authors on Instagram is the infamous “one link in bio” rule.
That’s where Linktree — and similar bio link tools — come in. Linktree acts as a bridge between your Instagram profile and your broader digital presence, offering multiple clickable links in one neat, branded landing page.
However, simply adding a Linktree isn’t enough. To truly make it work for you as an author, you must strategically design and optimize your Linktree so it drives traffic, encourages book sales, and fosters deeper reader connections.
This comprehensive guide will show you exactly how to do that — step-by-step.
🌟 Why Authors Need a Linktree on Instagram
Instagram limits users to a single clickable link in their bio. For authors who need to share:
Book purchase links,
Newsletter signups,
Media kits,
Blog posts,
Press interviews,
Podcast appearances, and more — one link simply isn’t enough.
Linktree solves this problem by providing a centralized hub where you can share all your important links. Think of it as your digital business card — an organized, branded gateway that connects your audience to everything you offer.
Here’s what makes Linktree especially valuable for authors:
Benefit
Description
Multi-Link Access
Lets you promote several books, websites, and resources at once.
Analytics
Track clicks and see what links resonate most with readers.
Customization
Match your author brand colors, fonts, and aesthetic.
Ease of Use
No coding skills required; updates take seconds.
Integration
Works seamlessly with Instagram, TikTok, and other social platforms.
With a well-designed Linktree, your Instagram followers can easily find everything about you and your writing career — without confusion or clutter.
🎯 Step 1: Define Your Goal
Before building or optimizing your Linktree, ask yourself: What do I want people to do when they click my bio link?
Your Linktree should serve a specific goal, not just exist as a catch-all menu. For example:
📖 Sell books — prioritize purchase links and calls to action.
💌 Grow your newsletter list — put your signup link at the top.
🎙️ Promote your author brand — feature media appearances, podcasts, and interviews.
🖋️ Engage your readers — highlight social media groups, book clubs, or Discord communities.
Once you’re clear on your goal, the design and layout of your Linktree will naturally follow.
🧱 Step 2: Structure Your Linktree Like a Professional Author Page
Many authors make the mistake of throwing random links onto their Linktree without order or hierarchy. A professional-looking Linktree should be organized, minimalistic, and purposeful.
Here’s an ideal structure for authors:
Profile Section
Your name and pen name (if applicable).
A short, engaging tagline like: “Award-winning fantasy author weaving stories of courage and destiny.”
Primary Call-to-Action Link
Your latest book release or pre-order link.
Example: ✨ Pre-order “The Midnight Library: Shadows Return” now!
Secondary Links
Newsletter sign-up.
Audiobook editions.
Author website.
Blog or Substack posts.
Community & Engagement Links
Reader groups on Facebook or Discord.
Patreon or Ko-fi (for exclusive content).
Podcast interviews or guest appearances.
Media & Contact Links
Media kit or press contact.
Literary agent or publisher page.
By keeping only 5–8 links maximum, your Linktree will look clean, intentional, and easy to navigate. Too many options can overwhelm visitors — a psychological phenomenon known as choice overload.
🎨 Step 3: Branding and Design — Make It Look Author-Centric
Your Linktree should visually represent your author identity. Whether you write cozy romances, dystopian thrillers, or epic fantasy sagas, your Linktree design should align with your genre and personality.
Here are some design tips:
Profile Image: Use a professional author headshot, not a random selfie. Readers want to connect with you.
Color Palette: Match your book covers or website theme. For example:
A horror writer might use dark tones and blood-red accents.
A children’s author might choose pastel colors and playful icons.
A fantasy author might use gold, midnight blue, and serif fonts.
Fonts: Avoid generic styles. Choose readable, distinctive typography that suits your author brand.
Background Image or Pattern: Some tools allow custom backgrounds. You could use:
A blurred photo of your writing desk.
A quote overlay from your latest novel.
Subtle texture resembling parchment or stars.
Consistency across your website, Instagram feed, and Linktree strengthens brand recognition — making readers remember and trust you more.
🔗 Step 4: Write Compelling Link Titles
Your links should invite clicks — not just label destinations. Instead of writing bland text like “Buy my book,” try phrasing that sparks curiosity or urgency.
Boring Link Text
Engaging Alternative
Buy my new book
📘 Get “Winds of Eternity” today — now available!
Join my newsletter
💌 Join 10,000 readers — get exclusive short stories!
Visit my website
🌐 Explore my writing world & upcoming events!
Listen to podcast
🎧 Hear my latest author interview!
Use emojis strategically — they make your Linktree feel more human and visually engaging, especially on mobile screens.
💡 Step 5: Add Rich Media and Advanced Features
Linktree isn’t just about text links anymore. As an author, you can leverage its premium features to make your page more dynamic.
Recommended Additions:
Book Covers as Thumbnails: Add your book cover image next to your link. Visuals catch attention faster than words.
Embedded Videos: Include book trailers or personal introductions.
Featured Link Highlight: Make your top link (like a new release) stand out with an accent color or animation.
Music or Podcast Embeds: Showcase interviews or audiobook samples.
Scheduling Links: Use Calendly integration for book club Q&As or consultations.
A visually rich Linktree can turn casual visitors into committed readers.
📈 Step 6: Track Performance with Analytics
Data is your best friend when optimizing your Linktree.
Most link-in-bio tools (including Linktree Pro, Beacons, and Koji) offer analytics that show:
How many people click your links,
Which links get the most engagement,
Where your traffic comes from (Instagram, TikTok, etc.),
When people are most active.
Use this information to:
Move your most clicked links higher on the list,
Remove underperforming links,
Test new CTAs (Call to Actions),
Optimize posting times on Instagram.
For example, if you notice that your newsletter sign-up gets more clicks than your “Buy Book” link, it may mean your followers want more free content before committing to a purchase — so nurture that interest!
🧩 Step 7: Integrate with Other Tools and Platforms
Authors can maximize the impact of their Linktree by connecting it with their broader digital ecosystem.
Integration Ideas:
Platform
Integration Purpose
Mailchimp / ConvertKit
Grow your newsletter list directly from your Linktree.
Shopify / Gumroad
Sell signed copies or digital books.
YouTube
Embed book trailers or live readings.
Patreon / Ko-fi
Offer behind-the-scenes content or fan tiers.
Goodreads / Amazon Author Page
Help readers explore all your works in one click.
When everything links together, your Linktree becomes a launchpad for your entire author brand.
🕰️ Step 8: Keep It Updated
A neglected Linktree sends the wrong message. Make it a habit to update your Linktree every few weeks or whenever something changes:
New book releases,
Blog posts,
Event appearances,
Podcast guest spots,
Awards or milestones.
Readers should always feel that your page is current and active — reinforcing your professionalism and engagement as an author.
📚 Step 9: Learn from the Best — Examples of Great Author Linktrees
Let’s look at how successful authors use Linktree to drive engagement:
1. Colleen Hoover (@colleenhoover)
Features only her latest releases and official website.
Uses clean visuals and simple CTAs.
Minimal links, maximum clarity.
2. Neil Gaiman (@neilhimself)
Directs fans to his website, Patreon, and book tour updates.
Keeps consistent black-and-gold branding.
Adds a touch of mystery that fits his genre.
3. Angie Thomas (@angiethomas)
Combines activism, writing, and education links.
Uses vivid colors matching her book themes.
Makes her brand feel powerful and purposeful.
4. V.E. Schwab (@veschwab)
Highlights pre-orders, newsletters, and her creative projects.
Uses visuals that evoke fantasy and depth.
Keeps a mix of personal and professional content.
These authors prove that simplicity, consistency, and clarity always win.
🧠 Step 10: Combine Linktree Strategy with Instagram Tactics
Optimizing your Linktree works best when paired with smart Instagram practices. Your posts, Reels, and Stories should naturally guide followers to your bio link.
Best Practices:
End captions with: “Link in bio for more!”
Add CTA stickers in Stories that point to your Linktree.
Use Instagram Highlights like “Books,” “News,” or “Events” with reminders about your link.
Cross-promote across other social channels.
Each time you mention your Linktree, you create another opportunity for your followers to explore your books and brand.
💬 Step 11: Add Personality — You’re Not Just Selling Books
Readers don’t just follow authors for products — they follow personalities. Your Linktree should reflect your authenticity.
Add touches like:
A short personal greeting (“Welcome, readers!”),
A quote from your writing,
A playful emoji style that reflects your tone.
These small human details make your Linktree feel like you, not just another marketing page.
🚀 Step 12: Explore Alternatives and Advanced Options
While Linktree is the most popular, you might consider other tools that offer unique features or better customization.
Tool
Notable Features
Best For
Beacons
Built-in bio analytics, embedded videos, email signup forms
Multi-platform creators
Koji
Interactive buttons, mini-games, and monetization
Authors with fan engagement goals
Campsite
Advanced design customization and analytics
Authors wanting full branding control
Taplink
Templates for sales funnels
Authors focusing on direct book sales
Shorby
Chat integrations and Messenger links
Authors offering coaching or consultations
The best choice depends on your author goals and technical comfort level.
🧭 Step 13: Checklist — Optimizing Your Author Linktree
Here’s a quick recap checklist to make sure your Linktree is truly optimized:
✅ Branded design (colors, fonts, and visuals) ✅ Profile photo and author tagline ✅ Main call-to-action link (latest release or signup) ✅ 5–8 purposeful links only ✅ Engaging link titles with emojis ✅ Embedded visuals or media ✅ Analytics tracking enabled ✅ Regular updates ✅ Cross-promotion on Instagram posts and stories
With these elements in place, your Linktree will become a powerful storytelling tool — one that drives conversions, loyalty, and engagement.
🧩 Final Thoughts: Turning Your Linktree into a Storytelling Hub
As an author, your goal on Instagram is not just to sell books — it’s to tell stories. Your Linktree is an extension of that narrative. Every color, every link, and every phrase should reflect who you are as a writer and invite readers to explore your world.
Think of it as your digital library entrance — where readers step inside, intrigued and excited, to discover what lies beyond.
A well-optimized Linktree transforms your Instagram bio from a static space into an interactive literary experience. And when done right, it becomes a bridge between your art and your audience — one click at a time.
Instagram has long been known as the kingdom of visuals — photos, reels, and stories that catch the eye before the mind has time to blink. Yet, in 2025, a new feature is rewriting the platform’s creative rules: text-only posts.
For years, writers and authors struggled to find their space in a world of filters and video loops. Captions were too short for essays, carousels too cumbersome for storytelling, and third-party tools too limiting. Now, Instagram has introduced a feature that could change how authors share their voice online — one that allows words to take center stage.
This article explores everything authors need to know about the new Instagram text-only post feature — how it works, how to use it, and how to make it a powerful tool for building an author brand in a digital world driven by visuals.
1. What Are Text-Only Posts on Instagram?
The text-only post feature is exactly what it sounds like: users can now create posts made up entirely of words — no photos, no videos, no backgrounds, just clean, customizable text.
This evolution represents a major shift for Instagram, a platform that built its reputation on the mantra “a picture is worth a thousand words.” Now, the reverse might be true: a few powerful words can paint a picture.
Here’s what the new format offers:
✍️ Character flexibility: Users can write longer posts than typical captions.
🎨 Typography options: Different font styles, sizes, and alignment choices.
🌈 Background customization: Choose plain colors, gradients, or textures.
💬 Interactive comments: Readers can respond directly to your writing like any other post.
📈 Algorithm visibility: Text-only posts appear in feeds and explore pages, just like visual ones.
This means that authors — from poets and essayists to novelists and nonfiction writers — can finally use Instagram as a literary stage, not just a marketing tool.
2. Why Instagram Launched This Feature
Instagram’s move toward text content isn’t random. It’s part of a larger trend across social media: the written word is making a comeback.
Platforms like Threads, Substack, and even TikTok (through captions and storytelling) have shown that audiences crave meaning, not just visuals. Meta likely saw an opportunity to capture that creative energy within Instagram’s ecosystem.
Three reasons stand out behind the shift:
Diversifying content formats: Instagram wants to keep creators from migrating to text-first platforms like X (Twitter) or Threads.
Encouraging deeper engagement: Text-only posts can spark thoughtful conversations, not just quick reactions.
Empowering creators beyond visuals: Many writers and thought leaders find it challenging to compete with video creators. This new feature levels the playing field.
In essence, Instagram is saying: You don’t have to be a photographer to belong here anymore.
3. How Authors Can Use the Text-Only Post Feature
Let’s get practical. How can authors actually make use of this tool?
Here are some ideas divided by content type:
a. Micro Stories
Short fiction thrives on constraint. Use the new text format to share:
One-paragraph flash fiction
Haikus and micro-poems
Serialized stories (Part 1, Part 2…)
💡 Example: “Her coffee had gone cold, but she stayed — because warmth came from the words he left behind.”
b. Writing Prompts
Authors can engage followers with creative prompts:
“Write a story using the word silhouette.”
“Describe a storm without mentioning rain.”
“If your favorite character met your younger self — what would they say?”
This encourages audience participation, helping authors connect with readers and aspiring writers alike.
c. Quotes from Your Work
Use text-only posts to feature memorable lines or emotional excerpts from your books, essays, or poetry collections.
💬 Example:
“The sea doesn’t ask where you’ve been. It only asks if you’re ready to return.” — from The Waves Remember
Such quotes can spark curiosity, leading followers to seek your work.
d. Personal Reflections
Readers love authenticity. Share thoughts on your creative journey, lessons from rejection, or insights into your writing process.
🧠 Tip: Keep it conversational and honest. Your followers want to feel they’re reading a page from your diary, not your press release.
e. Behind-the-Scenes Notes
Talk about:
How you create characters
What inspires your story worlds
The books or songs that fuel your writing days
These posts humanize you — transforming “an author” into “a person who writes.”
4. How to Create a Text-Only Post (Step by Step)
To make the most of this new feature, follow these steps:
Use line breaks, emojis, and spacing for readability
6
Post and engage
Respond to comments, pin top feedback, and track analytics
📱 Pro Tip: Experiment with different tones — poetic one day, humorous the next — to find what resonates most with your audience.
5. The Benefits for Authors
Let’s explore why this feature could become an author’s secret weapon on Instagram.
a. Reach New Readers Organically
Instagram’s algorithm favors engagement. Text-only posts encourage reading, commenting, and sharing — all key signals for visibility.
b. Build a Literary Community
Instead of simply showing book covers, authors can now create discussions. Words invite conversation, and conversation builds connection.
c. Reduce Content Creation Pressure
No need to stage photoshoots or edit videos. A powerful idea and a few lines of text can make a bigger impact than a heavily designed post.
d. Create a Personal Aesthetic
Even without images, text-only posts can have a strong visual identity through font, tone, and layout. Think of it as a minimalist book cover for your words.
e. Encourage Cross-Platform Growth
Use Instagram as a gateway to your Substack, Medium, or author website. A short text post can tease longer works elsewhere.
6. Tips to Make Your Text-Only Posts Stand Out
While simplicity is beautiful, strategy still matters. Here are techniques that make your writing pop in a scroll-heavy feed:
1. Lead with a Hook
Just like a story’s opening line, the first sentence of your post determines if readers stop or scroll. Examples:
“I almost quit writing last year. Here’s why I didn’t.”
“What if your book chose you — not the other way around?”
2. Use Line Breaks Strategically
Break your text for rhythm and impact:
She left the city behind. But the city — never left her.
3. Play with Typography
Use all caps for emphasis, italics for tone (where supported), or emoji bullets to structure long posts.
4. End with a Question
Encourage dialogue:
“Writers, what’s one sentence you wish you had written?”
5. Stay Consistent
Develop a recognizable style — whether lyrical, motivational, or introspective — so followers know your “voice” immediately.
7. Comparing Instagram’s Text-Only Posts to Threads and X
To understand its potential, let’s compare Instagram’s feature with similar text-based platforms:
Platform
Main Focus
Ideal For
Tone
Instagram (Text Posts)
Short-to-medium creative writing
Authors, poets, storytellers
Artistic, emotional
Threads
Conversations and opinions
Thought leaders, social commentators
Casual, interactive
X (Twitter)
News and debates
Journalists, commentators
Fast-paced, reactive
Substack Notes
Long-form reflections
Essayists, newsletter writers
Intellectual, niche
Instagram’s advantage lies in its hybrid audience — people who love visuals and meaningful words. For authors, that means exposure to a broader readership.
8. The Aesthetic Power of Simplicity
Instagram’s text-only posts aren’t just about removing visuals — they’re about refocusing attention. When you strip away the imagery, your message stands naked, unfiltered, and powerful.
Writers can use this to their advantage:
Pair a minimalist background with emotionally charged text.
Alternate between visual posts (like book covers) and textual ones for rhythm.
Create recurring series — for example, “Monday Musings” or “Quote of the Week.”
Consistency transforms your feed into an anthology of micro-literature.
9. Building an Author Brand Through Text
Every author’s Instagram should tell a story — not just through books, but through presence.
Here’s how to use the new feature strategically to build a cohesive brand:
Goal
Content Type
Example
Showcase writing style
Microfiction / poems
“I write to remember what silence sounds like.”
Promote books
Excerpts + buy links
“From Chapter 7 of The Glass Door — now available.”
Engage readers
Discussion posts
“Who’s your favorite unreliable narrator?”
Inspire others
Motivational thoughts
“The blank page is not empty. It’s infinite.”
Authors who blend storytelling with personality create emotional connections — and emotional connection sells books.
10. Potential Challenges (and How to Overcome Them)
Every new feature comes with growing pains. Here’s what to expect — and how to adapt:
1. Visual Competition
Instagram is still highly visual. To stand out, use creative typography, bold backgrounds, or emoji headlines to attract the eye.
2. Reader Attention Span
Keep posts concise. Even though there’s space for long text, brevity often wins.
3. Algorithm Learning Curve
It may take a few weeks for Instagram’s algorithm to recognize your new posting style. Stay consistent and watch insights closely.
4. Creative Fatigue
Don’t force daily posts. Focus on quality — one profound paragraph beats five rushed ones.
11. The Psychology of Text-Only Engagement
Why are people drawn to text-only posts in a sea of images? Psychology provides clues:
Cognitive focus: Reading activates deeper brain processing than viewing images.
Emotional intimacy: Words can evoke imagination and empathy.
Slower consumption: Unlike reels, reading slows users down, increasing dwell time (a key metric for Instagram engagement).
For writers, this means you can use emotion, rhythm, and metaphor to command attention — the same tools you use in storytelling.
12. Case Studies: Authors Using Text Posts Creatively
Case 1: The Modern Poet
An indie poet uses Instagram text posts to share verses daily. One poem went viral, earning over 100K shares and doubling her book sales within a week.
Her strategy? She ends each post with a subtle call-to-action:
“Liked this? Find more in Midnight Letters — link in bio.”
Case 2: The Memoirist
A nonfiction writer posts short reflections about grief, parenting, and creativity. Followers say the posts feel “like therapy in a few lines.”
His consistency led to invitations for podcast interviews and collaborations with publishers.
Case 3: The Fiction Author
This novelist shares snippets from upcoming novels with cryptic hashtags, creating suspense:
“She never meant to open the door. But some knocks aren’t meant to be ignored. #ComingSoon #NewBook2025”
Fans speculate in the comments — turning posts into mini book clubs.
13. Future of Writing on Instagram
The arrival of text-only posts could mark the start of a literary renaissance on social media.
Imagine:
Digital poetry slams in comment sections.
Writing challenges going viral through hashtags.
Collaborative storytelling chains between authors and readers.
Instagram, once the playground of influencers and photographers, may become a fertile ground for the next generation of writers.
14. Integrating Text Posts with Other Features
To maximize your impact:
Combine Reels + Text Posts: Share your writing in text form, then narrate it in a Reel.
Use Stories for Teasers: Announce your upcoming text posts to build anticipation.
Create Highlights: Organize your text posts by theme (“Poems,” “Reflections,” “Inspiration”).
Cross-format synergy strengthens visibility and engagement.
15. Analytics: Measuring What Works
Track your performance through Instagram Insights. Focus on metrics like:
Impressions (how many saw it)
Saves (a strong signal of emotional connection)
Shares (word-of-mouth potential)
Comments (community engagement)
Analyze which types of writing perform best. Are your followers responding to humor? Reflection? Poetry? Adjust accordingly.
16. Final Thoughts: Words Take the Spotlight Again
Instagram’s text-only posts aren’t just another feature. They represent a philosophical shift — a recognition that expression doesn’t always need a picture.
For authors, this is both liberation and opportunity. It’s a chance to transform social media from distraction into art, from marketing into meaning.
So, the next time you open Instagram, don’t worry about lighting or angles. Just focus on what truly matters — your words.
Because sometimes, the most powerful image is the one painted in the reader’s mind.
In the digital age, social media is no longer a playground for self-promotion alone—it’s a platform for authenticity, transparency, and connection. For authors, Instagram has evolved far beyond book teasers and aesthetic quotes. It has become a powerful communication tool, especially in times of crisis.
Whether facing a personal controversy, a global event that affects readers, or a PR issue tied to your literary work, Instagram can help authors maintain credibility, empathy, and control of their narrative. This article explores, in depth, how authors can use Instagram for effective crisis communication—balancing professionalism, authenticity, and storytelling.
1. Understanding Crisis Communication for Authors
A “crisis” for an author can take many forms. It could be:
A backlash over a book’s theme or representation.
Negative press related to personal behavior or statements.
Controversy involving publishers, contracts, or collaborations.
Misunderstandings with readers or fellow writers.
Global crises that demand a sensitive response (e.g., pandemics, social movements, wars).
In each scenario, communication is key. Silence can sometimes be perceived as guilt or indifference, while an impulsive reaction might make things worse. The goal is to respond thoughtfully and strategically—using the unique advantages of Instagram to guide the narrative.
Crisis communication for authors involves three principles:
Transparency — Acknowledge the situation truthfully.
Empathy — Show understanding and care for those affected.
Consistency — Keep your messaging aligned across all channels.
2. Why Instagram Matters in a Crisis
Instagram is visual, interactive, and personal—all traits that make it effective in times of tension. Here’s why:
a. Direct Communication
Instagram allows you to speak directly to your audience, bypassing media filters. Through Stories, Lives, or Reels, you can explain your perspective in your own words and tone.
b. Emotional Connection
Images and videos carry emotional weight. A sincere facial expression or a calm video statement feels more human than a long press release.
c. Real-Time Updates
Crisis situations evolve quickly. Instagram’s instant nature helps you share updates, clarifications, or apologies as the situation unfolds.
d. Two-Way Dialogue
Comments, DMs, and polls allow you to gauge public sentiment and respond accordingly. This interactivity builds trust and demonstrates accountability.
e. Community Management
Your followers—fans, book bloggers, and other authors—can become your support network. Handling the crisis well can actually strengthen these relationships.
3. Preparing Before the Crisis
The best crisis management starts long before any issue arises. Think of it as “reputation insurance.”
a. Build a Positive Reputation
Consistently post meaningful content: behind-the-scenes writing moments, book recommendations, thoughtful captions. A loyal and positive community will defend you if a misunderstanding occurs.
b. Develop a Crisis Plan
Ask yourself:
Who will speak on your behalf? (You, your agent, or a publicist?)
What tone should your posts have?
What are your “red lines” — topics you won’t discuss publicly?
Having these answers ready ensures calm decision-making when emotions run high.
c. Save Key Contacts
Maintain a list of PR professionals, editors, or legal advisors you can consult quickly.
d. Monitor Your Online Reputation
Use tools like Hootsuite, Mention, or Google Alerts to track conversations about you or your books. The faster you identify an issue, the easier it is to contain.
4. Responding During a Crisis
When a crisis hits, your first 24–48 hours are critical. How you respond shapes public perception.
Step 1: Assess Before Acting
Don’t rush to post. Gather facts. Understand what happened, who’s involved, and how your audience feels.
Ask:
Is this a misunderstanding that needs clarification?
Is an apology necessary?
Should I respond publicly or privately?
Step 2: Choose the Right Format
Each Instagram format has a different impact:
Format
Best Use in a Crisis
Tone
Instagram Stories
Quick updates, short clarifications, behind-the-scenes perspective
Personal, conversational
Instagram Live
Addressing major issues directly to your audience
Authentic, transparent
Feed Post
Official statements or apologies
Formal yet empathetic
Reels
Reassuring creative content or follow-up after resolution
Positive, reflective
Comments/Replies
Addressing misinformation or engaging empathetically
Respectful, composed
Step 3: Write the Right Message
A crisis statement should have four parts:
Acknowledgment — “I’ve seen your concerns about…”
Clarification or Apology — “Here’s what happened…” or “I’m truly sorry for…”
Action — “I’m taking steps to…”
Commitment to Growth — “I’ve learned from this and will do better.”
Avoid defensive language. Replace “That’s not my fault” with “I understand why this has hurt some readers, and I want to clarify.”
5. Visual Storytelling in Crisis Communication
Instagram is primarily visual, so your imagery must reinforce your message.
a. Use Calm and Neutral Imagery
Avoid bright, celebratory colors during sensitive times.
Choose muted tones, minimal design, or simple backgrounds.
Black-and-white images can convey seriousness or reflection.
b. Feature Yourself
People respond to faces. A calm, open expression builds trust.
Record a short video explaining your position.
Maintain eye contact with the camera.
Avoid heavy editing; authenticity matters more than polish.
c. Text Graphics for Key Points
Summarize your statement in carousel format or a text post. Example:
“What Happened. What I’m Doing. What Comes Next.”
This format is easily shareable and clarifies your message visually.
6. Managing Comments and Messages
a. Don’t Delete Criticism Unnecessarily
Unless it’s hateful or abusive, let constructive criticism stay visible. It shows you’re not hiding from feedback.
b. Engage Selectively
Respond where it adds value. Avoid endless back-and-forth arguments. Thank supportive followers and acknowledge valid criticism briefly.
c. Use “Close Friends” Feature
If you need to share emotional updates or behind-the-scenes context, use Close Friends Stories for a more intimate audience—trusted readers, author peers, or industry colleagues.
d. Moderate Your Community
If trolls or harassment increase, use tools like:
Comment filters to hide offensive words.
Limit feature to control who can comment.
Restrict or block accounts spreading misinformation.
7. Collaborating with Others During a Crisis
Sometimes, collaboration helps restore credibility and show unity.
a. Partner with Other Authors
Ask peers to share balanced perspectives, or co-host an Instagram Live to discuss lessons learned.
b. Involve Experts
If the issue relates to sensitive themes (e.g., representation or cultural appropriation), invite qualified voices to speak alongside you.
c. Work with Your Publisher
Coordinate with your publishing team so statements and actions remain consistent across channels.
8. Turning Crisis into Opportunity
Handled wisely, a crisis can humanize you as an author and even deepen audience trust.
a. Share Growth
After things settle, reflect publicly. Talk about what you learned, how your writing will evolve, or what you’re doing differently.
Example:
“This experience reminded me of the importance of listening to readers. My next project will include more diverse voices in its development process.”
b. Reconnect Through Positivity
Share uplifting content—reader testimonials, charity projects, or creative updates—to gradually shift your page’s tone from reactive to proactive.
c. Reinforce Brand Values
Use the crisis as a chance to reaffirm what you stand for: empathy, inclusivity, curiosity, creativity, or freedom of expression.
9. Case Studies: How Authors Handled Instagram Crises
Let’s analyze a few real-world (fictionalized) examples for lessons learned.
Case 1: The Misunderstood Caption
An author posted a quote taken out of context and faced backlash. Response: Within 12 hours, they clarified via Stories, apologized, and edited the caption. Lesson: Quick acknowledgment and tone correction can stop misinformation early.
Case 2: Representation Controversy
A fantasy writer faced criticism for lack of diversity in her novel. Response: She held an Instagram Live with authors of color to discuss representation, then pledged to hire sensitivity readers. Lesson: Action speaks louder than words.
Case 3: Personal Burnout and Silence
An author went offline for a month without explanation, sparking concern. Response: Upon return, she shared a Reel about writer’s burnout and self-care. Lesson: Transparency builds empathy and strengthens fan loyalty.
10. Tools and Features That Help in Crisis Situations
Here’s how Instagram’s tools can support structured crisis management:
Feature
Purpose in Crisis
Example Usage
Stories Highlights
Archive important updates
“My Statement” highlight with clarifications
Pinned Posts
Keep your official response visible
Pin your apology or action plan
Notes (DM Feature)
Share short updates privately
“Taking a brief break—thank you for understanding”
Collab Posts
Partner with organizations or experts
“Collab with @InclusiveAuthors on diversity in writing”
Link in Bio
Redirect to official statements or donations
“Read my full response here”
11. Psychological and Emotional Self-Care
Crisis communication can be emotionally draining. As an author, your creative identity is deeply personal, so public criticism can feel devastating.
a. Step Back When Needed
It’s okay to take a brief break. Communicate clearly: “I’ll be offline for a few days to reflect.”
b. Seek Support
Talk to trusted friends, colleagues, or therapists. Online empathy from followers is valuable but doesn’t replace real-world emotional care.
c. Don’t Let Fear Kill Your Creativity
Remember: One crisis doesn’t define your entire career. Use writing as a form of healing and self-expression.
12. Rebuilding After the Crisis
After things calm down, focus on long-term rebuilding.
a. Audit Your Online Presence
Review your captions, hashtags, and old posts. Remove anything that could be misunderstood later.
b. Re-engage Your Audience
Run interactive polls, share creative snippets, or invite followers to Q&As about your next work.
c. Celebrate Positive Milestones
When you achieve something new (a book launch, an award, a charity project), share it with gratitude, not arrogance. Show growth, not triumphalism.
d. Keep Learning
Follow PR professionals, join author communities, and attend workshops about digital ethics and communication. The more you learn, the better you’ll prevent future missteps.
13. Final Thoughts: Authenticity as the Ultimate Strategy
Crisis communication on Instagram isn’t about image manipulation—it’s about truth, empathy, and emotional intelligence. Readers today value honesty more than perfection.
When authors approach crises with courage and compassion, they don’t just protect their brand—they inspire others to handle difficult conversations with grace. Instagram, with its visual storytelling and community-driven design, is the perfect medium for that balance.
So, whether you’re facing a PR storm or simply preparing for the unexpected, remember: Your words are your legacy—but your humanity is your strength.
In today’s fast-paced digital world, authors are no longer just writers — they are brands. Whether you’re an indie author self-publishing your debut novel or a seasoned writer with a traditional publishing deal, Instagram has become one of the most effective tools for building a loyal readership, promoting new releases, and connecting with fans around the globe.
But with millions of creators posting daily, how do you stand out on such a visual and competitive platform?
The answer lies in Instagram Stories — and more specifically, in the templates you use.
This guide explores how authors can use Instagram Story templates to showcase their books, personalities, and writing journeys with professionalism and creativity. Plus, we’ll dive into ready-to-use ideas and examples you can start implementing today.
🌟 Why Instagram Stories Matter for Authors
Before we dive into templates, let’s understand why Stories are so powerful.
Instagram Stories are short, engaging snippets that appear at the top of your followers’ feeds for 24 hours. They are perfect for quick updates, sneak peeks, behind-the-scenes content, and polls — all of which help build a connection with your audience.
Here’s why they’re essential for authors:
Benefit
Description
Visibility
Stories appear at the top of the app, increasing your chances of being seen.
Authenticity
They allow you to show your personal side — readers love connecting with the person behind the words.
Engagement
Interactive stickers like polls and Q&A boost audience participation.
Promotion
Announce new releases, book tours, and events quickly and effectively.
Unlike posts, Stories don’t have to be perfect. They’re raw, real, and direct — making them ideal for connecting emotionally with readers.
🎨 What Are Instagram Story Templates?
An Instagram Story Template is a pre-designed layout you can customize with your own text, images, and colors.
These templates help you:
Maintain a consistent aesthetic for your author brand.
Save time while keeping your content professional-looking.
Create an instantly recognizable style that followers associate with your name or book series.
You can design your own using tools like Canva, Adobe Express, or Fotor, or download pre-made ones designed specifically for authors.
✍️ How Authors Can Use Instagram Story Templates
Now let’s look at the creative ways authors can use templates in their daily Instagram strategy.
1. Book Announcements
When launching a new book, your Instagram Stories can become a mini-marketing campaign. Use a series of templates like:
“Cover Reveal” Template: A dramatic background with a blurred image of your book cover and the text “Coming Soon…”.
“Release Countdown” Template: A countdown sticker paired with the book cover and a tagline.
“Now Available” Template: Include where the book can be purchased — Amazon, Kindle, or your website.
💡 Tip: Keep your brand colors consistent across each template to create visual continuity.
2. Character Introductions
Readers love getting to know your characters beyond the pages.
Use a template featuring:
Character photo (artwork or stock image that fits their look).
A brief description (“Age 29 | Detective | Secret: She can’t remember her past”).
Your book title at the bottom corner.
This approach turns your Instagram into a cinematic experience that draws readers deeper into your world.
3. Behind the Scenes of Writing
Your followers are curious about your process. Templates for “A Day in the Life of an Author” or “Writing Progress” can include:
A progress bar (e.g., 45% of the manuscript complete).
Workspace photos or cozy writing setups.
Coffee and notebook aesthetics — readers love relatable content.
You can even include prompts like “Today’s Word Count Goal” or “Currently Editing Chapter 7”.
4. Quotes from Your Book
Quotes are one of the most shareable types of content on Instagram.
Use a minimalist template featuring:
The quote in elegant typography.
Subtle background (perhaps a blurred page or forest, depending on your book’s vibe).
Your book title or logo.
You can even create a series of quote templates so readers recognize your aesthetic immediately.
5. Reader Reviews and Testimonials
Social proof sells books. Create a template for review highlights:
Add a five-star rating graphic.
Include a short snippet: “Couldn’t put it down!” — @booklover95
Add your book cover thumbnail and thank the reviewer.
You can post these as Stories and later save them to a Highlight called “Reviews.”
6. Polls and Q&A Sessions
Interaction is the lifeblood of any author-reader relationship.
Use Q&A templates to encourage conversation:
“Ask Me Anything About My Book!”
“Which character do you relate to most?” (with poll stickers)
“Guess what I’m writing next!”
Templates with space for answers, question boxes, and polls make your Stories look organized and engaging.
7. Book Excerpts and Sneak Peeks
Use a storytelling-style template to share a few lines from your upcoming book. Include:
Title and chapter number.
A short quote (2–3 sentences).
A “Swipe Up to Read More” (or link sticker) if available.
The goal is to tease — give readers just enough to crave the rest.
8. Writing Tips or Author Advice
Become a mentor figure to your followers by sharing writing wisdom.
You can use educational templates such as:
“Writing Tip Tuesday”
“How I Create My Characters”
“3 Ways to Overcome Writer’s Block”
Add bullet points or icons to make the information visually appealing and easy to digest.
9. Book Events and Signings
If you’re attending a convention, doing a signing, or hosting an online Q&A, Story templates are a great way to promote it.
Include:
Event name and date.
Location or link.
A personal message like “Can’t wait to meet you!”
You can also design post-event “Thank You” templates featuring event photos and quotes from fans.
10. Fan Art and Reader Features
Celebrate your readers’ creativity!
Design a “Fan Feature” template to showcase:
User’s name or handle.
Their artwork or photo with your book.
A thank-you caption and emoji reactions.
This builds community and encourages others to engage with your content.
💡 Design Tips for Author Story Templates
Even the best ideas fall flat if your visuals aren’t cohesive. Here are essential design rules for authors creating or customizing templates:
Element
Tips
Color Palette
Use colors that reflect your author brand. For example, dark tones for thrillers, pastel hues for romance, or earth tones for fantasy.
Typography
Limit to 2 fonts: one for headings, one for body text. Avoid overly decorative fonts that reduce readability.
Branding
Add your name, logo, or social handle in a discreet corner.
Consistency
Keep layouts similar across all templates to establish visual identity.
Imagery
Use high-quality, copyright-free photos from Unsplash, Pexels, or your own photoshoot.
📲 Tools to Create Instagram Story Templates
You don’t need advanced design skills to create beautiful templates. Here are tools authors can use:
Tool
Best For
Highlights
Canva
Beginners
Free author-specific templates, customizable colors and fonts.
Adobe Express
Professionals
Polished designs, brand kit integration.
Fotor
Quick edits
Easy-to-use interface, ideal for mobile creation.
VistaCreate (Crello)
Story animations
Supports video and motion effects for dynamic Stories.
Over by GoDaddy
Branding
Excellent for adding watermarks and consistent branding.
🧩 Template Packs You Can Use Today
To save you time, here are ready-to-use Story template ideas for authors, categorized by content type:
🕮 Book Launch Pack
“Cover Reveal”
“Meet the Author”
“Pre-Order Available”
“Countdown: 3 Days Left!”
“Now Available!”
🪶 Writing Journey Pack
“Today’s Writing Goal”
“Editing Progress”
“Coffee + Chapter 12”
“Snippet Sunday”
“Plot Twist Tease”
💌 Reader Connection Pack
“Fan Feature”
“Book Review Highlight”
“Ask Me Anything”
“Reading Poll: Which Hero Do You Prefer?”
“Reader Shoutout”
🌈 Aesthetic Inspiration Pack
“Mood Board: My Next Novel”
“Character Mood”
“Scene Inspiration”
“Playlist for Writing”
“Quote of the Day”
Each of these can be easily created in Canva — just search “Instagram Story template for authors” or build from scratch using your chosen colors and fonts.
💬 How to Keep Your Story Highlights Organized
Stories disappear after 24 hours, but you can save them to Highlights to make your Instagram profile a dynamic portfolio.
Organize them like this:
Highlight Title
Purpose
📚 Books
All your current and past releases.
✏️ Writing Life
Behind-the-scenes writing journey.
💬 Reviews
Reader testimonials and feedback.
🎉 Events
Book tours, signings, interviews.
🎨 Fan Art
Reader-created content.
Each Highlight can have a custom cover template, maintaining your cohesive aesthetic.
📈 Turning Story Engagement into Book Sales
Templates are not just about aesthetics — they’re tools for marketing.
To maximize their impact:
Use link stickers (formerly “Swipe Up”) to direct followers to your Amazon or author website.
Add calls-to-action (CTAs) like “Pre-order now!” or “Tap to learn more.”
Encourage reader interaction with polls (“Have you read this chapter yet?”).
Combine your Story strategy with posts, Reels, and hashtags like #Bookstagram, #AuthorLife, and #IndieAuthor for a well-rounded Instagram presence.
🌟 Real Examples of Authors Using Story Templates
1. Colleen Hoover
Known for her emotional novels, Hoover uses soft tones and handwritten fonts in her Stories to mirror her brand identity. She frequently shares “Reader Reactions” templates.
2. Neil Gaiman
Gaiman’s Instagram mixes classic literature aesthetics with dark imagery. His Story templates often include monochrome filters and minimalist text.
3. V.E. Schwab
Her Stories blend fantasy visuals with elegant serif fonts. Templates showcase quotes, cover reveals, and event updates in a cinematic tone.
Each of these authors uses Story design as an extension of their storytelling voice.
🚀 10 Instagram Story Template Ideas You Can Use Today
Here’s a quick list of ready-to-implement templates you can try now:
Book Cover Drop – a clean layout revealing your latest book.
Quote of the Day – stylized typography overlay on a thematic background.
Today’s Writing Progress – a word count tracker or bar.
Fan Friday – spotlight a reader photo or review.
Weekend Reading List – share what you or your characters are reading.
Behind the Pen – a candid photo of your writing desk.
Character Moodboard – visual collage representing a protagonist.
Before & After Editing – show how your story evolved.
Q&A Session – reusable question box template.
Thank You Post – gratitude message to your readers.
By using these ideas consistently, you’ll not only strengthen your brand but also make your followers feel part of your author journey.
💬 Final Thoughts
In a sea of visual content, authors who master Instagram Story templates stand out as both creative and professional.
A strong Story design strategy helps:
Build anticipation for new releases.
Deepen relationships with readers.
Establish a recognizable brand identity.
You don’t need to be a designer — just a storyteller who understands how visuals amplify words. Start small, experiment with templates, and let your Stories reflect the heart of your writing.
Your next loyal reader might just discover you from a single, beautifully crafted Story.
In today’s digital age, authors no longer depend solely on book tours or traditional publicity to reach readers. Instagram has become one of the most powerful tools for writers to build an audience, connect emotionally with readers, and — most importantly — sell books. But while stunning visuals catch the eye, it’s the caption that turns curiosity into conversions.
In this detailed guide, we’ll explore how to write Instagram captions that sell — without sounding “salesy.” You’ll learn strategies grounded in psychology, storytelling, and marketing, along with examples and templates tailored specifically for authors.
1. Why Instagram Captions Matter for Authors
Instagram’s visual nature makes it ideal for book covers, writing aesthetics, and author photos. But when it comes to engagement and sales, the caption is where the magic happens.
A compelling caption can:
Turn a casual scroller into a loyal reader.
Build emotional resonance with your audience.
Drive traffic to your book link or newsletter.
Humanize your author brand and voice.
Think of your caption as your mini-chapter — a short piece of storytelling that invites the reader to take action.
2. Understanding the Instagram Algorithm for Writers
Before you write a single word, it helps to understand how Instagram decides what content gets seen. The platform rewards authentic engagement. This means:
Longer captions that hold attention are prioritized.
Posts that generate comments, saves, and shares rank higher.
Content that makes users stop scrolling gets boosted.
So, captions that provoke emotion, spark conversation, or invite participation are algorithmically favored.
✍️ Tip:
The average Instagram caption length has tripled since 2016 — from 140 characters to nearly 400. Don’t be afraid to tell a story.
3. The Psychology Behind Selling with Words
Selling isn’t about pushing your book. It’s about helping readers see how your story, message, or characters connect to their lives.
Here are the three psychological levers behind a persuasive caption:
a) Emotion
Readers buy emotionally, not logically. A caption that evokes curiosity, nostalgia, or inspiration can outperform one that lists book features.
Example: “Some nights, my character couldn’t sleep — neither could I. Writing this chapter broke me, but I had to tell her story.”
b) Authority
Share moments that show you as a credible and relatable author — awards, milestones, or your creative process.
Example: “After two years and 87 rewrites, my debut novel is finally ready. Here’s what I learned about persistence and coffee…”
c) Scarcity
Create gentle urgency without sounding pushy.
Example: “Only 3 days left to grab the signed edition — and yes, it comes with a secret bonus chapter.”
4. Anatomy of a High-Converting Instagram Caption
A great caption blends art and marketing. Here’s the proven structure many successful authors use:
Section
Purpose
Example
1. Hook
Stop the scroll with emotion or curiosity.
“This isn’t how I planned my first book launch…”
2. Story
Add a relatable or inspiring moment.
“I spent five years doubting myself before I typed ‘The End.’”
3. Value
Offer insight, advice, or behind-the-scenes content.
“Here’s what every aspiring author should know about rejection.”
4. Call to Action (CTA)
Invite engagement or sales.
“Grab your copy in the link — or tell me your biggest writing fear below.”
✨ Example Caption Breakdown:
“Three years ago, I almost quit writing. My drafts were messy, and I thought no one would care. Today, I’m holding my first printed copy — proof that persistence is stronger than perfection. If you’ve ever doubted your dream, this book is for you. 📖 Link in bio.”
5. Hooks That Capture Attention
The first line is crucial. It decides whether someone taps “read more” or scrolls past. Here are some scroll-stopping hooks for authors:
Emotional Hooks
“I never thought this story would see the light of day…”
“The scene that broke my heart to write.”
“A love letter to every reader who ever felt unseen.”
Curiosity Hooks
“The secret scene I almost deleted (but readers loved).”
“What I learned after my book went viral.”
“This is what no one tells you about being an author.”
Value Hooks
“3 things I wish I knew before publishing my first novel.”
“Why your first draft isn’t supposed to be good.”
“How I turned my journal into a bestselling story.”
6. Using Storytelling in Captions
As an author, you already have the most powerful marketing skill — storytelling. The trick is to apply it in miniature form.
The Micro-Story Formula:
Conflict: Start with a problem or emotion.
Journey: Describe what you experienced or learned.
Resolution: End with insight, inspiration, or a CTA.
Example: “When I got my first rejection letter, I cried. Then I pinned it above my desk and kept writing. Two years later, that same publisher offered me a deal. Never give up on your story.”
This structure builds authentic connection, not just promotion.
7. Crafting Captions That Reflect Your Author Brand
Your captions should sound like you. Consistency builds trust. Ask yourself:
What’s my tone? (Inspiring, humorous, mysterious?)
What themes define my books? (Romance, self-growth, fantasy, empowerment?)
What emotions do I want readers to associate with me?
Example:
If you write cozy romances, your captions might include warmth, heart emojis, and gentle humor. If you write thrillers, focus on suspense, curiosity, and short, impactful sentences.
“Behind every perfect crime is an imperfect writer, still rewriting chapter 12.”
8. The Power of Hashtags and Keywords
Captions help readers find you, not just follow you.
Best Practices:
Use hashtags that mix broad (#amwriting) and niche (#romanceauthorsofinstagram).
Place hashtags after your caption or in the first comment.
Include keywords naturally for SEO — Instagram now indexes them for search.
Add emojis to emphasize emotion or guide the reader’s eye.
Highlight CTAs with arrows or spacing.
Example: ✨ Writing update The first draft is DONE. ☕ Countless coffees later, my fantasy novel is alive. 💬 Want to beta read? DM me!
Readable captions feel personal and approachable.
13. Timing and Frequency
When you post matters almost as much as what you post. For authors, the best times typically align with readers’ downtime: early mornings, lunch hours, and evenings.
General Guide:
Day
Best Time (Local)
Why
Monday
8–9 a.m.
Start-of-week motivation posts perform well.
Wednesday
12–1 p.m.
Midweek inspiration or writing updates.
Friday
6–8 p.m.
Weekend reading vibes.
Sunday
9–11 a.m.
Reflective captions or book teasers.
Post 3–5 times a week, alternating between value, story, and promotion.
14. Examples of Author Captions That Sell
Example 1: Personal Connection
“I wrote this chapter during the hardest month of my life. Every word felt like a wound — but it healed me. If you’ve ever lost someone, I hope this story holds your heart for a while.”
Example 2: Teaser with Curiosity
“She opened the letter — and everything she believed about her past shattered. Would you read on?”
Example 3: Direct Yet Soft CTA
“My debut novel is finally out! 🎉 Thank you to everyone who believed in me. Grab your copy today and join the adventure — link in bio!”
Example 4: Community Engagement
“Writers, what’s the hardest scene you’ve ever written? For me, it was this one. The tears were real.”
15. Tools and AI Resources for Better Captions
Modern authors can use AI and apps to streamline caption creation:
Tool
Purpose
Benefit
ChatGPT
Brainstorm caption ideas
Saves time and boosts creativity
Canva Magic Write
Design + caption integration
Perfect for aesthetic posts
Later.com
Scheduling & analytics
Helps you post consistently
Notion / Trello
Caption planning
Keeps your content organized
Grammarly
Proofreading captions
Maintains professionalism
Use AI as a co-creator, not a replacement for your authentic voice.
16. Tracking What Works
Writing great captions isn’t a one-time effort. Measure your results:
Metrics to Track:
Engagement rate (likes, saves, comments)
Link clicks (use tools like Bitly)
Follower growth after specific posts
DMs or comments mentioning your book
Use insights to refine your style and topics.
17. Building Long-Term Reader Relationships
Captions don’t just sell books — they build relationships. When readers feel connected to your journey, they become repeat buyers and ambassadors for your stories.
Keep showing up authentically:
Share both victories and struggles.
Respond to comments genuinely.
Show appreciation for your community.
“Every message from a reader reminds me why I write. Thank you for being part of this story with me.”
18. Final Thoughts: Writing Captions That Tell and Sell
Your captions are more than marketing — they’re micro-stories that build bridges between your imagination and your readers’ hearts.
To recap:
Start with emotion.
Tell a story that invites curiosity.
Offer value or inspiration.
End with a gentle CTA.
When you blend storytelling with authenticity, sales become a natural byproduct of connection. Every caption is a chance to write another chapter in your relationship with readers — one scroll at a time.
So next time you post, remember: 📚 Your words don’t just describe your book. They sell your story.
In the age of digital storytelling, Instagram has evolved into much more than a platform for sharing photos — it’s a powerful stage for authors to connect with readers, build brand identity, and sell books. Yet, many writers struggle with one core challenge: understanding engagement.
What truly drives likes, comments, shares, and saves on Instagram? What separates a stagnant account from one that fosters genuine reader relationships and loyal followers?
This article dives deep into the science of Instagram engagement rates, explaining how authors can analyze, optimize, and grow their presence with purpose — and how the platform’s algorithms actually reward meaningful interaction.
📘 1. Why Instagram Matters for Authors
Instagram is a visual platform — but it’s also about storytelling. Each image, caption, and comment thread offers a chance to tell a story that resonates with an audience. For authors, that makes Instagram a natural fit.
Readers love glimpses into a writer’s world: the creative process, the messy desk, the behind-the-scenes of a book launch. Instagram allows authors to share those intimate moments that build emotional connections with readers.
Moreover, Instagram’s global reach and high engagement rate make it one of the most efficient channels for brand growth and community building. According to Hootsuite’s 2024 data, the average engagement rate across all industries on Instagram is around 1.94%, which is higher than most social platforms.
For authors, this means that with the right strategy, even a small but loyal audience can make a big impact.
📊 2. Understanding Instagram Engagement Rate
Engagement rate (ER) is the metric that defines how actively your audience interacts with your content. It’s a quantitative reflection of how much people care about what you post.
The Basic Formula
However, there are several variations of this formula depending on context. Let’s break them down:
Type
Formula
Best Used For
By Followers
(Likes + Comments) ÷ Followers × 100
Comparing overall engagement among influencers
By Impressions
(Engagements ÷ Impressions) × 100
Analyzing how engaging content is to those who actually saw it
By Reach
(Engagements ÷ Reach) × 100
Understanding real audience connection (since not all followers see a post)
By Posts
(Total Engagements ÷ Number of Posts)
Measuring consistency over time
Authors should primarily focus on engagement by reach, since it better reflects how well your content resonates with those who actually see it — not just total followers.
🧠 3. The Psychology Behind Engagement
To understand how to increase engagement, authors must grasp why people engage.
Here’s what the data and psychology say:
1. Emotional Resonance
Posts that evoke emotion — joy, nostalgia, curiosity, empathy — are more likely to be liked, commented on, or shared. For authors, storytelling is the ultimate emotional bridge. Share stories behind your books, your characters, or your writing struggles.
2. Reciprocity
When followers feel seen, they’re more likely to engage. Reply to comments, like reader photos of your book, and use stories to ask questions. Instagram rewards two-way interaction.
3. Consistency and Familiarity
The human brain loves patterns. Posting consistently (at least 3–4 times per week) helps your followers recognize your voice and style. Over time, familiarity breeds trust — and trust breeds engagement.
4. Social Proof
When a post has many likes or comments, others perceive it as more valuable and are more likely to engage. This is called bandwagon effect. Authors can trigger this effect early by asking friends or fans to interact right after posting.
5. Cognitive Ease
Simplicity wins. Posts that are easy to understand visually and textually perform better. Use clean visuals, short captions, and relatable themes.
📸 4. What Kind of Content Drives Engagement for Authors
Different types of posts trigger different forms of engagement. Let’s analyze the top-performing categories for authors:
Content Type
Engagement Type
Best Practices
Behind-the-scenes
Likes, Comments
Show your writing space, manuscript drafts, or coffee rituals.
Book Quotes
Shares, Saves
Use aesthetic backgrounds with short, emotional quotes from your work.
Reels (Short Videos)
Reach, Comments
Share writing tips, book hauls, or quick “a day in the life” videos.
Reader Spotlights
Comments, Trust
Repost reader reviews or photos of your books. Builds community.
Writing Tips
Saves
Share valuable, actionable insights on writing or publishing.
Book Announcements
Reach, Comments
Use countdowns, teasers, or visual trailers.
Reels Dominate Engagement
Instagram Reels currently deliver the highest average engagement rate — around 1.23% higher than static image posts, according to Later.com.
For authors, Reels are a great way to show personality: a quick monologue about writer’s block, a visual “cover reveal,” or a time-lapse of writing at a café.
📈 5. Algorithm Factors Affecting Engagement
Instagram’s algorithm determines what appears in a user’s feed based on predicted interest. It analyzes behavior patterns, such as how long someone watches your Reel or whether they save your post.
Here are the key algorithm signals that influence engagement:
Interest – Instagram predicts if users will care about your post based on past interactions.
Relationship – Accounts that exchange messages, comments, or tags are prioritized.
Timeliness – Newer posts are more likely to appear at the top of feeds.
Frequency of Use – Users who open the app often see more diverse content.
Session Time – The longer someone scrolls, the deeper Instagram digs into relevant content.
Tip for authors: To beat the algorithm, focus on interaction within the first 60 minutes** after posting. This “golden hour” signals to Instagram that your content is valuable.
🧩 6. The Metrics That Matter
While engagement rate is the headline metric, authors should monitor several supporting KPIs to understand overall performance:
Metric
What It Measures
Why It Matters
Reach
How many unique users saw your post
Indicates audience growth
Impressions
Total number of times a post was viewed
Reveals content’s exposure potential
Saves
How many users bookmarked your post
Shows long-term value of content
Shares
How often followers shared your post or story
Tracks virality potential
Comments
Depth of interaction
Demonstrates engagement quality
Story Replies
Private engagement metric
Great for audience intimacy
💬 7. The Power of Captions
Captions are where authors can truly shine. They provide space for storytelling and emotional connection — which directly fuels engagement.
Tips for Writing Engaging Captions:
Start with a Hook: Use curiosity or emotion — “I almost deleted my entire first draft today…”
Keep it Conversational: Write as if you’re talking to one reader, not a crowd.
Add a Call-to-Action (CTA): Ask a question or encourage comments — “What’s your favorite writing snack?”
Use Line Breaks: Avoid big text blocks; make it skimmable.
Include Emojis: They guide emotion and rhythm.
Add Hashtags Wisely: Mix general (#amwriting) with niche tags (#fantasyauthorsofinstagram).
Example Caption:
✍️ The first chapter is always the hardest. But today, I learned that the blank page is not my enemy — it’s my invitation.
What’s the hardest part of writing for you? Let’s talk. 💬
#writingcommunity #indieauthors #bookstagram
🕒 8. Timing: When to Post for Maximum Engagement
Even the most beautiful content can flop if posted at the wrong time.
Studies suggest the best times for engagement are typically:
Day
Best Time (Local)
Why It Works
Monday
11 AM – 1 PM
People check social media during lunch breaks.
Wednesday
12 PM – 2 PM
Midweek engagement spike.
Friday
9 AM – 11 AM
Audiences scroll before weekend plans.
Sunday
6 PM – 8 PM
Users wind down and read more captions.
However, every audience is different. Authors should use Instagram Insights to analyze when their specific followers are most active.
🔍 9. Using Analytics to Refine Engagement Strategy
To master engagement, data must guide your creative instincts.
Here’s how authors can use analytics:
Monitor Post Performance: Identify which post types get the most likes, saves, or shares.
Compare Formats: Do carousels outperform Reels? Use insights to decide your posting mix.
Track Follower Growth vs. Engagement: A large audience doesn’t guarantee engagement — measure quality over quantity.
Experiment and Adjust: Test different caption lengths, image styles, or hashtags monthly.
Study Top Performers: Analyze which posts bring the most comments — then replicate the formula.
🎯 10. Strategies to Increase Engagement
Let’s combine science and creativity into actionable tactics.
1. Encourage Interaction
Ask open-ended questions in captions, polls in Stories, or quiz stickers about your books.
2. Collaborate with Other Authors
Tag authors, do joint Lives, or co-host giveaways. Cross-audience exposure often doubles engagement.
3. Optimize Visual Aesthetics
Maintain consistent color palettes, fonts, and filters. A cohesive feed builds brand recognition.
4. Share Relatable Moments
Readers connect more with vulnerability than perfection. Share writer’s block, rejection letters, or your morning coffee ritual.
5. Create Serial Content
Make “series” posts — e.g., “Monday Writing Tip,” “Character Spotlight Friday.” Predictability keeps people coming back.
6. Engage in the First Hour
Reply to early comments quickly. This triggers Instagram’s “activity boost” algorithmic factor.
7. Pin Top Comments
Pin thoughtful or funny comments to encourage deeper conversations.
💡 11. Engagement Benchmarks for Authors
Wondering what counts as “good” engagement? Here’s a general guideline:
Follower Count
Average Engagement Rate
Excellent Rate
0–1K
7%+
10%+
1K–10K
3–5%
6–8%
10K–100K
1.5–3%
4–5%
100K+
0.8–1.5%
2%+
Authors typically perform above average, because their communities tend to be interest-driven rather than purely aesthetic.
🧬 12. The Future of Engagement: AI and Authenticity
Instagram’s 2025 direction is clear: the platform is rewarding authentic, conversational, and personalized content.
AI tools now analyze engagement patterns and even suggest optimal posting schedules. But authors should remember — technology amplifies, not replaces, authenticity.
Readers crave human connection. No algorithm can replicate a heartfelt caption, a genuine comment reply, or the excitement of seeing an author celebrate a milestone.
🔚 Conclusion: Engagement as Connection
For authors, Instagram is not just a promotional tool — it’s an extension of storytelling. Every post is a new chapter in the relationship with your audience.
Understanding engagement rates helps you make strategic choices — but it’s emotional engagement that transforms followers into lifelong readers.
So, experiment. Learn. Share. Connect. Because when you master the science of engagement, you amplify the art of connection.
Key Takeaways
✅ Engagement rate = (Likes + Comments + Shares + Saves) ÷ Followers × 100 ✅ Focus on engagement by reach for accuracy. ✅ Emotional, authentic content performs best. ✅ Reels and storytelling captions drive the most activity. ✅ Analyze data monthly — but stay human and relatable.
In today’s digital-first creative landscape, photographers are no longer limited to printed portfolios or gallery exhibitions to showcase their work. Instead, one of the most powerful and accessible platforms for visual storytelling is Instagram. With over two billion monthly active users and a design built around imagery, Instagram has become the modern photographer’s portfolio — a virtual gallery open to the world 24/7.
But transforming your Instagram profile from a casual photo dump into a professional portfolio requires intention, curation, and understanding of how the platform works. Whether you’re a portrait photographer, landscape explorer, wedding documentarian, or fine art visionary, your Instagram can serve as both a business card and a storytelling canvas.
This guide will take you through every stage of setting up your Instagram portfolio as a photographer — from account optimization to visual consistency, content strategy, and advanced tips for engagement and monetization.
1. Why Instagram Is the Perfect Portfolio Platform for Photographers
Instagram’s design inherently favors visual creators. While writers, musicians, or speakers have to adapt their content to fit the medium, photographers are already playing on home turf. The platform was built around images — clarity, composition, and creativity.
1.1 Visual-Centric Algorithm
Instagram’s algorithm prioritizes engaging visuals that capture attention quickly. High-quality photography naturally performs well, especially when optimized with hashtags, captions, and engagement tactics.
1.2 Direct Client Access
Potential clients — from art directors to newly engaged couples — often use Instagram as a discovery tool. Having a professional, well-organized portfolio can lead directly to collaborations, bookings, and sales.
1.3 Networking and Inspiration
Instagram allows you to connect with fellow photographers, brands, and creative agencies. You can participate in challenges, get featured on photography hubs, and stay inspired by others’ work.
1.4 Cross-Media Integration
You can link your Instagram portfolio to your website, Behance, or print shop. Conversely, embed your feed on your site or use posts as part of your digital resume.
2. Setting Up a Professional Photographer Profile
Before you start posting, your foundation needs to be solid. A professional Instagram profile creates trust and sets the tone for your brand.
2.1 Choose the Right Username and Handle
Your username should be:
Easy to spell and remember.
Reflective of your name or photography niche.
Consistent with other platforms (if possible).
Examples:
@JohnDoePhotography
@LightAndLens
@WanderFrameStudio
Avoid unnecessary numbers or symbols that look unprofessional.
2.2 Profile Picture
Your profile picture should either be:
A clean professional headshot (for personal branding).
A minimal logo (for studio or brand accounts).
Make sure it’s clear even when displayed in a small circle. Avoid text-heavy logos that become illegible on mobile.
2.3 Bio Optimization
Your bio is your elevator pitch. Keep it concise and magnetic. Include:
Who you are: “Freelance Portrait Photographer based in NYC.”
What you do: “Capturing human emotion through cinematic tones.”
CTA (Call to Action): “⬇️ Book a session or explore my latest work.”
Use line breaks or emojis for visual rhythm.
Example: 📸 Portrait & Lifestyle Photographer 🌆 NYC | Worldwide ✨ Let’s tell your story 👇 Portfolio & bookings
2.4 Link in Bio
Instagram allows only one clickable link. Use it strategically:
Direct to your portfolio website.
A Linktree or similar service to include multiple links (prints, bookings, contact).
A landing page that features your best galleries.
3. Creating a Cohesive Visual Identity
A great photographer’s Instagram feed feels intentional. When a visitor scrolls, they should instantly recognize your style, mood, and subject matter.
3.1 Define Your Niche and Style
Specialization makes you memorable. Decide on a consistent subject focus:
Portrait Photography
Travel & Landscape
Fashion & Editorial
Wildlife
Street Photography
Fine Art or Conceptual
Within your niche, define your visual language — color palette, tone, composition, and editing style.
Example: A travel photographer might use warm tones, soft contrast, and cinematic skies, while a street photographer might prefer monochrome, high contrast, and minimal retouching.
3.2 Color and Tone Consistency
Your feed should tell a story visually. Use the same editing presets or maintain color harmony across posts.
If one photo is moody black-and-white and the next is neon vibrant, the transition feels jarring. Tools like Lightroom presets or VSCO filters can help maintain uniformity.
3.3 Layout Planning
Use preview apps (like UNUM, Planoly, or Preview) to visualize your grid before posting.
You can arrange your feed in patterns such as:
Alternating wide shots and close-ups.
Using rows for themes (e.g., one row = one location).
Employing white borders for breathing space.
3.4 Story Highlights as Portfolio Sections
Use Instagram Stories Highlights as categorized mini-portfolios. For example:
📸 Portraits
🌍 Travel
💍 Weddings
🎬 Behind the Scenes
Use branded cover icons for consistency.
4. Content Strategy for Photographers
Posting beautiful photos isn’t enough — you need a strategic plan to keep your audience engaged and attract clients.
4.1 Types of Posts to Include
To build a dynamic portfolio, mix up your content types:
Type
Description
Purpose
Portfolio Shots
Your best professional work.
Showcase skills and attract clients.
Behind the Scenes (BTS)
Photos or reels of you working.
Builds authenticity and trust.
Before & After
Raw vs. edited comparisons.
Demonstrates technical skills.
Tips & Educational Posts
Share insights about lighting, editing, or composition.
Positions you as an expert.
Client Testimonials
Share screenshots or quotes.
Adds social proof.
Personal Stories
Show your human side.
Strengthens audience connection.
4.2 Posting Frequency
Consistency is key. Aim for:
3–4 posts per week
Stories daily (even short updates or reposts)
Reels twice a week to expand reach
Batch your content using a content calendar. Tools like Later, Buffer, or Metricool help you plan ahead.
4.3 Captions that Tell a Story
A striking image paired with a captivating caption deepens engagement.
Tips for great captions:
Start with a hook or emotion.
Describe the story behind the photo.
End with a call to action (e.g., “What’s your favorite time of day to shoot?”)
Example:
The sun was setting behind the dunes, and everything turned gold for just five minutes. These are the moments I live for. ✨ What’s your favorite light to shoot in?
5. Leveraging Reels and Video for Photographers
Even though Instagram started with photos, video is now central to its algorithm. Reels offer photographers a chance to show process and personality.
5.1 Ideas for Photographer Reels
Editing Time-Lapse: Show your Lightroom workflow.
Behind-the-Scenes Shoots: Short clips of you setting up or interacting with clients.
Before/After Transformations: Quick edits with dramatic reveals.
Photography Tips: Mini tutorials (lighting hacks, lens comparisons, etc.).
Location Scouting: Share cinematic clips from places you photograph.
5.2 Optimize Reels for Reach
Keep them between 7–15 seconds for engagement.
Use trending audio (relevant to your niche).
Add text overlays summarizing the message.
Always include your branding watermark subtly.
6. Hashtags, Tags, and Geotags
Using tags strategically helps your portfolio get discovered by the right audience.
Always tag your shooting location. Clients often search local photographers via location tags (e.g., “Paris Photographer”).
7. Storytelling Through Your Feed
Think of your Instagram feed as a visual narrative. Each row or post sequence can tell a micro-story:
A wedding series might go from “Getting Ready → Ceremony → Reception.”
A travel photographer can build a sequence from “Arrival → Exploration → Sunset → Nightscapes.”
Use carousels (multi-image posts) to tell stories in sequence — almost like mini photo essays.
8. Engagement and Community Building
Instagram isn’t just a portfolio — it’s a social platform. The more you interact, the more your work gets seen.
8.1 Engage Authentically
Respond to comments with gratitude.
Reply to DMs quickly.
Comment meaningfully on other photographers’ posts.
Join photography challenges or community hashtags.
8.2 Collaborate
Collaborations can expand your reach massively:
Partner with models, makeup artists, or stylists.
Do takeovers on photography hub accounts.
Host photo contests or giveaways.
8.3 Build an Email List
Use Instagram to funnel followers to your newsletter for long-term connection. Example CTA: “Join my mailing list for photography tips and travel stories ✉️ (link in bio).”
9. Portfolio Maintenance and Analytics
A portfolio is a living project — it evolves with you.
9.1 Regular Curation
Every 3–6 months, audit your profile:
Archive outdated or low-quality posts.
Highlight your latest work.
Refresh captions or hashtags if needed.
9.2 Analyze Your Insights
Check Instagram Insights to learn:
Which posts get the most saves or shares.
What time your audience is most active.
Which content formats perform best (Reels, carousels, photos).
Use this data to refine your posting strategy.
10. Monetization Opportunities for Photographers
Once your portfolio gains traction, Instagram can become a direct income source.
10.1 Direct Client Bookings
Use DMs or your bio link to guide clients to book shoots. Tip: Keep highlights with FAQs, rates, and availability.
10.2 Selling Prints or Presets
Create Reels or Stories showcasing your prints or Lightroom presets. Link to your shop.
10.3 Brand Partnerships
If your following grows, collaborate with:
Camera or lens companies.
Outdoor brands.
Fashion or lifestyle labels.
10.4 Workshops and Courses
Leverage your expertise to offer:
1:1 mentoring sessions.
Editing workshops.
Photography retreats.
11. Common Mistakes to Avoid
Mistake
Why It Hurts
Fix
Inconsistent editing style
Breaks visual harmony
Use presets and plan your feed
Ignoring captions
Missed chance to tell your story
Write thoughtful, emotional captions
Overposting selfies or random shots
Dilutes professionalism
Stick to your niche and brand tone
Not engaging with others
Limits visibility
Spend 15 min/day interacting
Neglecting analytics
Stagnates growth
Check insights weekly
12. Advanced Tips: Standing Out as a Photographer on Instagram
Use Carousel Posts for Storytelling – Show sequences of moments or a “making-of” process.
Pin Key Posts – Keep your best 3 images pinned at the top of your feed.
Integrate Reels with Static Posts – Alternate for visual rhythm.
Go Live Occasionally – Share Q&A sessions, photo critiques, or studio tours.
Experiment with AI and AR filters – Show creativity beyond traditional photography.
Conclusion: Instagram as Your Digital Gallery
Instagram is no longer just a social app; it’s a portfolio powerhouse for photographers who know how to use it intentionally. Your profile can serve as a visual resume, client magnet, and creative diary — all in one.
A well-curated Instagram portfolio doesn’t happen overnight. It’s built through strategy, consistency, and storytelling. Treat every post as a piece of your gallery — something that reflects not only your technical skill but your artistic vision.
Whether you dream of landing magazine features, destination wedding gigs, or art exhibitions, your Instagram can open those doors — if you treat it like the living, breathing gallery it deserves to be.
As an author promoting your work on social media, Instagram offers a variety of tools to engage your readers, build your brand, and share your voice. One popular feature is the Music Sticker, which lets you overlay licensed music on stories. It sounds fun and easy—but using music has legal implications. This article dives deep into how to use Instagram’s Music Sticker legally, what authors need to know, pitfalls to avoid, and best practices. Whether you have a personal or business/author brand account, this guide will help you stay on the right side of copyright law while enhancing your content with music.
Table of Contents
What is Instagram’s Music Sticker
Why authors might want to use it
Key legal issues & copyright basics
Instagram’s licensing for music — what Instagram does vs what you are responsible for
Differences between account types (personal / creator / business)
When the Music Sticker is safe to use
When you need extra permission or licensing
Consequences of misusing music
Best practices for authors
Case studies / examples
Practical checklist before posting
Conclusion
1. What is Instagram’s Music Sticker
The Music Sticker is a feature that lets you select a song from Instagram’s music library and add a short clip to your Story (or similar content). It shows metadata like song name/artist, may allow users to tap to see more, etc. Because Instagram has entered into licensing agreements with many rights holders, this feature gives people a degree of safe use within Instagram, under certain conditions.
2. Why Authors Might Want to Use It
To set mood / tone when unveiling a book cover, quote, or excerpt
To produce teasers or trailers for new releases
To share behind-the-scenes content (writing sessions, reading excerpts) with musical ambiance
To engage with followers: pairing visuals + audio often increases retention and emotional resonance
In short, music helps authors add an emotional layer, making posts (stories especially) more vivid and memorable.
3. Key Legal Issues & Copyright Basics
Before using music, authors should understand some basics of copyright:
Copyright protects musical works (composition / lyrics) and sound recordings (the specific recorded performance) separately.
Just because a song exists publicly (on Spotify, YouTube, etc.) doesn’t mean you can freely use it.
“Copyright holder” typically includes the songwriter/composer, lyricist, and the recording publisher / record label (for the master recording).
Using music without permission can infringe copyright—even if you’re not monetizing, if recognition is given, or if the clip is short.
Concepts like fair use (in the US) or fair dealing (in the UK, Commonwealth countries) may offer limited exceptions, but they are narrow and risky to rely on for commercial or promotional content.
4. Instagram’s Licensing: What Instagram Handles & What You’re Responsible For
Instagram (via Meta) usually secures licenses with various rights holders so that the platform can offer users a music library to use in Stories, Reels, etc. However, that does not mean every possible use is permitted under those licenses. Key points:
The licensing that Instagram obtains tends to cover non-commercial/personal use more heavily, or usage that is clearly part of Instagram’s built-in features.
For business or promotional content (including an author using Instagram to promote books), those licenses often do not fully cover commercial use, unless Instagram provides specific permissions or unless you use music from a library cleared for commercial use (e.g. Meta Sound Collection or a Commercial Music Library).
If a song is not in Instagram’s licensed library (or you are using external editing tools to insert music not selected via Instagram’s music tools), you may need to secure rights yourself (sync license etc.).
5. Differences Between Account Types
How Instagram accounts are categorized affects what music you can use.
Personal Accounts / Creator Accounts: These often have access to the broader licensed library for Instagram’s built-in music tools. Using these tools for stories, reels, etc., for personal expression is more likely to be covered.
Business/Author Brand Accounts: These often face more restrictions. Because content from business accounts tends to be promotional, it may require music that is explicitly cleared for commercial use. Instagram tends to restrict access for business accounts to a smaller catalog (e.g. royalty-free or rights-cleared tracks). Using popular commercial songs often triggers licensing issues if the post is tied to promotion.
6. When the Music Sticker is Safe to Use
Here are the scenarios where using Instagram’s Music Sticker tends to be safer (though not risk-free):
You are using the sticker via Instagram’s native tools (Stories, Reels, etc.), selecting music from Instagram’s library.
Your account is a personal or creator account (not clearly promotional) and the post is not being boosted/promoted as an ad.
You are in a region where Instagram has obtained the required licenses for that music. Be aware licensing varies by country. If a song appears in the sticker options in your country, that generally means Instagram has licensing for users there. But even then, country licensing may still limit some uses.
You are not selling or directly making revenue from that specific post, or the post is not directly tied to book sales (if so, it becomes more “commercial”).
7. When You Need Extra Permission / Licensing
There are times when the Music Sticker alone isn’t enough. Situations requiring extra care include:
When the content is promotional or commercial (e.g. an ad, or a post explicitly promoting a book for purchase or pre-order).
If you plan to boost or sponsor the post / advertise it. Those uses often need music that is cleared for commercial use. Instagram may reject boost requests if the song is not cleared for commercial promotion.
If the song is not available in Instagram’s licensed library for your country / account type.
If you are using external editing tools to insert music not selected via Instagram’s sticker/library tools. That bypasses Instagram’s licensing and usually triggers the need for separate licensing.
If the track is famous, well known, or very identifiable (higher risk).
To secure licensing: you might need a synchronization license (sync license) for the composition and sometimes for the master recording. You may need to negotiate with record labels and publishers. This can get expensive and complicated.
8. Consequences of Misusing Music
What can happen if you misuse copyrighted music on Instagram:
Instagram may mute the audio automatically, either in stories, reels or otherwise.
The content may be removed or blocked in certain countries.
If you repeatedly infringe copyright, there may be penalties like account restrictions or suspension.
Legal claims: in many jurisdictions, copyright holders can issue takedown notices, demand damages, etc. Even if Instagram removes content under its policy, rights holders may pursue further action.
If you attempt to promote content with unlicensed music, advertisement features may be rejected by Instagram. For example, boosting posts using non-commercially cleared music often fails.
9. Best Practices for Authors
Here are recommendations for authors to safely use music via Instagram’s Music Sticker:
Verify your account type Know whether you have a personal, creator, or business/brand account. If you use your account mainly for author branding and promotion, treat it like a business account in terms of licensing risk.
Use Instagram’s built-in music library whenever possible Stickers or music selection inside the Instagram app are usually the safest route because Instagram has done licensing work (for certain regions and account types) to provide that music.
Choose music clearly allowed for commercial use when promoting books If you’re doing promotions, book launches, adverts, etc., pick tracks from Instagram’s Commercial Music Library or Meta Sound Collection, or from other royalty-free / cleared music services.
Keep documentation If you acquire any license (sync or other), keep written records. If Instagram flags or removes content, you may need to appeal using proof of license.
Check regional availability Just because music is available in the library doesn’t mean it’s cleared for all countries or all uses. Music licensing is territorial. Be aware of where your followers are and where the content can be viewed.
Use short clips wisely—but don’t assume short = allowed Many people think that using a few seconds exempts them from copyright violations. That’s not guaranteed. Even short, recognizable segments can be infringing. Better to follow licensed use rather than assume safety.
Credit where needed—but understand it doesn’t replace licensing Attribution of the artist/song is good practice, but it doesn’t substitute for obtaining rights. Instagram’s rules and most copyright laws require permissions, not just credits.
When in doubt, use royalty-free or public domain music There are many services and websites that provide music that is cleared for commercial use. Some public domain works are also usable without licensing.
Create your own music / collaborate If you can, work with composers or musicians to produce original tracks. Then you own the rights or have clear permissions. This gives maximum flexibility.
Monitor changes in Instagram’s policy Instagram’s licensing agreements change. Meta may add or remove songs from their library. Laws may change or enforcement may shift. Keep up to date so old content doesn’t suddenly become problematic.
10. Case Studies / Examples
Here are hypothetical or real examples to illustrate:
Example A: Cover Reveal Story with Music Sticker An author reveals a book cover via Instagram Story. They use Instagram’s Music Sticker, select a song from the in-app library. They do not tag it as an ad, do not boost the story. Because they are using built-in tools and no promotion, this is likely safe.
Example B: Book Launch Reel + Paid Boost An author creates a Reel announcing pre-orders, uses a trending pop song selected via the Instagram Music Sticker, then boosts the post as an advertisement. This is riskier. Because boosting is commercial use, Instagram may require that the song is cleared for commercial use.
Example C: Third-party editing + external music file An author edits a video in another app, adds a commercial track, then uploads that video to Instagram, bypassing the Music Sticker / in-app library. Even if Instagram’s music library has that song, because the use was external, the licensing via Instagram might not cover it. Likely needs a separate license.
Example D: Using Public Domain or Royalty-Free An author uses a royalty-free track cleared for commercial use, or uses music in the public domain. They produce a Reel promoting a new book and maybe even boost it. If the license they have allows commercial use, this is safe.
11. Practical Checklist Before Posting
Here’s a quick checklist authors can run through before adding music via the Music Sticker:
Item
Yes / No
If No → What to Do
Is the song in Instagram’s licensed music library (for your country)?
If not, pick another song or obtain license.
Is the account type (creator/business) subject to commercial use restrictions?
If yes and you plan promotion, use music cleared for commercial use.
Is the post going to be boosted or used as an ad?
If yes → ensure commercial-use rights.
Is the content promotional (book launch, pre-order, etc.)?
If yes → treat as commercial; pick accordingly.
Do you have documentation/licensing (if required)?
Acquire written agreement, save files.
Is the music track famous/clearly recognizable / high risk?
Be more cautious. Possibly choose safer track.
Is attribution/credit required by the license?
If yes, include it. But understand it doesn’t replace licensing.
Region / geographic licensing covered?
Check for territory licensing.
12. Conclusion
For authors using Instagram, the Music Sticker is a powerful tool—to create mood, emotion, and connection. It helps your content “sing,” literally. However, with that power comes responsibility. Misusing music can lead to muted posts, removed content, account issues, or even legal exposure.
By understanding how Instagram’s music licensing works, being aware of your account type, using music that is legally cleared for your use case, keeping documentation, and staying informed of licensing laws and policies, you can use the Music Sticker in a way that is both creative and legal.
If you like, I can prepare a version of this article more specifically for authors in Brazil (Portuguese + Brazilian law) or tailored to your genre. Would you prefer that?
In today’s digital age, authors—just like any creative professionals—must navigate a crowded social media landscape. Whether you are a novelist, memoirist, poet, or non‐fiction author, your online presence plays an increasingly important role in building your audience, connecting with readers, marketing your books, and expanding your professional network. Two of the platforms authors often consider are Instagram and LinkedIn.
Each platform offers distinct strengths, weaknesses, culture, and best practices. Choosing where and how to invest your time, content creation, and engagement strategy can make a big difference. In this article, we explore the pros and cons of Instagram versus LinkedIn for authors, compare strategic approaches on both platforms, and offer actionable guidance on how authors can use them—either separately or together—to maximize visibility, engagement, and ultimately book sales or recognition.
1. Why Social Media Matters for Authors
Before comparing platforms, it’s important to be clear on why authors need social media.
Audience building. Many readers discover new authors through social media. A strong following gives you a built‐in audience when you launch a new book.
Branding & identity. Your online presence helps define who you are as an author: genre, voice, values, aesthetic. This can help attract readers who resonate with you.
Authority & credibility. Sharing insights about writing, research, publishing, or about life as an author positions you as authoritative; it helps with invitations to talks, workshops, interviews.
Engagement & feedback. Social media allows two‐way communication: you can gauge what readers care about, respond to comments, build relationships.
Promotion & sales. While social media alone rarely sells books by the thousands, it contributes to visibility, referrals, word of mouth, preorders, etc.
Networking. With other authors, agents, editors, publishers. Many opportunities come via connections, collaborations.
Because of these roles, choosing the right platforms—and using them effectively—is crucial.
2. Overview: Instagram & LinkedIn
Instagram
Instagram is a highly visual platform, optimized for images, short videos (Stories, Reels), carousel posts, and increasingly immersive content like video. It is more casual, creative, aesthetically driven. Key features:
Feed posts (single image or carousel). Photos, graphic quotes, illustrations.
Stories. Disappearing content (24h), good for behind‐the‐scenes, personal glimpses, polls, Q&A.
Reels / short videos. Very powerful for discoverability because Instagram promotes Reels heavily.
IGTV / longer video (to some extent).
Hashtags, geotags. Important for reach.
Shopping / links (via stories or link in bio).
Audience: tends to skew younger, more visually oriented; interested in aesthetics, inspiration, identity, lifestyle.
Culture: creativity, authenticity, connection, visual storytelling; less formal.
LinkedIn
LinkedIn is a professional networking platform. It is more text/video driven (articles, status updates, uploads), less about visual aesthetic (though visuals help), more about professional credibility, thought leadership, work history, career progress. Key features:
Profile & experience. Your credentials, education, work history, publications, etc.
Status updates. Posts with text, images, links, short videos.
Articles / long‐form content. Good for essays, professional reflections, research, expertise.
Networking with peers and industry professionals. Agents, editors, other authors, publishers, marketing experts.
Groups, events. Professional interest groups, panels, online events.
Sharing of achievements, announcements, professional milestones.
Audience: more mature, professional, largely interested in content that contributes to career, professional development, learning, insight.
Culture: more formal (though that is evolving), emphasis on expertise, high‐quality content, professional tone.
3. Key Differences: Instagram vs. LinkedIn for Authors
Let’s compare the two platforms across several dimensions:
Network connections, shares, recommendations, groups, sometimes Pulse articles, LinkedIn’s algorithms but less viral like Reels
Networking potential
More with peers/readers/fans/influencers; less structured professional opportunities (though that is changing)
Strong potential to connect with agents, editors, publishers, speaking opportunities, professional collaborations
Time investment / content production
Visual content can require design, photo/video editing; frequent posting helps (daily / several times a week)
Writing thoughtful posts or articles takes time; posting maybe less frequently but consistency matters
Monetization / commercial value
Can use for direct sales (via links), brand partnerships, influencer marketing, book launches; connecting with readers
More about professional visibility; indirect monetization via contracts, speaking fees, consulting, recognition rather than direct consumer sales
4. Strengths of Instagram for Authors
Here are concrete advantages of choosing—or emphasizing—Instagram in an author’s social media mix.
a) Visual storytelling supports branding
Authors can use Instagram to communicate their brand visually. Book cover photos, artistic images, quotes laid out in beautiful typography, photos of writing spaces, landscapes or visual imagery that reflect the tone and setting of their work—all help readers connect more emotionally. Consistent visual themes (color palettes, filters, fonts) reinforce identity.
b) Emotional connection and authenticity
Instagram allows for personal glimpses: process of writing, revision, inspiration, failures, daily life. Sharing those makes authors more human to readers, which fosters loyalty and community. For example: writing routines, “afternoon writing walk,” notebooks, snapshots of desk, or drafts.
c) High potential for discoverability via Reels / hashtags / viral content
Instagram’s algorithm rewards engagement, and formats like Reels allow content to be surfaced to people who don’t follow you yet. If well‐executed, a short Reel featuring a dramatic reading, writing tip, or behind‐scenes can go quite far.
d) Engagement with readers (comments, DMs, live videos)
Readers tend to comment, react, follow, send messages. Live Sessions / Q&A in Stories or via live video let the author connect directly. Polls, question stickers in Stories, “This vs That” content foster interaction.
e) Flexibility & creativity
Because Instagram is less formal, authors can experiment: memes, humorous takes, literary quotes, creative visuals, collaborations with illustrators, typographers. There’s space to play.
5. Strengths of LinkedIn for Authors
Now the advantages of LinkedIn.
a) Professional credibility & authority
Sharing professional insights, your writing journey in publishing, lessons from contracts, marketing, editing—these contribute to being seen as knowledgeable. Posts or articles on LinkedIn can establish you as a thought leader in your genre or field (especially non‐fiction), which can translate into invitations to speak, teach, write columns, etc.
b) Networking with industry stakeholders
LinkedIn is a place where agents, editors, other authors, publishing house professionals, and consultants often have profiles. Making posts that get reshared or joining professional groups can increase visibility to those people.
c) Long‐form content & in-depth discussions
Through LinkedIn Articles or longer status uploads, authors can publish polished, substantive pieces: essays about craft, book industry trends, research findings, etc. These types of content are well-suited for LinkedIn readers, who may value reflection, depth, authority.
d) Less saturated for some content types
Since many authors flock to Instagram, LinkedIn may offer less competition (depending on author’s focus). If your niche involves professional writing, research, non‐fiction, or crossovers (e.g., business, self‐help, academic), LinkedIn might give you more weight per post.
e) Career & side revenue opportunities
Beyond book sales, writing consultation, workshops, speaking engagements, teaching offer additional revenue streams. LinkedIn is well suited for promoting those or being discovered for them.
6. Weaknesses / Challenges
It’s not all rosy. Each platform has its drawbacks.
Instagram’s potential drawbacks
High content production burden. Visuals, photos, designing graphics, video editing can eat time and/or money.
Algorithm volatility. The reach of posts is affected by changes in algorithm, features like Reels or Stories—Instagram often shifts priorities.
Surface level engagements. Many interactions are likes or quick comments rather than deep discussion. DMs may be shallow.
Professional contacts less common. Less likely to connect with agents, editors; more focused on readers / fellow creators.
Noise & competition. Because so many people are using Instagram, standing out takes creativity, consistency, and sometimes budget (e.g. ads).
LinkedIn’s potential drawbacks
Less visual appeal. If your work depends strongly on visual aesthetics, or you want to show book covers, art, mood boards, LinkedIn may be less suitable.
Slower growth in audience engagement for some kinds of content. Viral reach is harder on LinkedIn; posts often stay in smaller network unless very high engagement.
Expectations of tone / content. Must maintain professionalism. Overly casual or “lifestyle‐only” posts may not be appreciated.
Frequency vs quality trade‐off. You can’t post superficial content too often; readers expect thought and value; shallow content may reflect poorly.
Limited in terms of reach to general readers. LinkedIn’s audience is professional; many are not book buyers or literary consumers in the same way followers on Instagram might be.
7. What Types of Authors Benefit More from Instagram, Which from LinkedIn?
Not all authors will benefit equally from both platforms. Genre, audience, writing goals, and personality matter.
Genre / Situation
Likely to do better on Instagram
Likely to do better on LinkedIn
Fiction, especially genre fiction (romance, fantasy, sci-fi, literary fiction)
High benefit. Visual appeal, creative aesthetics, quote graphics, fan art, cosplays, appeal to younger readers.
Can help too, but less obvious unless author wants to write also professionally about writing, or teach writing etc.
Children’s books / illustrated works
Excellent; visuals are central.
Less direct value unless promoting author brand in educational / publishing circles.
Non‐fiction (business, self‐help, academic, professional development)
Okay; can do visuals, quotes, infographics. But the depth of content may require supplementary platforms.
Very strong; you can share insight, policy, research, business lessons; strong networking.
Memoir / personal storytelling
Strong benefit; readers love “behind the curtain”-type authenticity.
Benefit in professional angles (speaking, workshops), but the intimate narrative may reach more impact via Instagram.
New authors vs seasoned authors
New authors may use Instagram to build a readership; seasoned authors might leverage LinkedIn more for speaking, partnerships.
Seasoned authors may also use LinkedIn to amplify authority, leverage their past work. New authors can benefit from both, depending on niche.
8. Strategic Goals: What Are You Trying to Achieve?
Before choosing platform(s), it’s essential to define what you want to achieve. Your strategy will differ depending on your goals. Some possible goals:
Grow reader base. To sell books, to build community around your work.
Establish authority / thought leadership. To get speaking gigs, workshops, professional recognition.
Network with publishing industry. Agents, editors, reviewers.
Increase visibility / brand awareness. Make your name more known.
Generate revenue beyond book sales. Consulting, teaching, licensing, etc.
Support book launches or events. Preorders, tours, signing, etc.
Your goals will help decide what content to produce, how often, what tone, which platform to focus on.
9. Platform‐Specific Strategy Guidelines for Authors
Here are detailed strategies for authors on each platform (Instagram & LinkedIn), plus guidelines for using both in coordination.
Instagram Strategy for Authors
a) Define your visual brand
Choose aesthetic style: color palette, fonts, filters.
Decide what kinds of visuals you’ll post: cover art, writing desk, nature, quotes, bookish close-ups, inspiration boards.
Be consistent: your feed should feel coherent, recognizable.
b) Content pillars
Structure your content around 3-5 themes (“pillars”) so that you have variety but consistency. For example:
Writing process / behind the scenes
Book quotes / excerpts / readings
Reader engagement: questions, polls, “Ask me anything”
Personal / lifestyle content that humanizes you as a writer
Promotion: book teasers, launch announcements, sales, events
c) Use Reels & short videos aggressively
Reels are favored in algorithm: quick tips for writers, speeded-up writing or editing clips, behind-the-scene snapshots.
Use trending audio/video formats but adapt them to your author brand.
Mix educational content with entertaining content.
d) Maximum engagement
Use Stories: polls, Q&A, interactive features.
Reply to comments and DMs.
Encourage saved/shares: posts that people want to save (writing tips, quotes) or share with friends.
Use hashtags thoughtfully; niche hashtags and bookish communities.
e) Harness collaborations
Partner with book cover designers, illustrators, other authors, bookstagrammers, reviewers.
Do giveaways.
Guest posts, takeovers.
f) Posting cadence
Feed posts: perhaps 3-4 times per week (or more if possible).
Stories: daily if feasible.
Reels: frequently, since they tend to give more reach.
g) Track metrics & adjust
Monitor which posts get more reach, saves, comments, shares.
See what kinds of content are bringing followers or traffic (to your website, to book preorders).
Adjust content pillars accordingly.
LinkedIn Strategy for Authors
a) Profile optimization
Make sure your profile clearly states you’re an author, genres, publications.
Use a professional photo.
Include details: writing projects, published books, roles (guest lecturer, editor, etc.), speaking, awards.
Feature key posts or articles, media, links to your books.
b) Content types and posts
Short posts sharing lessons learned (writing craft, publishing, marketing).
Long‐form articles (LinkedIn Articles) with more in‐depth reflection.
Industry commentary (e.g. market trends, reviews of how publishing is changing).
Connect strategically: send personalized connection requests to people in publishing, educators, reviewers, etc.
Encourage conversations: ask questions in posts, invite feedback or discussion.
d) Thought leadership
Publish articles that demonstrate your expertise (e.g. “How self‐editing changed my writing”, “The business of publishing: what no one tells new authors”).
Share case studies: successes/failures, data (for instance, social media metrics, marketing campaign outcomes).
Offer advice or educational content.
e) Using LinkedIn’s features
Attend or organize virtual events, webinars (LinkedIn Live if available in your region).
Use the “Featured” section on your profile to highlight your best content (articles, book covers, media appearances).
If possible, use LinkedIn newsletter features (depending on availability) to build a subscription model.
f) Posting cadence
Probably less frequent than Instagram. For example, 2-3 well-crafted posts per week, and 1 long‐form article per month (or every few weeks).
Regular but sustainable: better to do fewer high‐quality posts than many superficial ones.
g) Measuring performance
Look at metrics: views, likes, comments, shares, but also who is engaging (are they in publishing, agents, reviewers, etc.).
Track growth of connections, invitations, opportunities (speaking, workshops).
Watch for traffic of LinkedIn → your website / bookstore / mailing list.
10. Combining Instagram and LinkedIn: Integrated Strategy
Rather than choosing one, many authors benefit from using both platforms in a complementary way. Here’s how to integrate them:
a) Define overarching brand and voice
Your author brand should be consistent: values, writing genre, voice, aesthetics. That brand filters into both platforms but expressed differently on each. On Instagram, more visual, personal, creative; on LinkedIn more professional, authoritative.
b) Cross‐promotion
Use Instagram bio or posts to mention your LinkedIn article when you have a major piece (e.g. “Check out my thoughts on author branding over on LinkedIn, link in bio”).
On LinkedIn, when sharing an article or professional insight, include visuals (snippets of quotes or graphics you also use on Instagram) to maintain visual brand consistency.
c) Repurpose content
A long piece you write for LinkedIn can be broken into bite-sized tips for Instagram posts / Reels.
Instagram quotes or images can become teasers or promotion for LinkedIn content (or vice versa).
Use similar visuals when possible so that your audience recognizes you across platforms.
d) Allocate time/resources appropriately
Since time is limited, decide what level of effort to allocate to each platform depending on your goals. If growing readers is your immediate aim, maybe more time in Instagram; if professional recognition or speaking engagements, more time on LinkedIn.
e) Use each platform for different audiences
Segment your content: for example, your LinkedIn audience might be more interested in the behind-the-scenes of marketing, contracts, book business; your Instagram audience might want emotional/fun content, behind the scenes of writing, sneak peeks, etc. Customize accordingly.
f) Funnel from one to another
Use Instagram to build awareness and emotional connection; then funnel interested people to your website or mailing list.
Use LinkedIn to build authority and professional connections, which can lead to opportunities (speaking, teaching) that reinforce your visibility and credibility in Instagram posts.
11. Case Examples (Hypothetical & Real)
To illustrate, here are some examples of how authors might use Instagram / LinkedIn strategies effectively.
Example 1: Fiction Author – “Ava Parker”
Genre: Young Adult Fantasy.
Instagram strategy: Ava posts cover reveals, character art, mood boards, quotes from her manuscripts, sneak peeks of her writing space. She also shares Reels of her writing routine, inspiration sources (nature walks, reading old mythologies), and collaborates with fantasy illustrators. She engages with fans via Stories Q&A and lets them vote on small aesthetic choices.
LinkedIn strategy: She writes articles about navigating YA fantasy publishing, dealing with rejection, lessons from beta reading. She connects with editors, participates in panels about young readers’ markets, shares her journey from first draft to publication.
Integration: She repurposes parts of LinkedIn articles into shorter Instagram posts (“5 things I wish I’d known when writing fantasy”), posts snippets of success stories, uses similar visuals/color themes for both platforms so her brand “Ava Parker, YA Fantasy Author” looks cohesive.
Example 2: Non-Fiction Author – “Marcus Li”
Genre: Business / Entrepreneurship.
Instagram strategy: Marcus shares short video tips (e.g. “how to structure your business book”), visual infographics about his lessons, behind-the-scene photos from speaking events, snapshots of notes or whiteboard work. He uses Reels periodically and posts success stories from clients or testimonials.
LinkedIn strategy: Marcus writes long articles about business trends, book publishing in the business world, case studies of clients, best practices. He uses LinkedIn to network with corporate clients, media, potential collaborators, and gets speaking gigs.
Integration: His Instagram posts often tease a new LinkedIn article (“I just wrote about the 3 biggest mistakes business authors make; see full piece on LinkedIn”). He recycles quotes, uses consistent graphics style, sometimes shares a video on LinkedIn too.
12. When Might One Platform Be Sufficient?
There may be times when focusing on just one platform makes sense, typically when:
You have a small amount of time, and want to concentrate energy to get better results.
Your audience is strongly present on one platform. Example: if your readers are mostly younger and love Instagram, you may get far more ROI there. Or if you are writing in professional, academic, or business niche, LinkedIn might be more useful.
You need to build authority first (using LinkedIn) or emotional connection first (Instagram).
In those cases, be sure you do that one platform well rather than spreading thin across multiple.
13. Metrics & KPIs: How to Evaluate Which Platform Is Working
To know whether your investment in a given platform is paying off, track relevant metrics and Key Performance Indicators. Here are ones to watch:
Goal
What to measure
How to interpret
Audience growth
Follower / connection count over time
Growth indicates reach and appeal; rate of growth matters.
Track regularly (monthly, quarterly) so you can see trends and pivot if needed.
14. Best Practices & Tips
Here are some additional tips that apply across both platforms.
Authenticity counts. Readers and professionals alike gravitate toward sincerity. Don’t try to copy someone else’s voice—adapt what works to your own.
Storytelling is central. Whether on Instagram or LinkedIn, stories (your journey, challenges, successes) connect. Use stories in captions, articles.
Value first. Always ask: “What value am I giving?” A tip, insight, emotional resonance, information—rather than only promotion.
Consistency over perfection. Better to post regularly than to wait for perfect content. Over time, quality will improve.
Adapt and iterate. Monitor what works—posts with high engagement, etc.—and adjust your content pillars.
Use visuals wisely. Even on LinkedIn, visuals boost engagement. On Instagram, invest in good photography or design.
Build an email list. Social media should help you grow direct contact via newsletter or mailing list—this is something you own.
Respect platform norms. What works on Instagram (short, fun, visuals) may feel out of place on LinkedIn. Adapt tone, format, content accordingly.
15. Sample Strategy Plan: A Six-Month Timeline
To make this more concrete, here’s a sample roadmap for an author who wants to build both platforms over six months.
Month
Instagram Focus
LinkedIn Focus
Month 1
Audit current visual brand; define content pillars; set up a posting calendar; post 3 feed posts per week + daily Stories; start doing Reels weekly.
Polish profile, write an “about the author” post, share first short posts (2 per week), connect with 20+ industry people; write one long article.
Month 2
Increase engagement: use more interactive Stories, polls; collaborate with small bookstagrammers; experiment with Reels formats.
Focus on sharing insight posts; comment more on others’ posts; join relevant groups; share the article; measure what topics engage.
Month 3
Tease snippets of upcoming projects; share more behind-the-scenes; invite reader input; possibly run a small giveaway.
Perhaps organize a webinar or virtual event; publish another long article; invite others to engage; track network growth.
Month 4
Launch campaign for upcoming book or project: cover reveal, pre-order announcements, countdowns; Reels showing the writing process.
Share lessons from book launch; case study; publicize events; leverage connections for endorsements or reviews.
Month 5
Deepen community: respond to all DMs/comments; share reader feedback; maybe host live Q&A; amplify user-generated content (fan art or reviews).
Use LinkedIn to secure speaking / workshop opportunities; publish higher value content (e.g., expert interviews); gather testimonials.
Month 6
Evaluate metrics; see which content types performed best; refine visual brand; plan next launch.
Evaluate which posts / articles led to professional opportunities; adjust posting frequency; plan content around upcoming book or project.
16. Which Platform Should You Prioritize (or Both) — Decision Framework
If you’re uncertain where to focus, here are key questions to ask yourself, which help decide:
Who is my primary audience (readers vs industry professionals)?
What kind of content can I realistically produce well and regularly (visual, video, long‐form writing)?
What are my goals? (Grow readership vs credibility vs professional opportunities vs revenue)
What resources do I have? (Time, budget for visuals/video, editing, perhaps a social media assistant)
Which platform’s norms and culture align better with my personality and genre?
If many of your goals align with both readership and industry visibility, and you have capacity, doing both can be very powerful. If you need to choose, let your goals and audience guide you.
17. Summary & Recommendations
To wrap up:
Instagram is excellent for building emotional connection, showcasing author personality, sharing visually rich content, and growing a reader base, especially in fiction/creative genres.
LinkedIn is more suited to cultivating authority, professional networks, discussing industry issues, non‐fiction or business/academic genres, and getting opportunities beyond pure readership (speaking, consulting, etc.).
For authors with multiple goals (readership, industry recognition, professional opportunities), a combined strategy is usually best: leverage the strengths of both platforms while adapting content, tone, and strategy to each.
Consistency, value, authenticity matter more than flashy visuals or superficial metrics.
Monitor what works, be ready to pivot, and allow your strategy to evolve as you grow your audience and your author brand.
An Instagram takeover is when you temporarily give control (fully or partially) of your Instagram account to someone else — an influencer, team member, customer, or partner — so they can post content directly to your feed, Stories, Live, etc. Takeovers are powerful for:
Increasing engagement
Reaching new audiences
Bringing fresh content and perspectives
Humanizing your brand
But they need careful planning. Here are the steps, tips, and things to watch out for.
Step 1: Define Your Goals
Before anything else, clarify what you want from the takeover:
Increase brand awareness / reach
Grow follower count
Promote a product, event, or service
Educate your audience about something (behind-the-scenes, day in the life, etc.)
Improve engagement (comments, DMs, Story interactions, etc.)
Set measurable targets (e.g. “gain 200 new followers,” “increase Story views by 50%,” “get 100 responses to polls”).
Also decide on the scope:
Will the guest have full access (post live, reply to DMs, etc.) or will content be pre-approved?
Duration: a few hours, a day, a weekend, or longer?
Which formats will be used: Stories, feed posts, Reels, Live, IGTV?
Step 2: Choose the Right Host / Guest
Who is going to take over should align with your brand values and goals.
Consider:
Influencers who appeal to your target audience
Team members who represent behind-the-scenes stories
Customers or fans for authentic perspectives
Partners / collaborators
Things to check:
Their style / voice matches or complements yours
They understand Instagram well (formats, what works, engagement)
They’re reliable (meet deadlines, committed)
Step 3: Establish Clear Guidelines
To avoid issues, set up guidelines for the person taking over. These can include:
What content is allowed / not allowed (e.g. language, topics)
What tone and voice to use
Approval process (if you want to review content beforehand)
Brand assets to use (logos, filters, colours, templates)
How many posts / Stories per day, minimum / maximum
Use of hashtags, geotags, tagging other accounts
What to do about comments / DMs / user interaction
Also outline practical rules: account access, security (passwords, devices), what to do if something goes wrong.
Step 4: Plan the Content & Timeline
Mapping everything out in advance helps ensure smooth execution.
Create a content plan: what the guest will post and when
Collect the media in advance (photos, videos, captions) if pre-approved content is part of the plan
Determine key moments: introduction, mid-takeover highlights, wrap up
Decide on interactive elements (polls, quizzes, stickers) to drive engagement
Prepare promotional materials (announcements, teasers) so you can build anticipation
Schedule check-ins: make sure the guest host is clear on the schedule, has everything ready, can log in, etc.
Step 5: Promote the Takeover
If no one knows about it, very few will watch / engage.
Announce in advance via your Instagram feed, Stories, maybe even Reels
Use countdown stickers or teaser Stories to build interest
Ask the guest host to promote it via their account as well
Cross-promote on other platforms (Facebook, email newsletters, etc.)
Step 6: Account Access & Security
Depending on how much control the guest will have, you’ll need to manage access carefully.
Full takeover: guest uses your account’s login — riskier
Semi-takeover / partial: guest sends content, you post from your account; or using tools with contributor rights or content scheduling platforms
Security tips:
Use two-factor authentication
Only share passwords with trusted people; change them after the takeover
If possible, restrict access by device or location
Keep a backup / recovery plan in case something goes wrong
Step 7: Execute the Takeover
On the day (or during the takeover period), make sure things go smoothly:
Start with an introduction post / Story: who the guest is, what they’ll be doing. Helps orient the audience.
Spread out content over the allotted time rather than posting in a single burst. Keeps audience engagement more consistent.
Use different formats: photos, video, Stories, polls, live if planned, etc.
Be responsive: if audience comments or sends questions/polls, try to reply or incorporate their responses. It makes the takeover feel more live and engaging.
Monitor for any issues (tone, off-brand content, technical problems)
Step 8: Wrap Up & Follow Up
After the takeover ends:
Post a sign-off content: thank the guest, thank the audience, wrap up what was shared.
Save Stories as Highlights (if applicable) so people can view them later.
Collect all metrics: how many new followers, reach, post / Story views, engagement, etc. Compare with your goals.
Debrief with the guest host: what went well, what could be improved
Change password or revoke access, if needed
Use content later: repurpose some of their posts or best moments to other platforms or in future content
Best Practices & Tips
Authenticity wins: the more real and less polished, the more people connect. Let the guest’s voice come through.
Balance freedom & control: give your guest creative leeway, but keep guidelines so it stays aligned with your brand.
Consistent branding: even if the guest has their own style, make sure your brand identity (light, tone, fonts, logos, etc.) is maintained.
Use a branded hashtag: both for the takeover itself and to collect UGC (user-generated content).
Interactive elements: polls, Q&A stickers, quizzes, etc. – these boost engagement and make followers feel part of it.
Visual quality: especially for feed posts or Reels. Well-lit, good framing, interesting composition. Even Stories benefit from attention to aesthetics.
Timing matters: post when your audience is most active. Use your Instagram analytics to pick optimal times.
Potential Challenges & How to Mitigate
Challenge
Mitigation
Guest posts something off-brand or with errors
Have approval process, content submitted in advance; clear guidelines
Audience complaints or negative feedback during takeover
Monitor comments, have someone in your team ready to respond or escalate
Login / tech issues
Test ahead of time; ensure necessary devices are working; have backups
Low engagement during takeover
Promote heavily ahead of time; include interactive elements; encourage guest to engage back
Security concerns
Use 2FA; change password afterward; limit access; trust-based selection
Summary Checklist
Here’s a quick pre-takeover checklist:
Define goals & metrics
Select the guest / host
Create guidelines / brand rules
Plan content & timeline
Secure access & set up security
Promote the takeover ahead
Execute with consistency & engagement
Wrap up & review performance
Example Timeline
Here’s a sample timeline you might use:
Days Before Takeover
Task
~14 days
Choose host; set goals; outline guidelines; begin content planning
Remind host; test login; finalize schedule; begin teaser promotion
Day of takeover
Launch with intro; post content as per schedule; interact; monitor
Day after
Sign-off; save highlights; change passwords; review metrics
2-3 days after
Full analytics; debrief; plan content repurposing; feedback from guest & team
Why It Works
Brings new voices / perspectives, which often feel more authentic
Allows your audience to see behind the scenes or something different
Leverages the guest’s audience (if they promote it) to bring new followers
Can generate higher engagement through novelty
Do you want me to put together a version of this “How to Host an Instagram Takeover” guide tailored to Brazilian brands / Portuguese speakers, or with examples from your industry? I can also create a checklist graphic.
In today’s digital era, authors are no longer limited to bookstores, libraries, or book fairs to reach their audience. Social media platforms—especially Instagram—have become powerful tools for building a personal brand, engaging with readers, and promoting books effectively. With over 2 billion active monthly users, Instagram provides a visually dynamic and interactive space where stories, aesthetics, and communities converge. For authors, this means endless opportunities to market their books in ways that are personal, creative, and authentic.
This article will serve as a comprehensive guide for authors—whether traditionally published or self-published—on how to use Instagram as a powerful promotional tool. We will cover everything from setting up a professional profile to advanced strategies like Instagram Ads, influencer collaborations, and analytics.
Why Instagram Works for Authors
Instagram is not just for fashion influencers, fitness coaches, or travel bloggers. It thrives on storytelling—something authors are naturally skilled at. Here are a few reasons why Instagram is perfect for book promotion:
Visual Appeal – Book covers, illustrations, and quotes look beautiful in Instagram’s visual format.
Storytelling Tools – Stories, reels, and captions allow authors to share narratives beyond their books.
Community Building – Readers love interacting directly with authors. Instagram bridges that gap.
Hashtag Ecosystem – Book-related hashtags (#Bookstagram, #AmWriting, #IndieAuthor) help authors connect with engaged communities.
Global Reach – Instagram’s algorithm helps authors connect with readers worldwide.
Setting Up an Author Instagram Profile
Before diving into strategies, authors must build a strong foundation by optimizing their Instagram profile. Think of your profile as your digital business card.
1. Choose the Right Username and Handle
Keep it simple, searchable, and professional.
Use your real name or pen name, e.g., @JaneDoeAuthor or @MarkWritesBooks.
2. Profile Picture
Use a professional headshot or your book logo.
Avoid blurry selfies—your profile should look credible.
3. Bio Optimization
Instagram bios are limited to 150 characters, so make it count. Include:
Who you are: “Author of historical fantasy novels”
What readers can expect: “Sharing writing tips & behind-the-scenes of book life”
Call-to-Action (CTA): “Download a free chapter 👇”
A link: Use Linktree or Beacons to direct followers to Amazon, Goodreads, or your website.
Example: 📚 Fantasy Author | ✍️ Sharing Writing Journeys ✨ New Release: The Forgotten Realms 👇 Get your free first chapter
4. Switch to a Professional Account
Choose “Creator” or “Business” account for access to analytics, ads, and scheduling tools.
Content Strategies for Authors
Creating engaging content is the key to growing your audience. Authors should aim for a mix of personal branding, storytelling, and book promotion.
1. Share Your Writing Journey
Readers love to see the person behind the book. Post about:
Writing routines
Desk setups
Favorite coffee/tea for writing
Milestones (“Just hit 50,000 words on my novel!”)
2. Book Photography
The #Bookstagram community thrives on aesthetic book photos. Tips:
Use props like candles, flowers, or coffee mugs.
Showcase your book in real-life situations (reading at the beach, cozy corner).
Experiment with flat-lay photography.
3. Quotes & Excerpts
Highlight powerful lines from your books using Canva templates. Example: “The world was silent, except for the echo of her own heartbeat.”
4. Instagram Stories
Stories disappear in 24 hours but are great for engagement. Ideas:
Polls (“Which cover design do you like better?”)
Quizzes about your book’s characters
Behind-the-scenes of editing
Sharing reader reviews
5. Reels for Authors
Instagram reels are currently prioritized by the algorithm. Use them to:
Share writing tips in short clips.
Show “a day in the life” as an author.
Use trending sounds and adapt them for book promotion.
6. Live Sessions
Go live with:
Book readings
Q&A sessions with readers
Interviews with other authors
7. Collaborations
Team up with:
Bookstagrammers who can review your book.
Other authors for joint lives or promotions.
Hashtags for Authors
Hashtags expand your reach to targeted audiences. Here are some categories to use:
Use a mix of large-volume hashtags (millions of posts) and niche hashtags (10K–100K posts) for balance.
Building Reader Engagement
Instagram isn’t just about posting—it’s about engaging. Authors who actively interact with readers tend to build loyal fanbases.
Strategies to Boost Engagement:
Reply to comments thoughtfully.
Repost user-generated content (UGC) when readers tag your book.
Use Instagram’s “Ask me a question” feature for fan Q&As.
Share personal anecdotes to create authenticity.
Instagram Ads for Authors
While organic growth is important, Instagram Ads can supercharge visibility—especially around book launches.
Why Use Ads?
Target specific demographics: age, location, reading interests.
Showcase your book to new readers who don’t follow you yet.
Types of Ads for Authors
Image Ads: Your book cover with a direct link to Amazon.
Video Ads: A short book trailer.
Carousel Ads: Highlight multiple books or reviews.
Budget Tip: Start small ($5–$10/day) and test which ad creatives perform best.
Working with Bookstagrammers & Influencers
The Bookstagram community is a goldmine for authors. Influencers with dedicated reading audiences can help boost your visibility.
How to Approach Them:
Follow and engage with their posts first.
Offer a free copy (physical or digital).
Propose collaborations like giveaways or joint lives.
Benefits:
Builds credibility through social proof.
Increases book visibility in specific genres.
Tracking Your Success: Instagram Analytics
Authors must measure results to refine their strategies.
Key metrics to monitor:
Follower Growth – Are you attracting new readers?
Engagement Rate – Likes, comments, shares, saves.
Story Insights – Which polls/questions get responses?
Link Clicks – Are people visiting your Amazon/bookstore links?
Use tools like:
Instagram Insights (built-in)
Later, Buffer, or Hootsuite for deeper analytics
Common Mistakes Authors Should Avoid
Only Posting Sales Links – Don’t spam followers with “Buy my book!” posts.
Ignoring Engagement – Failing to reply to comments loses reader trust.
Low-Quality Images – Instagram is visual; poor quality hurts credibility.
Inconsistency – Posting once every few months won’t build traction.
Not Using Stories/Reels – Missing out on Instagram’s most engaging features.
Sample Weekly Instagram Plan for Authors
Day
Content Idea
Goal
Monday
Motivational writing quote
Inspire followers
Tuesday
Book photography (your book with props)
Attract Bookstagram audience
Wednesday
Writing tip reel
Build authority
Thursday
Throwback (your first draft photo)
Personal connection
Friday
Poll/quiz in Stories
Boost engagement
Saturday
Reader testimonial or review screenshot
Build trust
Sunday
Live Q&A or short reading
Deepen reader connection
Final Thoughts
Instagram is more than a photo-sharing app—it is a storytelling ecosystem. For authors, it provides a platform to:
Showcase their creativity.
Build a loyal community of readers.
Promote books authentically and effectively.
With consistency, creativity, and engagement, authors can turn Instagram into their most valuable book marketing tool.
Whether you are launching your debut novel or building a long-term author brand, Instagram can help you connect with the right readers, at the right time, in the right way.